18
Sewing preparation
1
Foot control
Sewing preparation
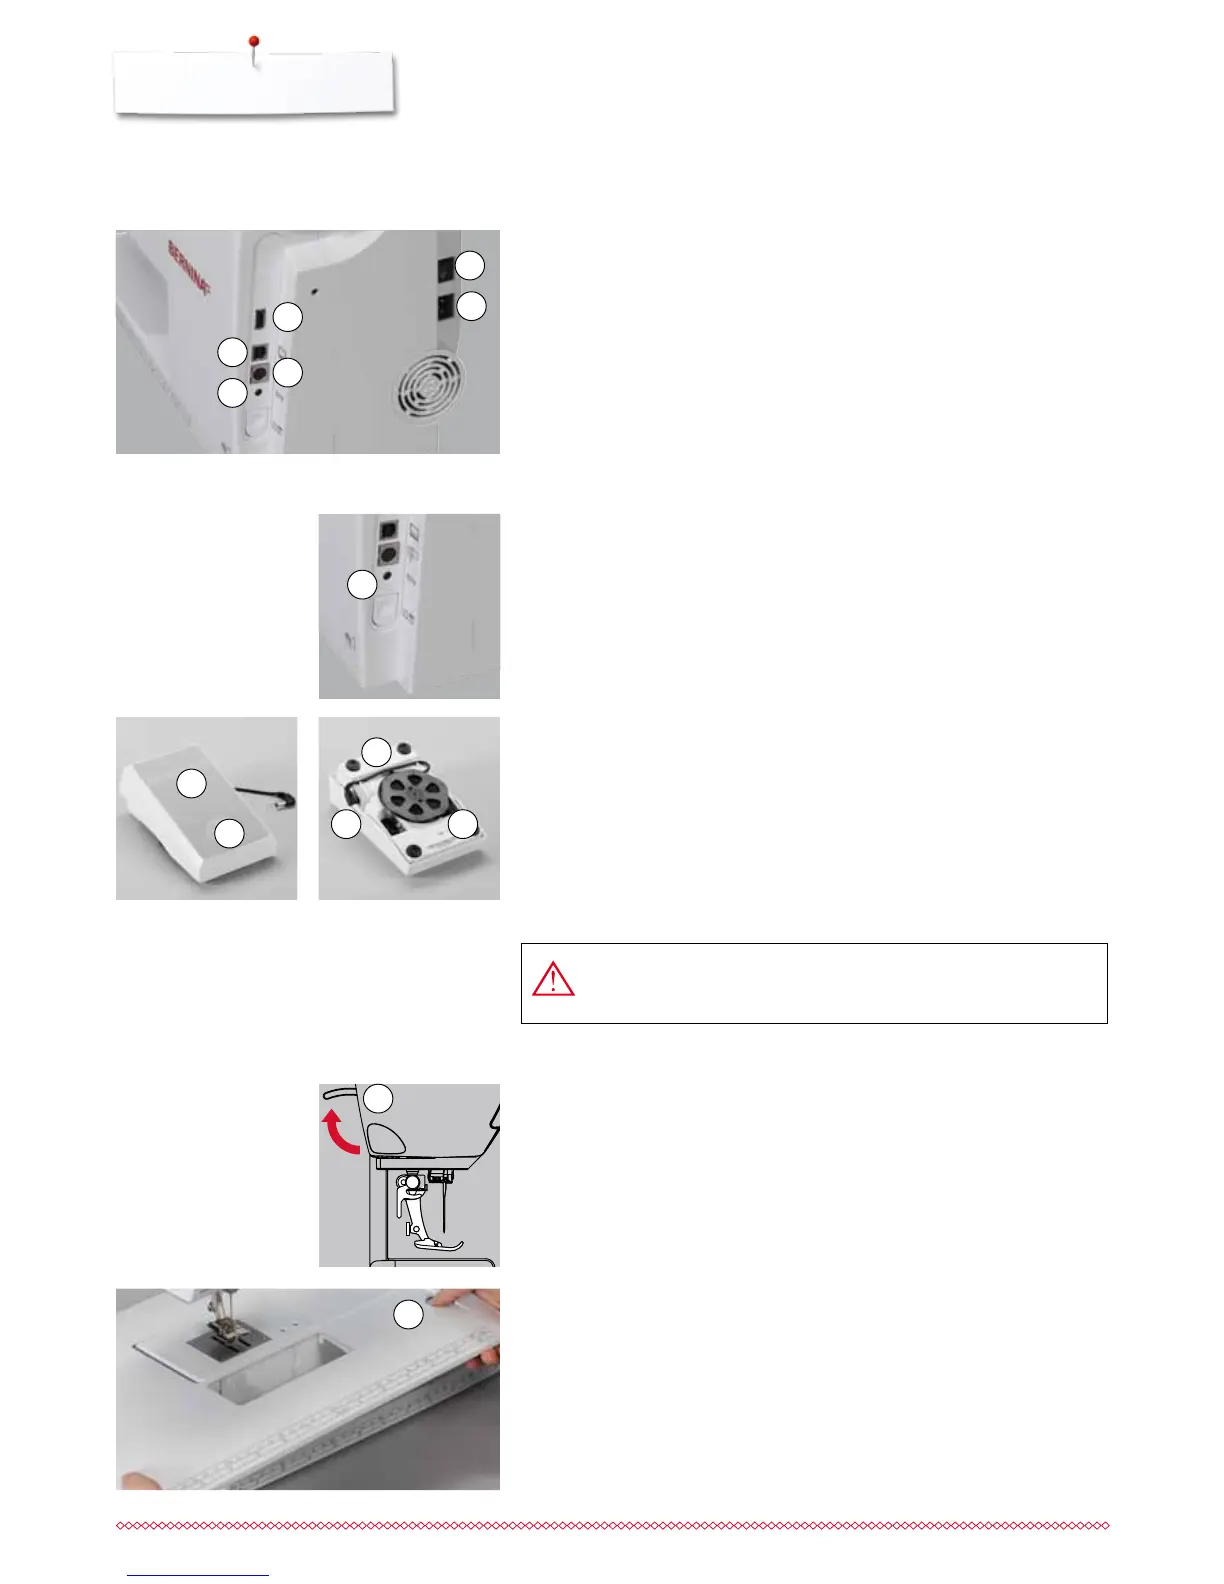
Connecting the foot control
⦁
unwind the cable
⦁
plug the cable in the outlet 1
⦁
unwind the cable to the desired length and slip into 4 or 5
Sewing speed control
Control the sewing speed by pressing the foot control 2 more or less.
Adjust needle down or up
⦁
sink the heel back 3 on the foot control
►
the needle adjusts the position up/down
Removing the foot control
⦁
wind the cable around the reel
⦁
plug cable into 6
USA/Canada only: Use only foot controller type LV-1 with
sewing computer B 560.
4
6 5
2
3
⦁
turn the handwheel (see page 13)
►
needle is raised
⦁
raise presser foot lever 1 up
►
presser foot is lifted
Slide-on table
The slide-on table increases sewing surface.
Attaching the slide-on table
⦁
raise the needle and presser foot
⦁
slide over free-arm to the right until it engages
Removing the slide-on table
⦁
raise the needle and presser foot
⦁
press button 2 down
⦁
pull slide-on table to the left
1
1
2
5
4
3
6
1 Power Switch
The sewing computer is switched on («I») and off («0») with the power switch.
I the sewing computer is switched on
0 the sewing computer is switched off
2 Power plug socket
3 Foot control socket
4 Connection for embroidery module
5 PC-connection for embroidery software
6 USB-connection
Power Switch/Power Cable
2


 To Next Page