My BERNINA
30
BERNINA SEWING MACHINE WORKBOOK
AUTOMATIC BUTTONHOLE PROGRAM
1. Fold the fabric square in half to 3” x 6”. Press.
2. Insert the stabilizer between the layers.
On-screen Buttonhole Measuring
1. Attach Automatic Buttonhole Foot #3A.
2. Select the Buttonhole menu; select Standard
Buttonhole #51.
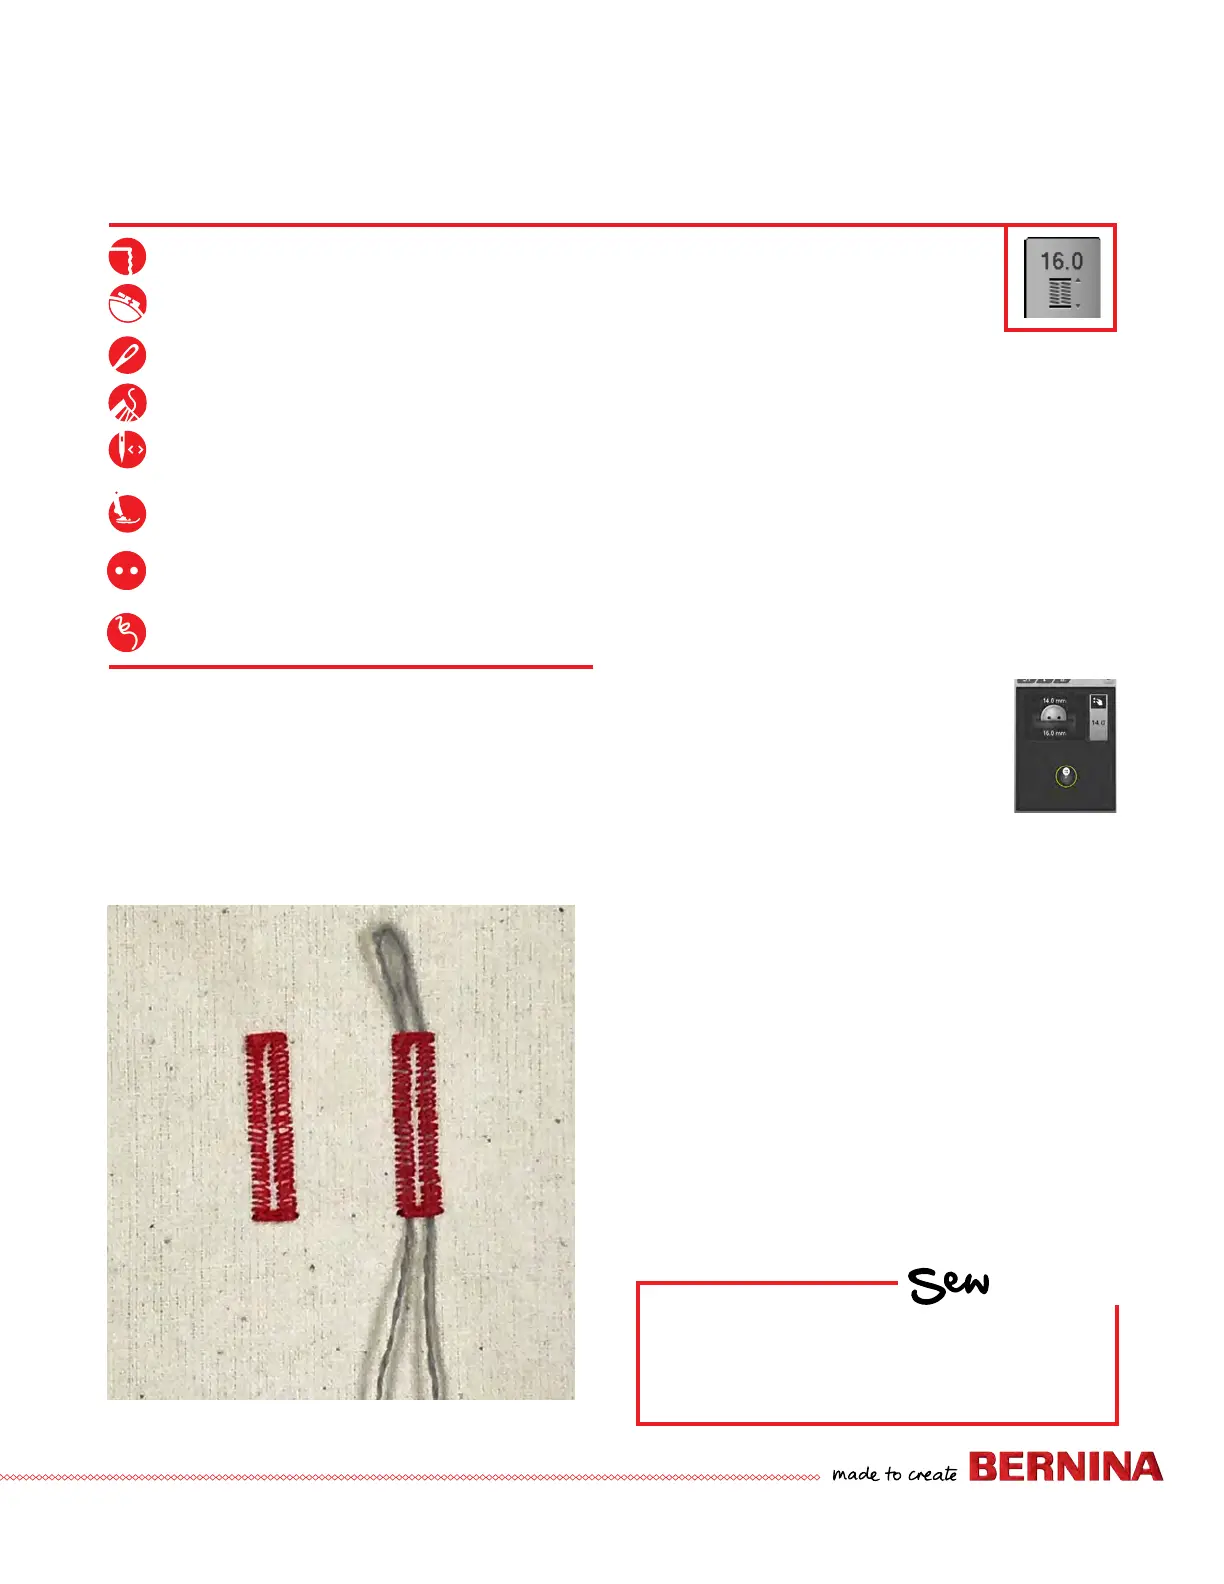
3.
Select the "i" menu and select the Buttonhole Length icon.
4. Hold button to the screen inside the
yellow outline. Use the Multi-function
Knobs to enlarge or decrease the circle
size until it encircles the button.
• The length is calculated directly from the
button diameter. 2 mm are automatically
added for button ease/thickness.
5. Sew the buttonhole. The buttonhole is repeatable
without re-setting.
Corded Buttonhole
1. Fold the cord in half and loop the middle around the
center “toe” of the foot.
2. Stitch a second buttonhole. Carefully remove the fabric
from under the foot.
3. Pull the cord ends until the loop is pulled up under the
buttonhole stitches; trim the ends of cord.
• If working on a knit fabric, knot the cord ends
together before trimming.
4. Store this buttonhole in Memory. See next page for
details.
Tips:
• Because Automatic Buttonhole is a program, it needs to
stitch to completion. Keep the Foot Control depressed
until the machine stops stitching, or use the Start/Stop
button to stitch the buttonhole.
• Buttonhole Bead Width and Stitch Density are also
adjustable using the Multi-function Knobs in the sewing
view.
HOW
Do you know how to:
• Program a buttonhole on-screen?
• Adjust buttonhole bead density?
Wool-like fabric or heavy flannel, 6” x 6”
Lightweight tear-away stabilizer 3” x 6”
80/12 Universal
Polyester or cotton embroidery thread
As programmed
Automatic Buttonhole Foot #3A
(optional accessory for B 475 QE and B 435)
3/4” (19 mm/30L) two-hole button
18" Narrow cord
(perle cotton, embroidery floss, etc.)