My BERNINA
43
BERNINA SEWING MACHINE WORKBOOK
ALL-OVER DIRECTIONAL STITCHING
Optional:
Create a 4-sided motif by selecting 315º
and 45º as the third and fourth sides.
Firm woven fabric, 6” x 6”
Heavyweight tear-away stabilizer 6” x 6”
80/12 Universal
Polyester or cotton embroidery thread
Default
Sideways Motion Foot #40C
Notes:
• Some adjustments may be necessary depending on the
fabric, thread, and stabilizer used to create the stitch
sample.
• This technique can also be created by importing sewing
machine stitches into Embroidery, which will be covered
in BERNINA Embroidery Machine Workbook.
FOR B 880 PLUS AND B 790 PLUS ONLY
This exercise features an all-over design created by selecting
one stitch (#656 is shown in the sample) and changing
directions as you sew. This all-over design is programmed
before stitching.
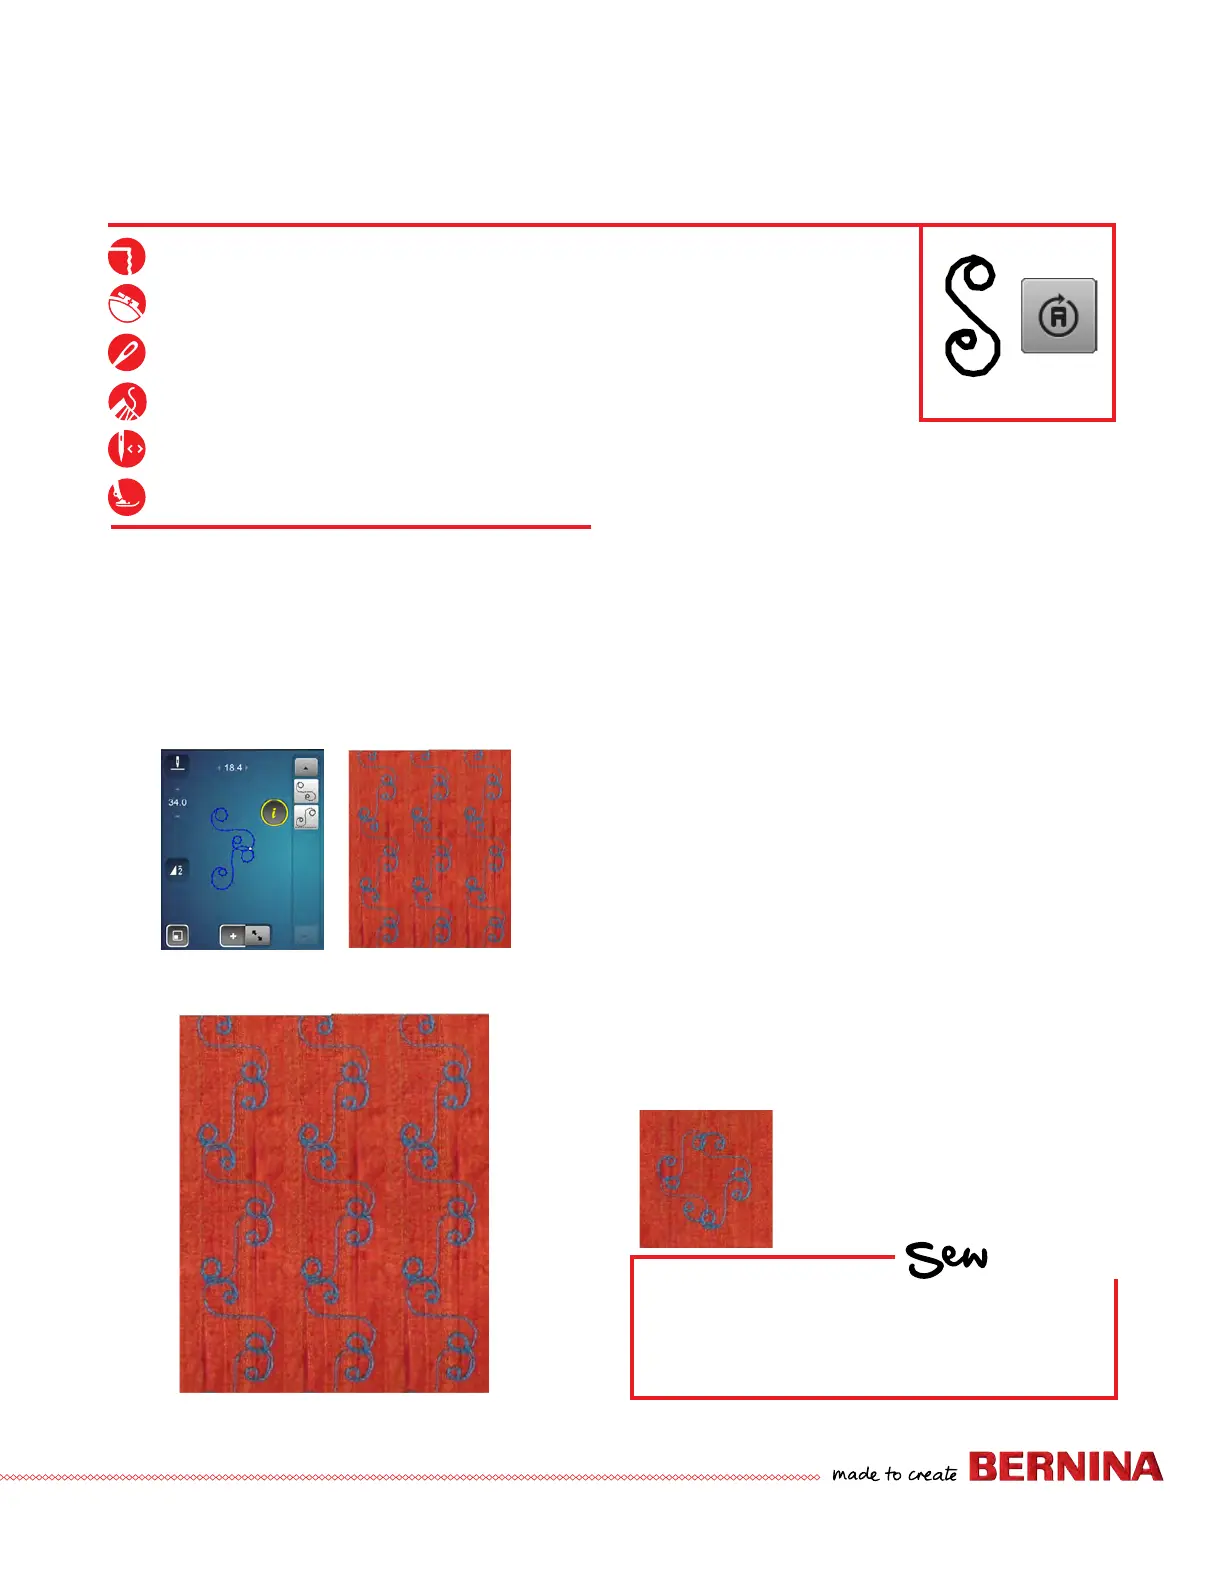
Directional Sewing-Programmed Combi
(See a and b)
1. Open Combi Mode; use 0-9 and input 656 and Check.
2. Select 0-9 to close. Add a second copy of 656.
3. Select 'i"; select pattern 1.
4. Select the Multi-directional icon and set the angle to
135º.
5.
Select pattern 2. Select the Multi-directional icon; set angle to
225º.
6. Select the "i" breadcrumb.
7. Select All (Edit the Complete Combination icon).
8. Set Pattern Repeat to 2 and stitch. (Selecting Modify
Screen provides a preview of the stitch.) To ll the
fabric, omit Setting Pattern Repeat and stitch.
9. Select Modify Screen to exit.
HOW
Do you know how to:
• Change directions in 45º increments
when Multi-Directional stitching?
(a) (b)