CLUTCH
EAS25170
CHECKING THE PRESSURE PLATE
1. Check:
• Pressure plate
Cracks/damage → Replace.
EAS22B1007
CHECKING THE CLUTCH PUSH LEVER AND
SHORT CLUTCH PUSH ROD
1. Check:
• Clutch push lever
• Short clutch push rod
Damage/wear → Replace the defective
part(s).
EAS25200
CHECKING THE PRIMARY DRIVE GEAR
1. Remove:
• Primary drive gear
Refer to “BALANCER GEARS” on page 5-53.
2. Check:
• Primary drive gear
Damage/wear → Replace the primary drive
gear and clutch housing as a set.
Excessive noise during operation → Replace
the primary drive gear and clutch housing as
a set.
3. Install:
• Primary drive gear
Refer to “BALANCER GEARS” on page 5-53.
EAS25210
CHECKING THE PRIMARY DRIVEN GEAR
1. Check:
• Primary driven gear “1”
Damage/wear → Replace the primary drive
gear and clutch housing as a set.
Excessive noise during operation → Replace
the primary drive gear and clutch housing as
a set.
EAS25240
INSTALLING THE CLUTCH
1. Install:
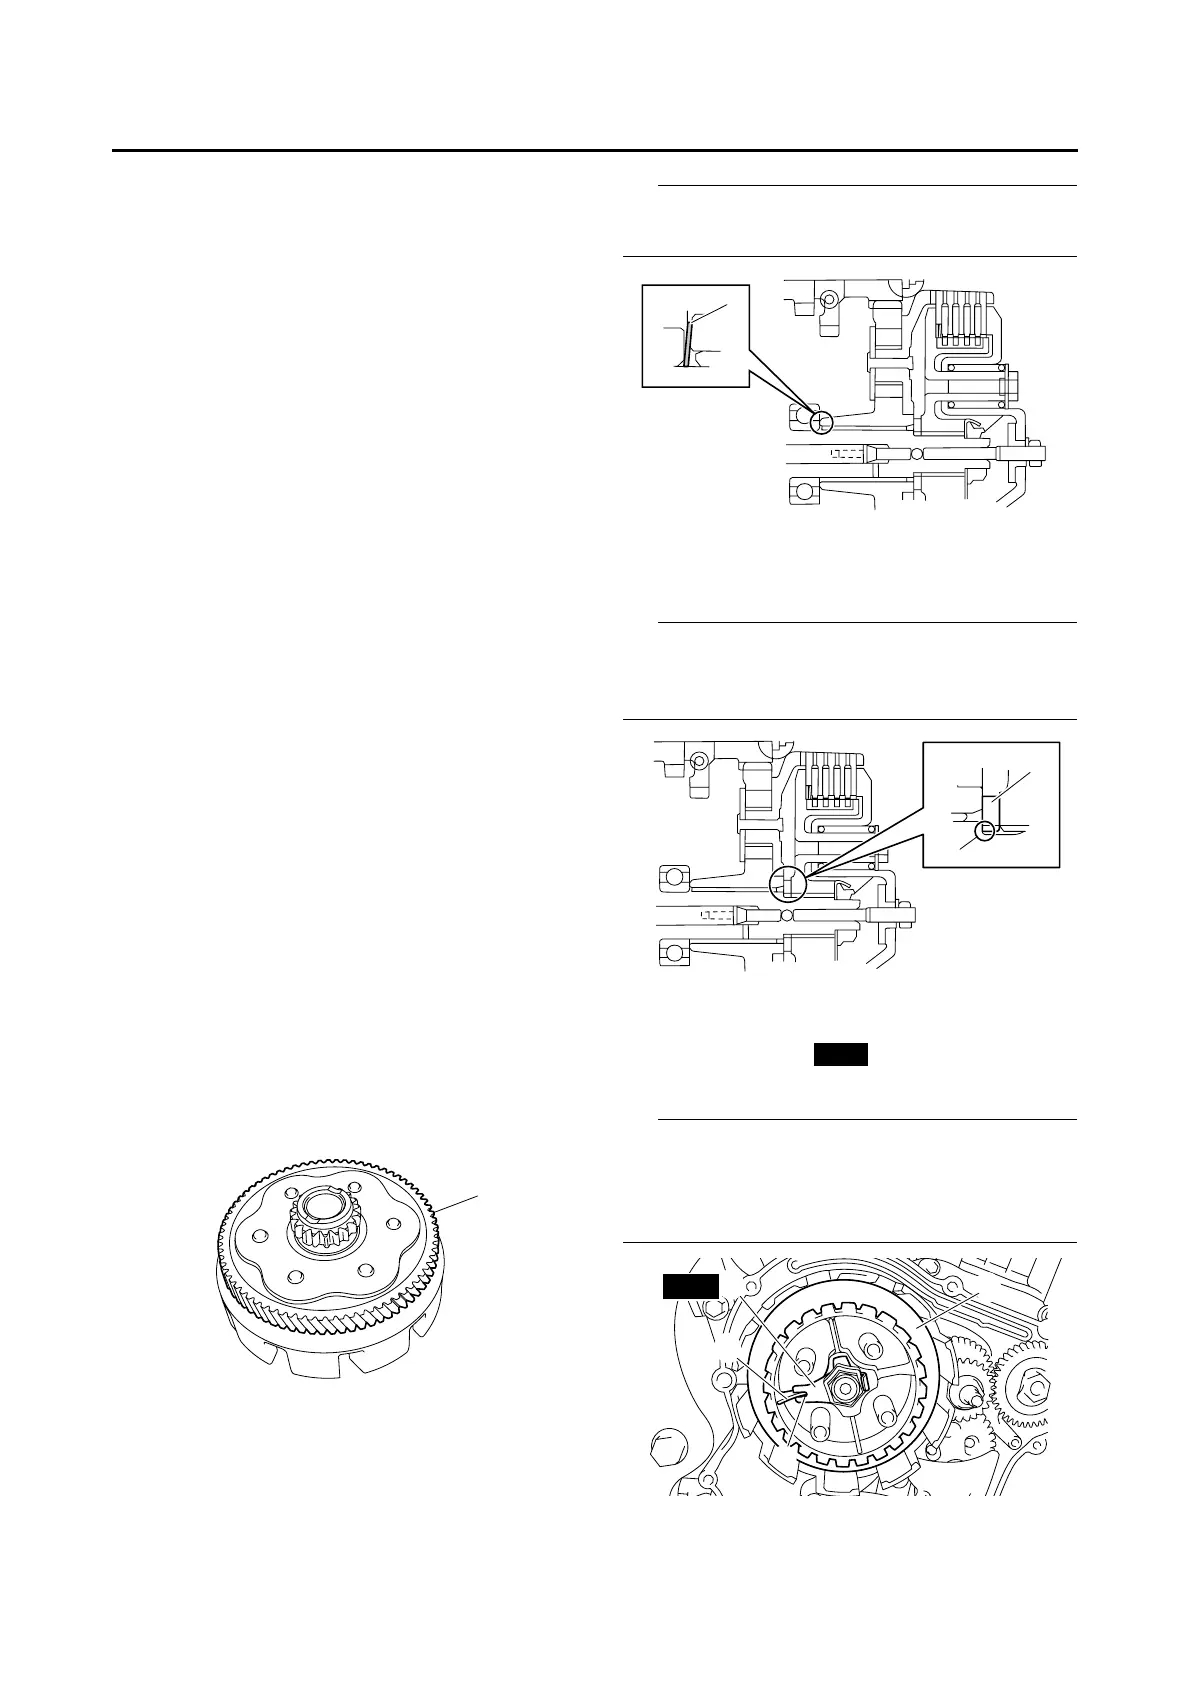
• Conical spring washer “1”
IP
Install the conical spring washer as shown in the
illustration.
2. Install:
• Clutch housing
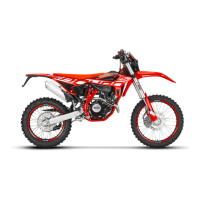
• Thrust washer “1”
IP
Be sure to install the thrust washer so that its
sharp edge “a” is facing away from the clutch
boss.
3. Install:
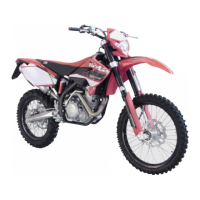
• Clutch boss “1”
• Lock washer “2”
• Clutch boss nut
IP
• Lubricate the clutch boss nut threads and lock
washer mating surfaces with engine oil.
• Align the notch “a” in the lock washer with a rib
“b” on the clutch boss.
1
1
1
a
New
a
b
1
2
New



 To Next Page