BALANCER GEARS
EAS22B1009
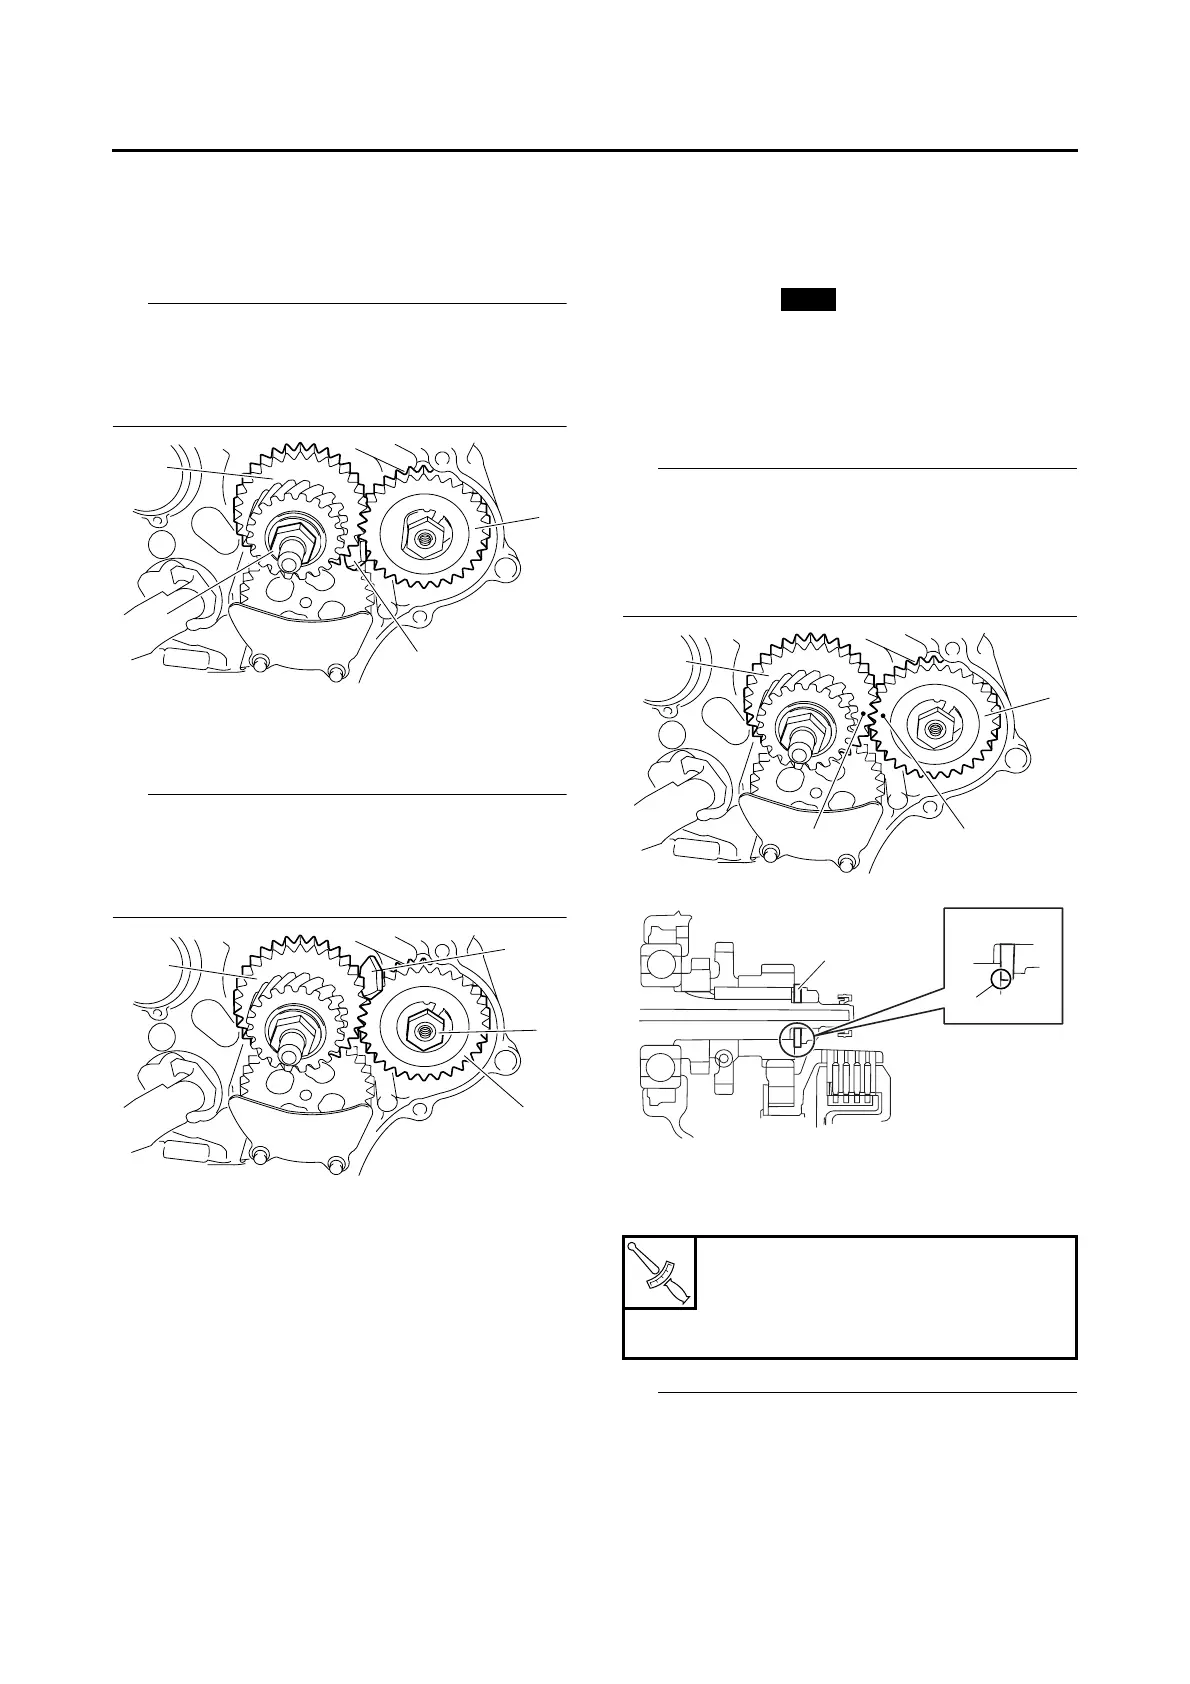
REMOVING THE PRIMARY DRIVE GEAR
AND BALANCER GEARS
1. Loosen:
• Primary drive gear nut “1”
IP
Place an aluminum plate “a” between the bal-
ancer drive gear “2” and the balancer driven
gear “3”, and then loosen the primary drive gear
nut.
2. Straighten the lock washer tab.
3. Loosen:
• Balancer driven gear nut “1”
IP
Place an aluminum plate “a” between the bal-
ancer drive gear “2” and the balancer driven
gear “3”, and then loosen the balancer driven
gear nut.
EAS22B1010
CHECKING THE BALANCER GEARS AND
PRIMARY DRIVE GEAR
1. Check:
• Balancer drive gear
• Balancer driven gear
Cracks/damage/wear → Replace.
2. Check:
• Primary drive gear
Refer to “CHECKING THE PRIMARY DRIVE
GEAR” on page 5-44.
EAS22B1011
INSTALLING THE PRIMARY DRIVE GEAR
AND BALANCER GEARS
1. Install:
• Balancer driven gear “1”
• Lock washer
• Balancer drive gear “2”
• Primary drive gear
• Washer “3”
• Balancer driven gear nut
• Primary drive gear nut
IP
• Align the punch mark “a” in the balancer drive
gear “2” with the punch mark “b” in the balancer
driven gear “1”.
• Be sure to install the washer so that its sharp
edge “c” is facing the primary drive gear.
2. Tighten:
• Balancer driven gear nut “1”
• Primary drive gear nut “2”
IP
• Place an aluminum plate “a” between the bal-
ancer drive gear “3” and the balancer driven
gear “4”, and then tighten the balancer driven
gear nut.
a
3
1
2
1
a
3
2
T
R
.
.
Balancer driven gear nut
50 Nm (5.0 m·kgf, 36 ft·lbf)
Primary drive gear nut
60 Nm (6.0 m·kgf, 43 ft·lbf)
New
b
a
2
1
c
3