Home
Biotek
Laboratory Equipment
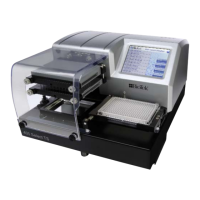
Synergy HTX
Biotek Synergy HTX User Manual
4
of 1
of 1 rating
184 pages
Give review
Manual
Specs
To Next Page
To Next Page
To Previous Page
To Previous Page
Loading...
148
|
Appendix
A
: Specif
ications
Lumines
cen
ce Sp
ecificat
ion
s
Luminesc
ence
≤ 60
amo
l/w
e
ll
DL ATP
in a 96
-
well p
lat
e
(lo
w
-
noise PM
T)
, 20 a
mo
l ty
pic
al
≤ 500 amol/well in a 96
-
well
pl
ate (red
-
shi
fted PMT)
10
-
second integra
tion, PMT sensitivity 150,
16 blank wells
BioTek
In
strum
ents, Inc
.
171
173
Table of Contents
Default Chapter
5
Default Chapter
5
Table of Contents
5
Contact Information
9
Customer Service and Sales
9
Global Service and Support
9
Document Conventions
11
Revision History
12
Intended Use Statement
13
Quality Control
13
Warranty and Product Registration
13
Repackaging and Shipping
14
Warnings
14
Hazards
15
Precautions
16
CE Mark
17
Directive 2004/108/EC: Electromagnetic Compatibility
17
Directive 2006/95/EC Low Voltage (Safety)
17
Directive 2002/96/EC: Waste Electrical and Electronic Equipment
18
Directive 98/79/EC: in Vitro Diagnostics (if Labeled for this Use)
18
Electromagnetic Interference and Susceptibility
18
Usa Fcc Class a
18
Canadian Department of Communications Class a
18
User Safety
19
Safety Symbols
20
Introduction
23
Synergy HTX Multi-Mode Microplate Reader
24
Package Contents
25
Optional Accessories
26
Product Support & Service
27
Technical Assistance Center (TAC)
27
Returning Instruments for Service/Repair
27
Applications Support
27
Installation
29
Chapter 2 Installation
30
Product Registration
30
1: Unpack and Inspect the Reader
30
2: Remove the Shipping Panel
32
3: Remove the Microplate Carrier Shipping Screw
33
4: Install the Fluorescence Lamp Assembly
34
5: Select an Appropriate Location
35
6: Connect the Power Supply
36
7: Unpack and Inspect the Dispense Module
37
8: Install the Dispense Module
40
Record Syringe Calibration Values
40
Install the Dispenser
40
9: Connect the Host Computer
42
10: Install Gen5 Software
42
11: Turn on the Reader
42
12: Establish Communication
43
13: Set the Dispenser Calibration Values
44
14: Run a System Test
45
15: Test the Injector System
46
Operational/Performance Qualification
48
Repackaging and Shipping Instructions
48
Getting Started
53
Chapter 3 Getting Started
54
Key Components
54
Power Switch, Carrier Eject Button, Microplate Carrier
54
Lamp Assembly and Filter Wheel Access
55
Excitation and Emission Filter Wheels
56
Installing the Time-Resolved Fluorescence Cartridge
59
Configuring the System for Luminescence Measurements
60
The External Dispense Module
61
Gen5 Software
63
Viewing/Updating the Filter and Wavelengths Tables
64
Creating Protocols and Experiments
65
Controlling the Dispense Module
67
Recommendations for Optimum Performance
70
Incubation and Partial Plates
71
Preventive Maintenance
73
Chapter 4 Preventive Maintenance
74
Recommended Maintenance Schedule
74
Overview
74
Daily Cleaning for the Dispense Module
74
Recommended Maintenance Schedule
75
Warnings and Precautions
76
Cleaning Exposed Surfaces
77
Inspect/Clean Excitation and Emission Filters
78
Flush/Purge the Fluid Path
79
Running a Dispense Protocol (Optional)
80
Empty/Clean the Tip Priming Trough
81
Clean the Priming Plate
81
Clean the Internal Components
82
Required Materials
83
Removing the Reader's Shroud
84
Removing the Internal Tubes and Injector Heads
86
Cleaning the Internal Tubes and Injector Heads
89
Cleaning the Optical Probes
90
Cleaning the Reader's Internal Surface
98
Reassembling the Components
99
Performance Check
101
As-Needed Maintenance
103
Chapter 5 As-Needed Maintenance
104
Purpose
104
This Appendix Contains Procedures for Decontaminating All Models
104
Required Materials
105
Procedure for Models Without Injectors
106
Routine Procedure for Models with Injectors
107
Clean Exposed Surfaces
107
Decontaminate the Fluid Lines
108
Rinse the Fluid Lines
109
Clean the Internal Tubing and Injector Heads
109
Clean the Tip Priming Trough and Priming Plate
110
Alternate Procedure for Models with Injectors
111
Instrument Qualification
113
Chapter 6 Instrument Qualification
114
Overview
114
Iq/Oq/Pq
114
Recommended Qualification Schedule
116
System Test
117
Absorbance Plate Test
122
Test Plate Certificates
122
Define Absorbance Test Plate Parameters
122
Run the Absorbance Plate Test
123
Results and Troubleshooting Tips
126
Luminescence Tests
128
Harta Plate Test
128
Gen5 Protocol Reading Parameters
129
Troubleshooting
131
Absorbance Liquid Tests
131
Absorbance Liquid Test 1
132
Absorbance Liquid Test 2
134
Absorbance Liquid Test 3 (Optional)
136
Fluorescence Tests
138
Required Materials
139
Test Solutions
140
Procedure
141
Results Analysis
141
Troubleshooting
142
Pipette Map
143
Gen5 Protocol Reading Parameters
144
Fluorescence Tests Using Methylumbelliferone
148
Dispense Module Tests
154
Required Materials
155
Alternate Test Solutions
155
Procedure for Models with Absorbance Capabilities
155
Procedure for Models Without Absorbance Capabilities
157
Results Analysis
159
Gen5 Test Protocols for Models with Absorbance Capabilities137
159
Capabilities
161
Create the Dispense Protocols
161
Specifications
167
Absorbance Specifications
167
General Specifications
168
Fluorescence Specifications
171
Models with Injectors
171
Luminescence Specifications
172
Error Codes
175
Error Codes Overview
176
Contact Info: Biotek Service/Tac
176
4
Based on 1 rating
Ask a question
Give review
Questions and Answers:
Need help?
Do you have a question about the Biotek Synergy HTX and is the answer not in the manual?
Ask a question
Biotek Synergy HTX Specifications
General
Brand
Biotek
Model
Synergy HTX
Category
Laboratory Equipment
Language
English
Related product manuals
Biotek Synergy HT
240 pages
Biotek Synergy H1
190 pages
Biotek ELx808
172 pages
Biotek ELx800
218 pages
Biotek 800TSI
60 pages
Biotek Epoch 2
42 pages
Biotek 405 TS
123 pages
Biotek 800 TS Series
60 pages
Biotek BioStack 3
127 pages

 Loading...