Hovering your mouse pointer over the gain, shutter
speed and white balance indicators reveal arrows
you can click on to adjust their respective settings.
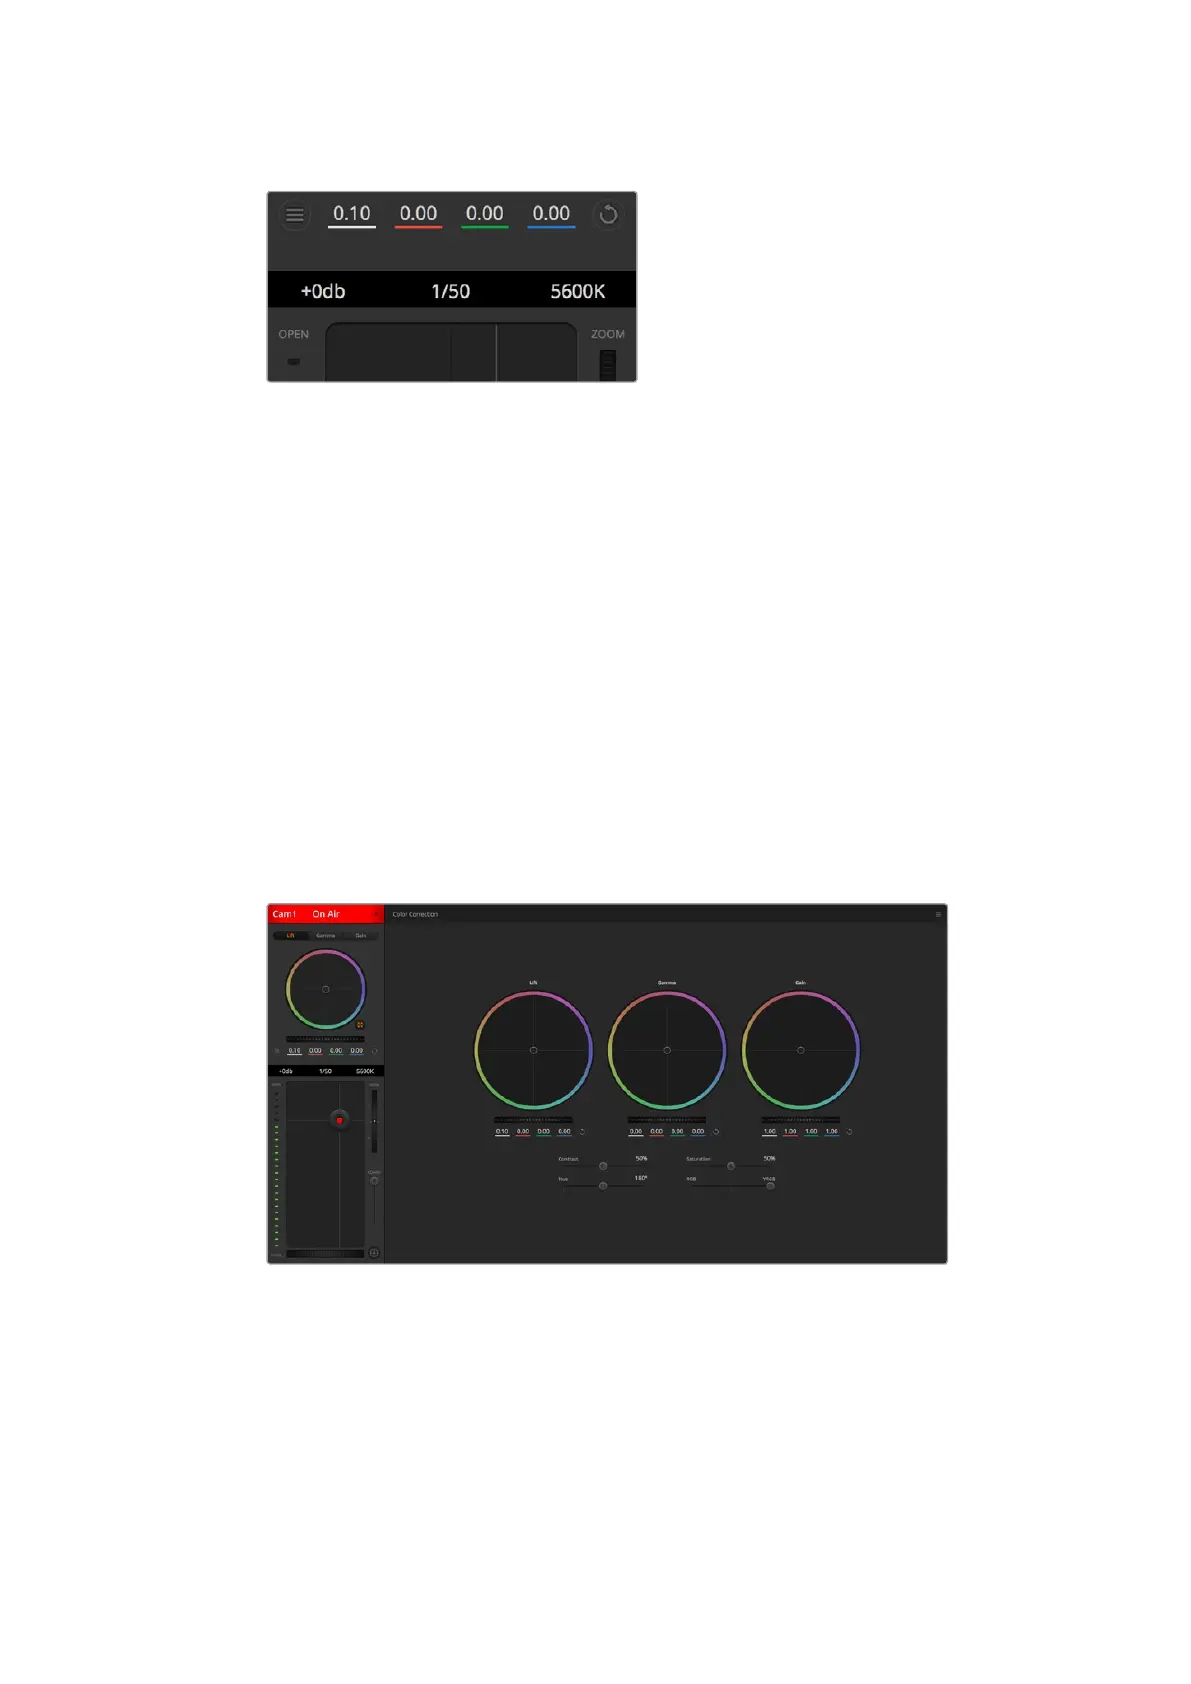
DaVinci Resolve Primary Color Corrector
If you have a color correction background, then you can change the camera control from a
switcher style CCU interface to a user interface that’s more like a primary color corrector on a
post production color grading system.
Your Blackmagic Studio Camera features a DaVinci Resolve primary color corrector built in.
Ifyou have used DaVinci Resolve, then creatively, grading in your Blackmagic Studio Camera
will be identical so you can use your color grading experience for live production.
The color corrector panel can be expanded out of any camera controller and provides expanded
color correction control with extra settings and a full primary color corrector interface.
You have color wheels and settings such as saturation available and you can see shadows,
midtones and highlight settings all at the same time. Simply switch between cameras using the
camera selection controls at the top of the window as you need.
Click on the DaVinci Resolve primary color corrector button
to expand the color correction window and adjust settings.
Color Wheels
The Lift/Gamma/Gain controls allow tonally specific yet overlapping regions of adjustment.
In photographic terms lift, gamma and gain corresponds to shadows, mid tones and highlights.
3838Using ATEM Software Control