Installation
7
Installing a DeckLink PCIe card in a Mac Pro
Please review the section in your Mac Pro user manual entitled “Adding PCI Express Cards” for information
on how to safely install PCI Express cards, including your DeckLink card.
1. Remove the power plug from the back of your Mac. This is a safety precaution before opening
your computer. Ensure that you are statically discharged by using a static strap.
2. Remove the side cover of your Mac to gain access to the PCIe slots.
3. Remove your DeckLink PCIe card from the protective static bag making sure you don’t touch the
gold connectors on the base of the card. These precautions should be taken when handling any
PCI card.
4. Remove the metal port access cover and screw from the back of your Mac.
5. Slot 4 is the recommended slot for DeckLink cards in the first generation of Mac Pro’s. Slot 3 or 4
(the top two slots) are the recommended slots for using a DeckLink PCIe card in an Early 2008 or
later model of Mac Pro. Insert your DeckLink PCIe card and ensure that it clicks firmly into place.
6. Secure the card by the screw.
7. The procedure for installing a RAID controller card is similar to the above.
8. Now replace the side cover of your Mac. Reconnect the power and start up the computer.
After installing your DeckLink PCIe card and closing the door on your Mac Pro, attach the supplied DeckLink
breakout cable to to the external multi-pin connector on your DeckLink card. Some card models ship with
both professional and consumer breakout cables for connecting to different video hardware. Attach the
appropriate breakout cable for your needs.
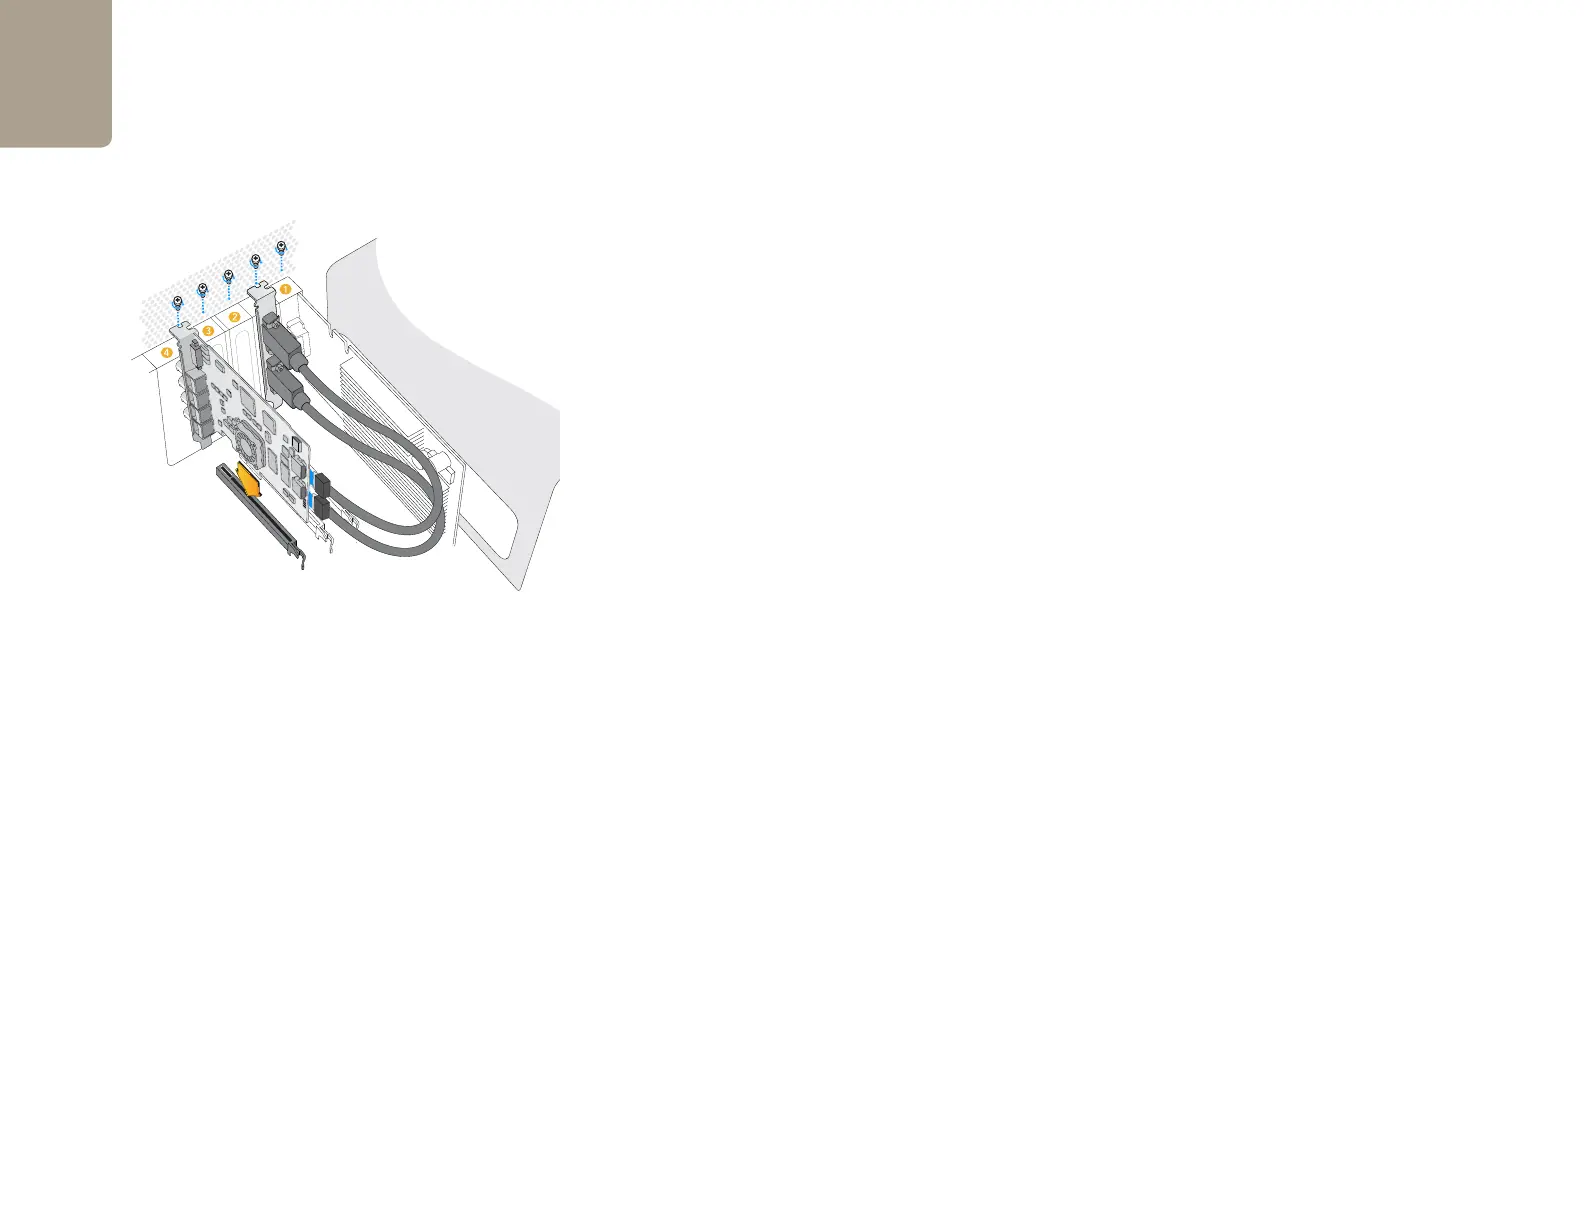
Install any model of DeckLink PCIe card in a spare slot as shown
in the above picture. The DeckLink HD Extreme 3D+ also has an
HDMI bracket, which installs in any spare port, and connects to
the rear of the card with the supplied HDMI cables.