NOTE When using ‘position’ with a tape based deck, the position indicator will
improve with time as the deck is queried by the controller.
To locate your timecode point, make sure your ‘player’ has a reference signal and is in ‘remote’
mode. Then on the controller:
1 Press the ‘player’ button if it is not already illuminated
2 Press the ‘shuttle’ button. Once pressed, the button will illuminate.
3 Rewind your tape by turning the search dial knob to the left until you feel the clutch engage.
You are now rewinding at full speed and the tape will be spooling back to the start.
4 Once you are nearing the timecode point, turn the dial back to the center. Once the knob is
near the center stop position you will feel a tap on the dial to let you know.
5 Press the ‘jog’ mode button. The jog button will now be illuminated. The dial will now spin
freely and you can turn it to find your desired timecode. The faster you turn the dial, the
faster the media will jog.
Now that you have found your timecode in point, you can use the four soft touch timecode
buttons to define your in and out timecode points. These timecode entry buttons operate the
same way as they do on traditional broadcast decks.
To set your timecode points:
1 Press ‘entry’ and ‘in’ to select your in point and release the buttons. The ‘in’ button willbe
illuminated to confirm an ‘in’ point is selected.
PLAYBACK
RECORD
TRIM PLAYER
REF
SERVO
REMOTE
RECORDER
HOURS MINUTES SECONDS FRAMES
IN
INPUT PREROLL SKIP REC SKIP
SHUTTLE JOG POSITION
EDIT EJECT REW PLAY F FWD STOP
OUT
ENTRY
DELETE
M
M
1 2 3 4 5 6 7 8
1 2 3 4 5 6 7 8
ENTRY
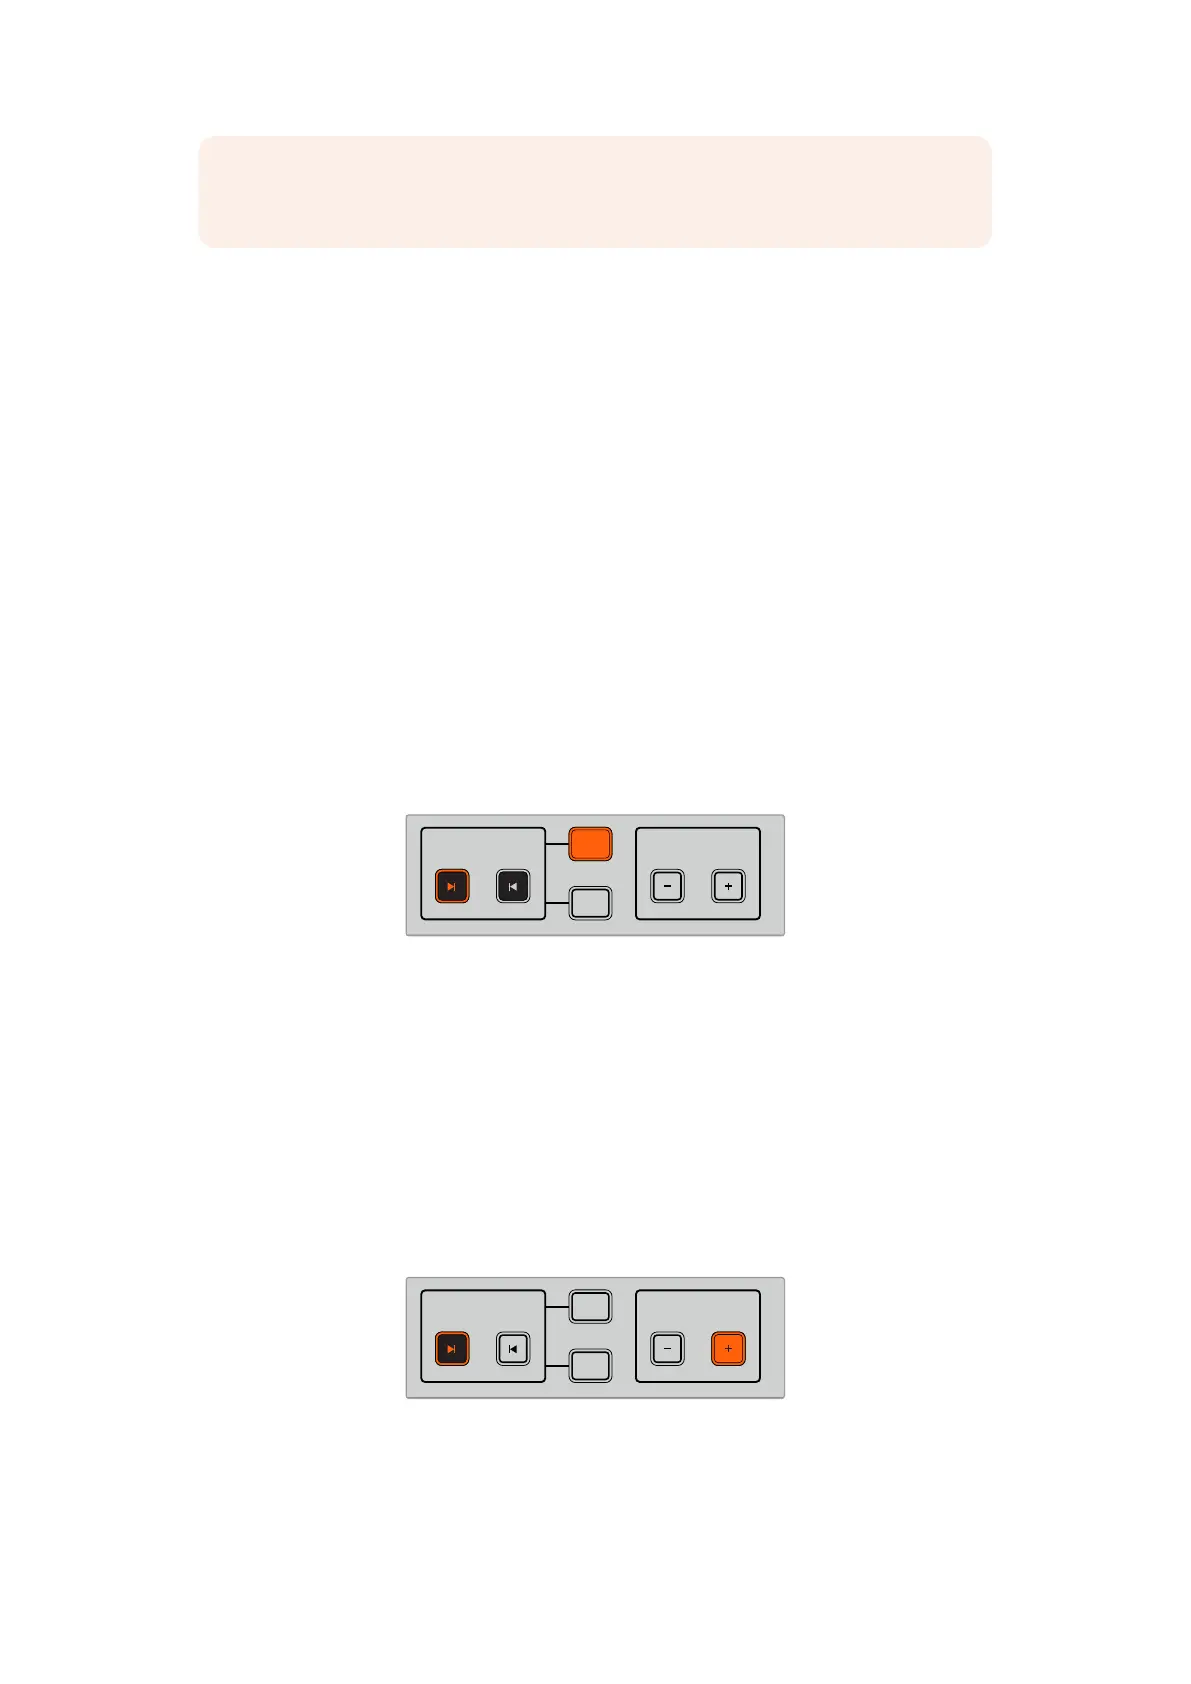
1
2
Press the entry and in buttons to set your in point
2 Now you can use the transport controls or search dial to locate your ‘out’ point. Once you
have found your out point, set it by pressing the ‘entry’ and ‘out’ buttons together.
Both the ‘in’ and ‘out’ buttons will now be illuminated.
The trim function lets you adjust your in and out points frame by frame. If you want to move
either of your timecode points by individual frames, you can do this by using the ‘trim’ buttons.
To trim your timecode frame by frame:
Press the ‘in’ button and then either trim ‘-’ or trim’+’ to move the in point backwards orforwards
one frame at a time.
PLAYBACK
RECORD
TRIM PLAYER
REF
SERVO
REMOTE
RECORDER
HOURS MINUTES SECONDS FRAMES
IN
INPUT PREROLL SKIP REC SKIP
SHUTTLE JOG POSITION
EDIT EJECT REW PLAY F FWD STOP
OUT
ENTRY
DELETE
M
M
1 2 3 4 5 6 7 8
1 2 3 4 5 6 7 8
1
2
Move your in point forward by a frame by pressing
the ‘in’ button and the trim ‘+’ button
Once your ‘in’ point is set, you can repeat the above steps to locate the ‘out’ point using the
search dial.
75HyperDeck Extreme Control Workflow