Getting Started with Capture and Playback
14
How to Set Up for Capture and Playback with Conversion
This section guides you through how to set up your Teranex 2D Processor hardware with your computer for
video capture and playback with conversion, including RS-422 remote deck control.
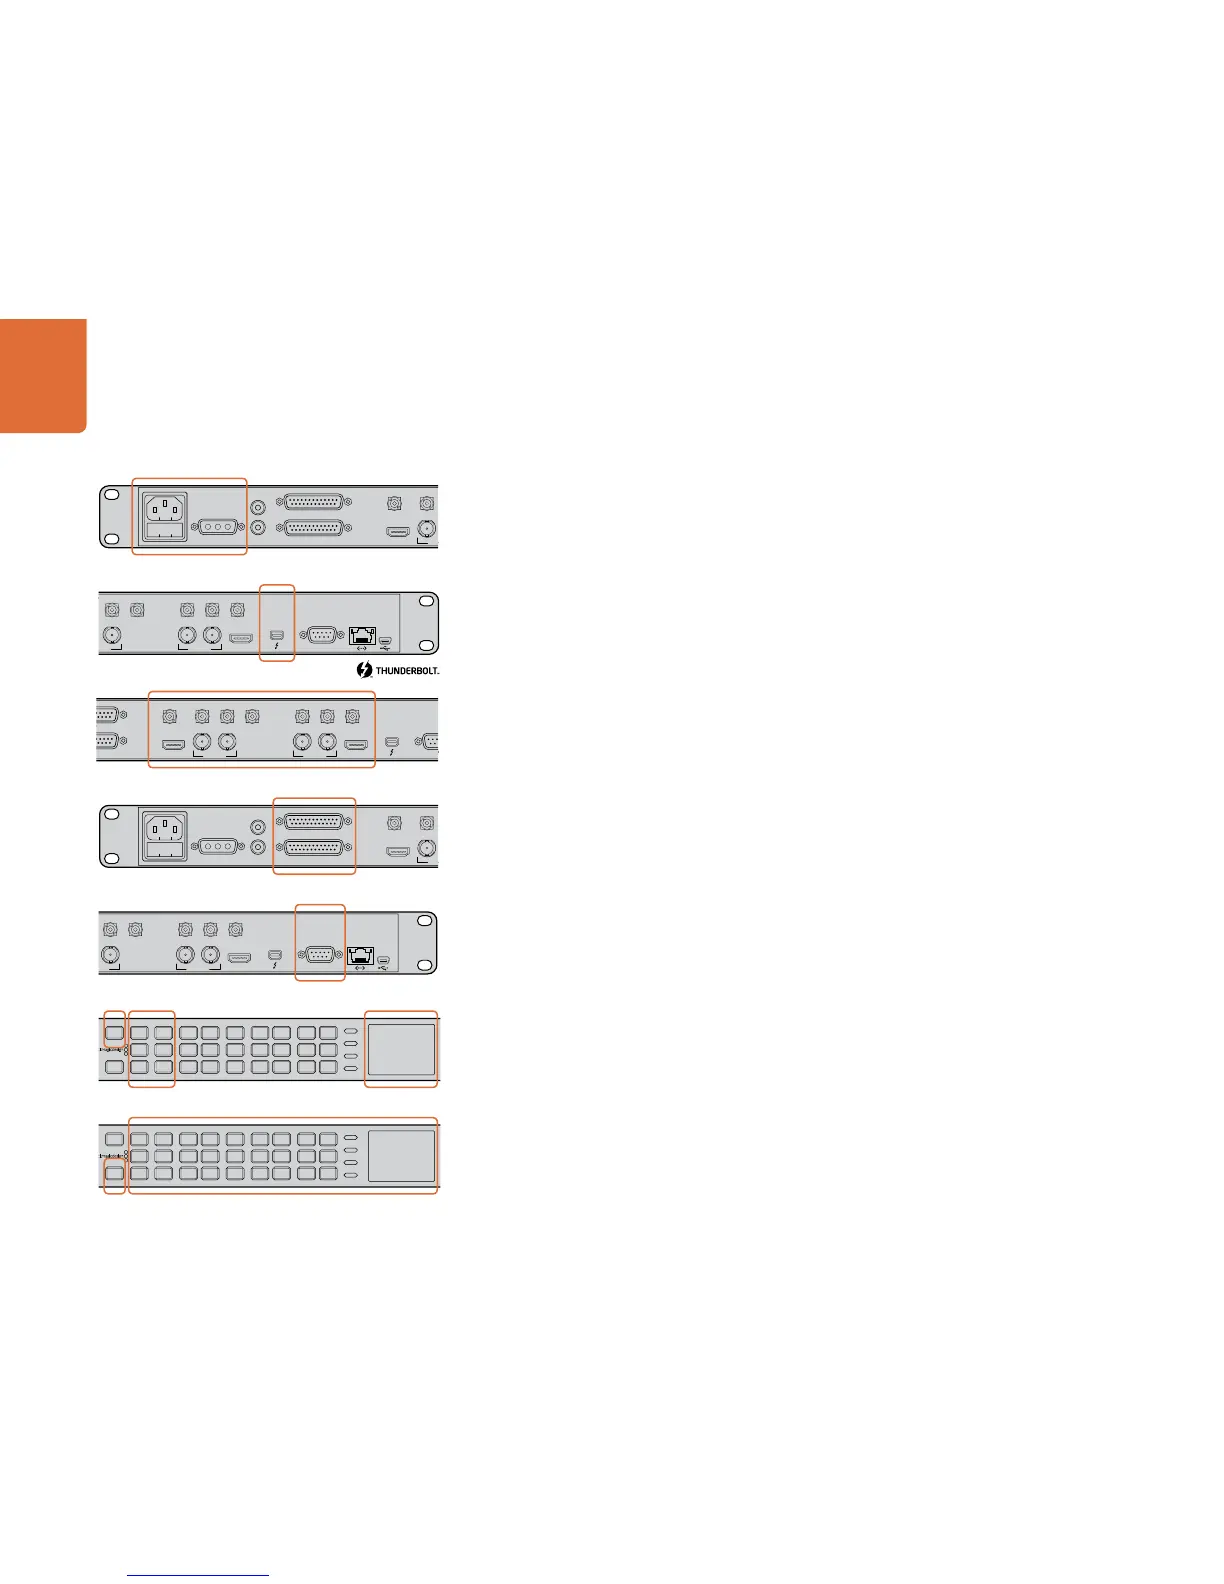
Connecting the Teranex 2D Processor to your computer
Step 1. Connect power to one or both power sockets. The easiest way to power the Teranex 2D Processor
is to connect an IEC cable to its AC power socket. Alternatively the 12V DC military grade port
can be used for external battery power and/or failover redundancy with an optional “brick” DC
adapter.
Step 2. Connect a Thunderbolt cable between the Teranex 2D Processor and a Thunderbolt port on your
computer, or to a Thunderbolt disk array which is attached to your computer.
Step 3. Connect cables between the video and audio connections on your Teranex 2D Processor and
your video equipment.
Step 4. If you are using analog or AES/EBU audio, rather than SDI or HDMI embedded audio, connect
common third party breakout cables to the DB-25 audio connectors for analog and AES/EBU
audio. Pinout diagrams for the DB-25 audio connectors can be seen in the "Connecting Video
and Audio Hardware" section of this manual.
Step 5. If you want to remotely control a video deck with RS-422 deck control, connect an RS-422 cable
between the RS-422 remote ports of the Teranex 2D Processor and the deck.
Step 6. On the front panel press the IN button and set the video source to SDI, HDMI or Analog. If you
are using embedded SDI or HDMI audio, set the audio source to Embed. Otherwise select from
AES or Analog audio. The processor will detect the format of the video input and automatically
configure the unit. The integrated LCD will show the incoming video signal.
Step 7. Press the OUT button on the front panel and use the buttons to select your desired output format,
frame type, frame rate and also set the output aspect ratio if needed. Press “Accept” on the
integrated LCD to confirm the new selection. You will notice that all video and audio output
buttons will be lit, indicating that all output types are active simultaneously.