40
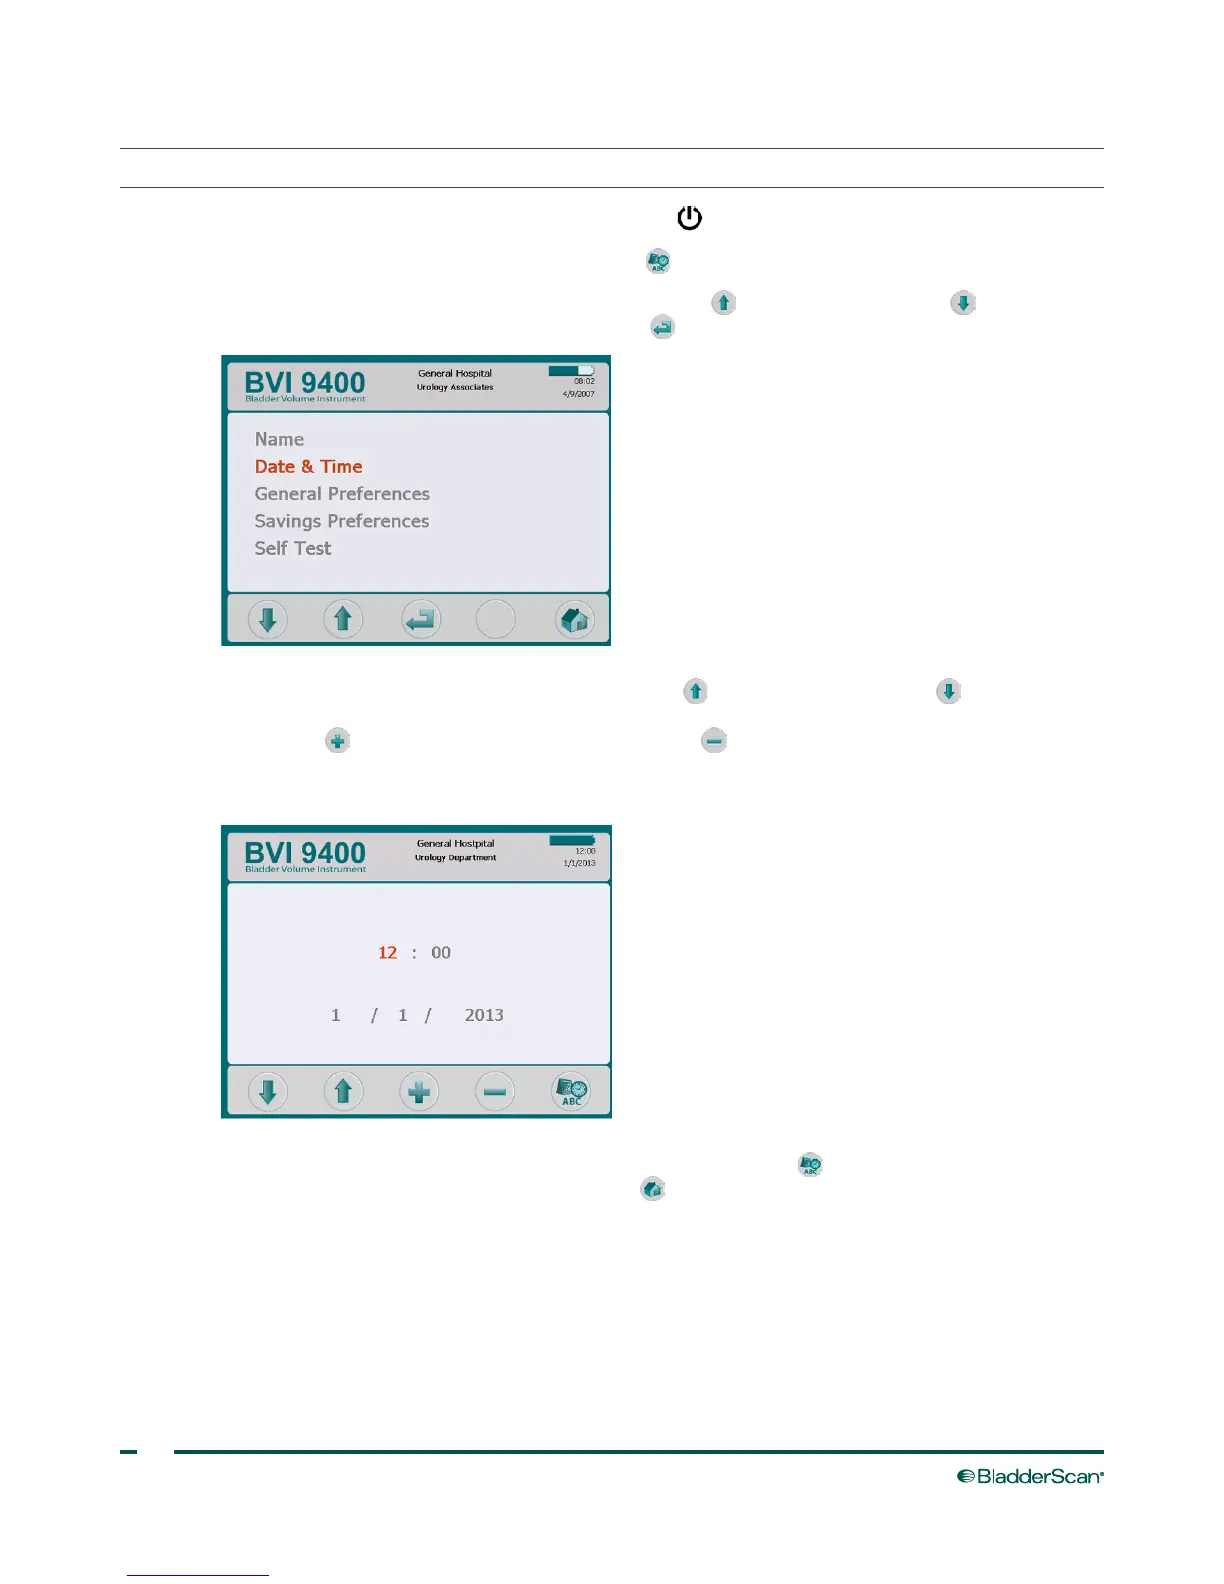
PROCEdURE 5. SET THE dATE ANd TIME
1. Turn on the instrument by pressing the Power button .
2. From the Home screen, press the Settings button to open the Settings screen.
3. On the Settings screen, push either the Up Arrow button or Down Arrow button until “Date &
Time“ is highlighted in red. Press the Enter button to open the Date & Time screen.
4. On the Date & Time screen, use the Up Arrow button and Down Arrow button to move to the
desired unit (hours, minutes, month, day, year). When the desired unit is highlighted in red, press the
Plus button to increase values and the Minus button to decrease values.
Note: If the time display is set to show a 24‑hour clock, the hour units are 0–23. If the clock is set to
show a 12‑hour clock, the hour units are 1–12 followed by AM or PM.
5. When the date and time are set correctly, press the Settings button to return to the Settings screen.
From the Settings screen, push the Home button to return to the Home screen.