Do you have a question about the Body Solid EXM1 and is the answer not in the manual?
Instructions for safely unpacking the EXM1 gym equipment after delivery.
List of tools necessary for assembling the EXM1 fitness machine.
Key considerations for setting up the EXM1, including surface and space.
Guidance and notes for a smoother and safer assembly process of the EXM1.
Specific safety advice for individuals assembling the EXM1 equipment themselves.
Detailed guidance on inspecting and maintaining the fitness machine's cables.
Procedures for checking and adjusting cable tension on the EXM1.
Guidelines for inspecting cables for wear and damage.
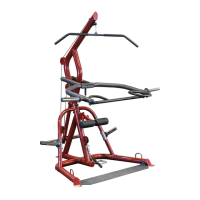
Connect the Stabilizing Leg P to the main frame using specified hardware.
Install foot caps onto the Stabilizing Leg P for stability and protection.
Join the main frame components with the rear leg and upright.
Install foot caps onto the Rear Leg B.
Connect the upper section of the main frame to the lower section.
Install the Flat Plate H onto the main frame assembly.
Connect the bracket to the upper frame and upright.
Install an end cap onto the upper main frame.
Position weight stack raisers and rubber donuts on the rear leg base.
Load weight stack plates onto the guide rods.
Join the top plate to the selector rod assembly.
Mount the connected top plate and selector rod onto the guide rods.
Connect guide rods to the rear upper beam for stability.
Install end caps onto the rear upper beam.
Place a plastic bushing into the main frame for component insertion.
Install the front foot plate onto the main frame assembly.
Connect the leg extension arm to the main frame.
Install end caps onto the leg extension arm.
Secure the back/seat pad to its supporting frame.
Install end caps onto the seat pad frame.
Mount the seat pad assembly into the main frame.
Secure the seat pad frame using a pop pin.
Secure the back/seat pad to its supporting frame.
Install end caps onto the back pad frame.
Connect the back pad frame to the adjustment mechanism.
Mount the back pad adjustment into the upper main frame.
Secure the back pad adjustment using a pop pin.
Connect the press arm pivot to the upper main frame.
Secure the upper main frame bolts.
Place end caps onto the press arm pivot.
Verify the presence of rubber stop and jam nut in the upper frame.
Install end caps onto the press arm.
Connect the press arm to its pivot assembly.
Install the right and left handles onto the press arm.
Insert foam roller bar into the main frame.
Insert foam roller bar into the seat pad frame.
Insert foam roller bar into the leg extension arm.
Guide the high pulley cable through the initial pulley points.
Install the first set of pulleys for the high pulley cable.
Direct the high pulley cable through the press arm pivot.
Install subsequent pulleys for the high pulley cable routing.
Mount the pulley shroud onto the press arm pivot.
Guide the high pulley cable around the next set of pulleys.
Install the remaining pulleys for the high pulley cable.
Attach the high pulley cable end to the weight stack mechanism.
Connect the cable end shaft to the cable's metal ball end.
Tension the cable and secure the selector rod assembly.
Route the low pulley cable's start into the leg extension arm.
Guide the low pulley cable through the main frame structure.
Install the first set of pulleys for the low pulley cable.
Continue guiding the low pulley cable through the main frame.
Install the next pulley for the low pulley cable.
Guide the low pulley cable through the double pulley holder.
Guide the low pulley cable through the small pulley holder.
Direct the low pulley cable through the upper main frame.
Connect the short cable's eye end to the main frame.
Guide the short cable and attach its chain end to the pulley holder.
Modify pulley positions in the double holder to adjust cable tension.
Modify pulley positions in the rear beam to adjust cable tension.
Alter the chain length on the short cable for tension adjustment.
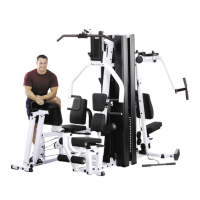
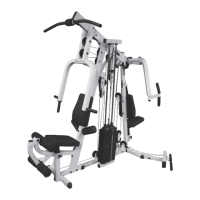
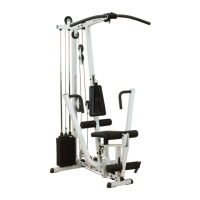
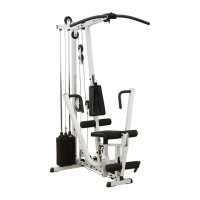
| Type | Home Gym |
|---|---|
| Material | Steel |
| Height | 93" |
| Length | 83" |
| Color | Black |
| Warranty | Lifetime Frame Warranty, 2-Year Parts Warranty |