8
Loosen the bolt at the top of the engine hanger
and swing the engine hanger forward.
15. Moving to the left hand side of the machine,
remove the gear shift lever.
16. Remove the magneto cover retaining screws.
17. Remove the two hex head bolts from the lower
half of the chain case and remove the lower
chain case section.
18. Remove the left hand battery cover.
Disconnect the wires running from the
magneto to the battery. Remove the battery
band and remove the battery. Locate the chain
connecting link and chain connector.
Dismount the drive chain from the small
sprocket. Temporarily reconnect the chain to
avoid losing the chain connector. Pull the
magneto wire loom out of the cycle frame.
19. Remove the nuts from the engine mounting
bolts. The nuts are located on the right hand
side of the machine. Withdraw the engine
mounting bolts from the left hand side of the
machine.
20. Lower the engine out of the frame.
21. Place the engine on the bench and remove the
kick starter lever.
22. Remove the cylinder head mounting bolts
using a 10mm socket wrench.
23. Using a 10mm open end wrench, remove the
four cylinder mounting nuts. Lift the cylinder
off the cylinder mounting studs.
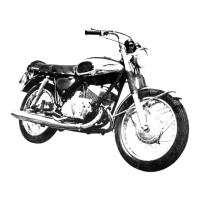
24. As soon as the cylinder is removed, insert the
piston seat (special tool) under the piston. This
special tool protects the piston during
disassembly and it also holds the crankshaft
stationary for further disassembly operation.
(Fig. 5)
25. Remove the piston pin snap rings and remove
the piston pin and piston from the connecting
rod. A suitable piston pin puller must be used
in this operation. This is provided in the
Bridgestone special tool kit.
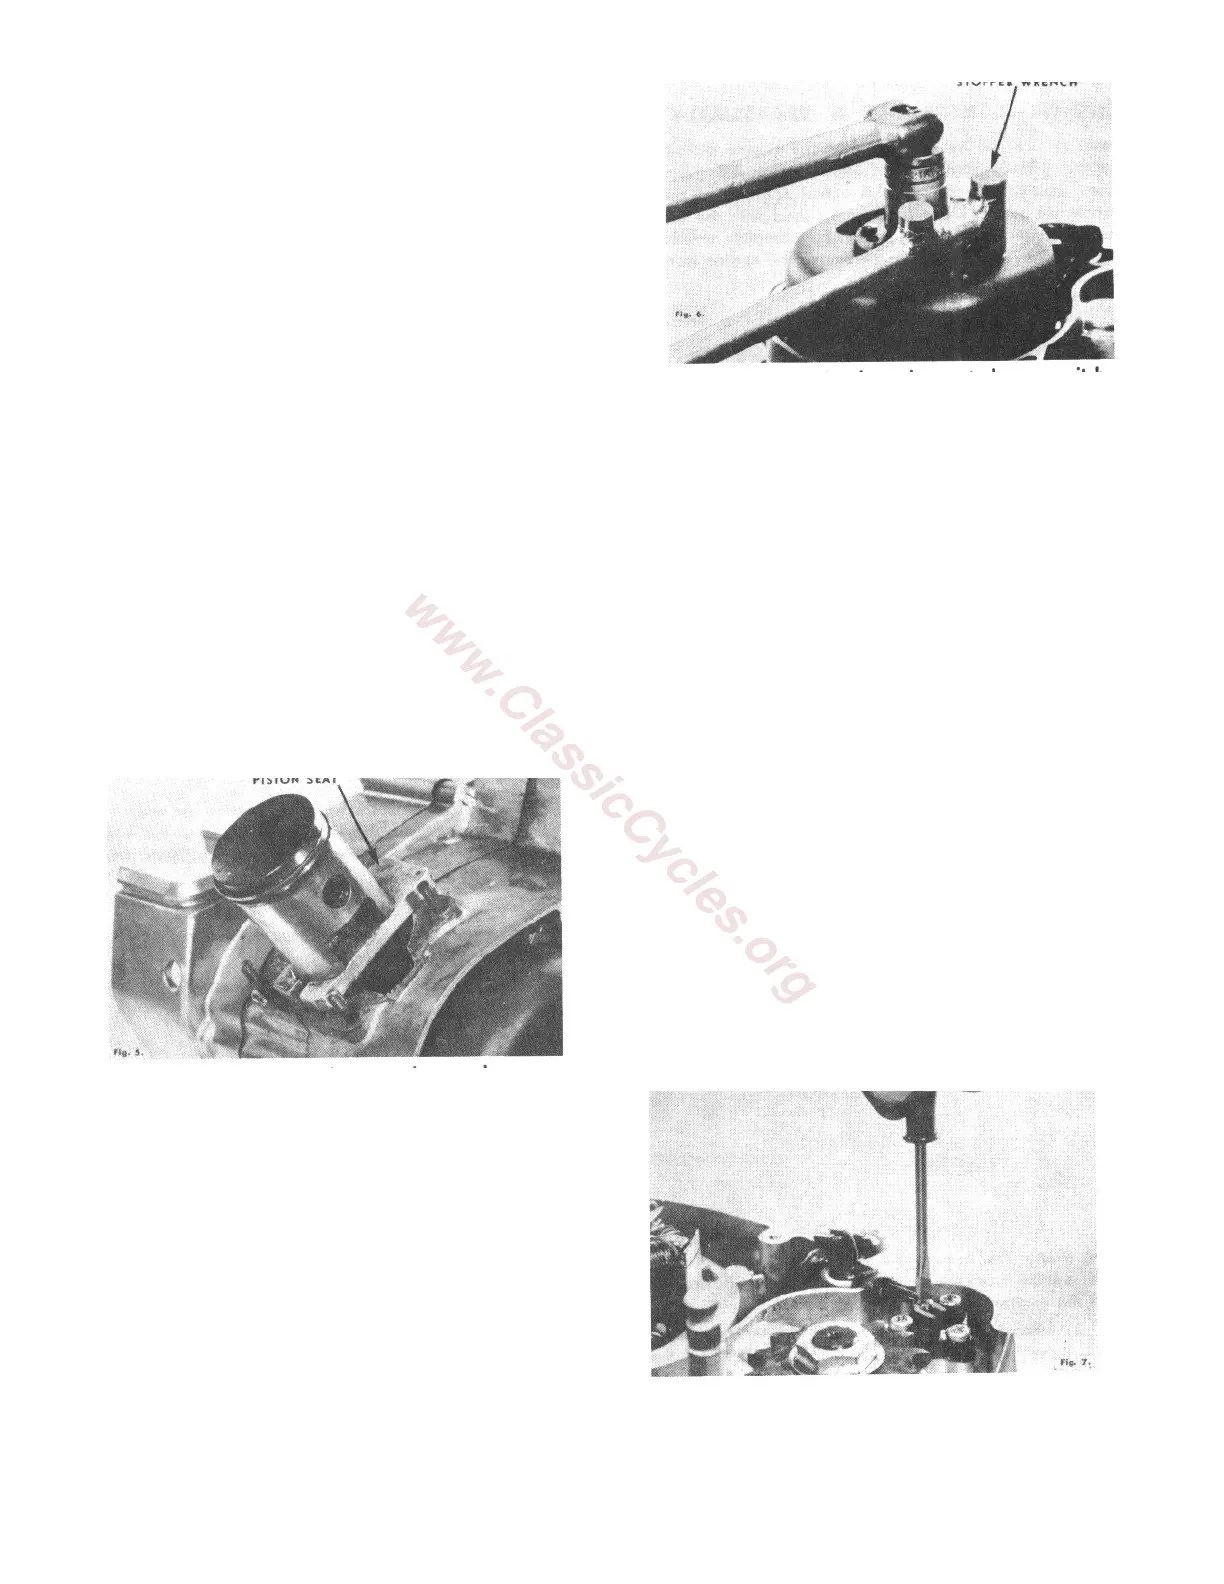
26. Position the engine on the bench, magneto
side up. Hold the magneto stationary with the
stopper wrench (special tool) and, using a
socket wrench, remove the magneto retaining
nut and lock washer. (Fig. 6)
27. Mount the magneto puller (special tool) and
holding the magneto stationary with the
stopper wrench, remove the fly wheel
magneto. CAUTION: When mounting the
magneto puller on the 90cc fly wheel magneto,
insert the three attaching screws just far
enough to engage two or three threads. If
these screws are turned in too far, it is possible
to damage the magneto coils.
28. Remove the wire from the neutral gear
switch. (Fig. 7)