Classic Cycles Technical Resources
9
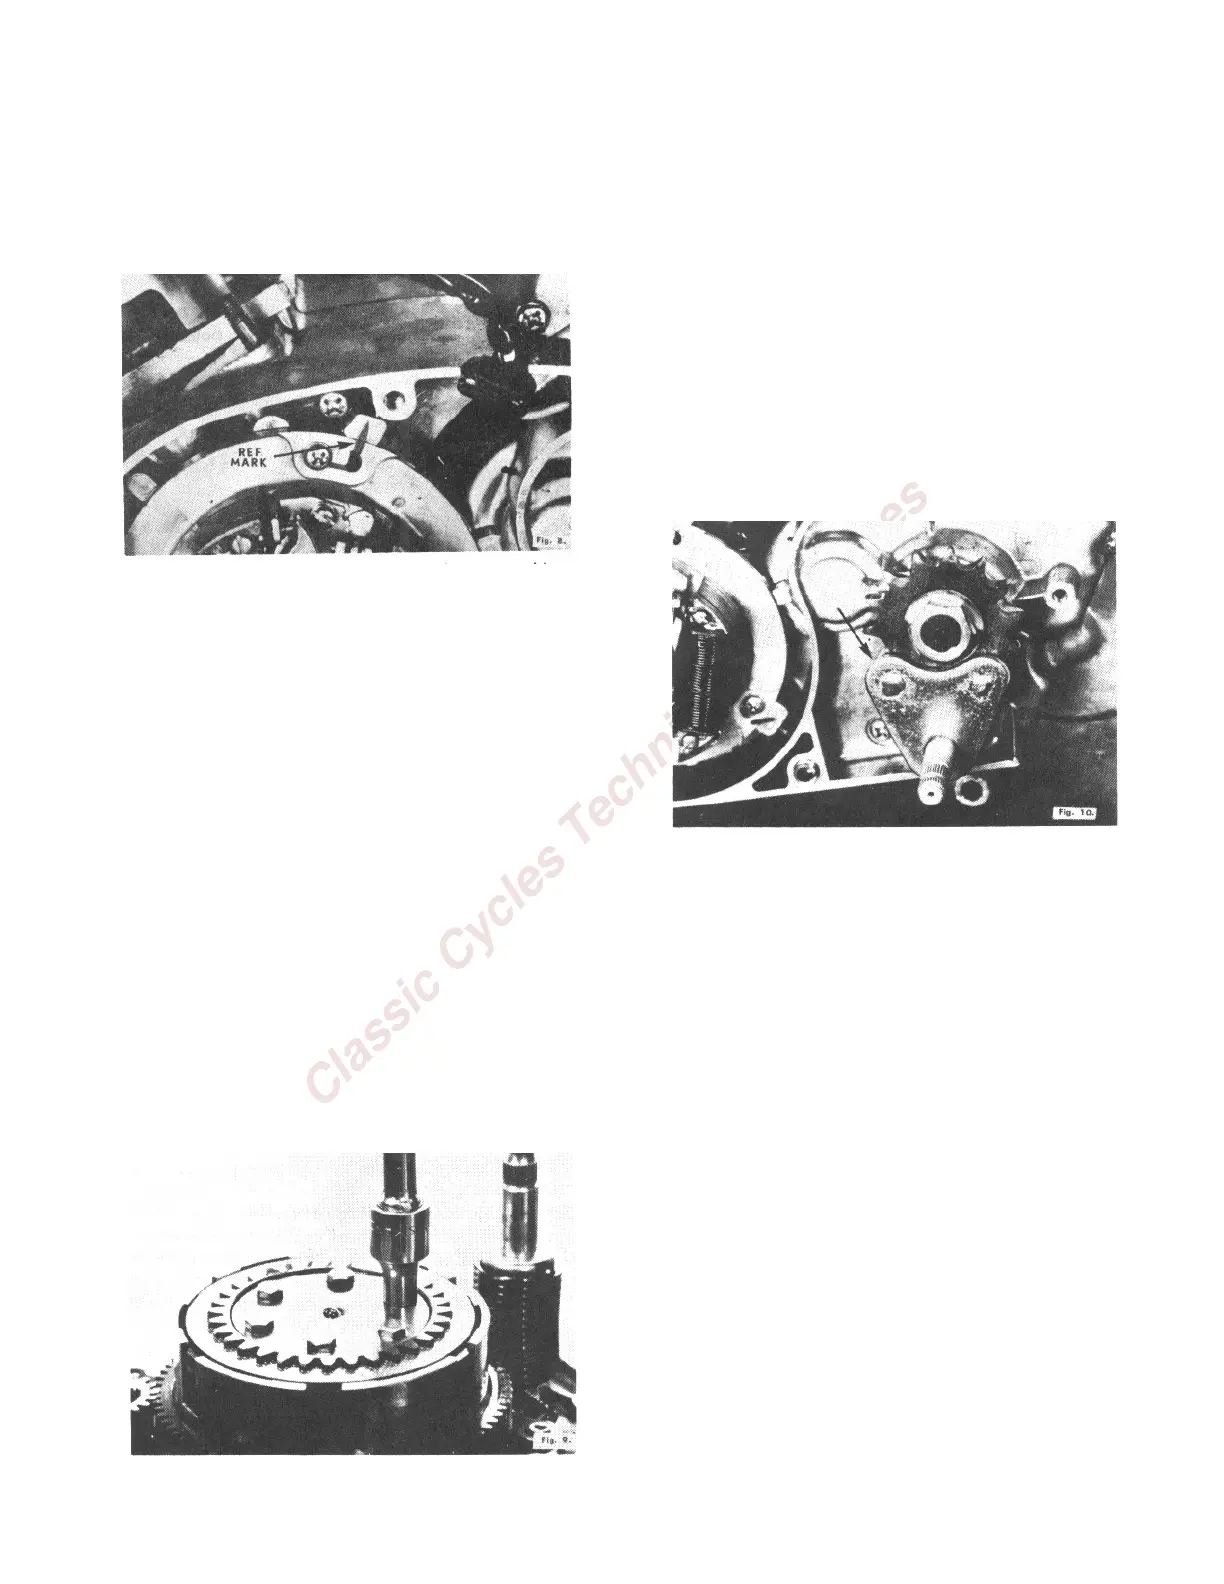
29. Carefully mark the position of the magneto
armature plate relative to the crankcase with
a prick punch or with a felt marking pen.
These reference marks will make it possible to
reinstall the magneto armature plate in
exactly the same position to avoid the
necessity of major timing adjustments when
the engine is reassembled. (Fig. 8)
30. Remove the three armature plate attaching
screws and remove the magneto armature
plate.
31. Remove the three neutral gear switch cover
mountings screws and remove the switch
cover. Remove the brass contact located under
the cover. This contact is fitted to the end of
the shift drum shaft.
32. Turn the engine over so that the carburetor
side faces up and remove the transmission
case cover screws.
33. With the screws removed, carefully remove
the transmission case cover. CAUTION: Some
oil will remain in the transmission case so use
caution in removing the transmission case
cover to avoid spilling this remaining oil.
34. Remove the 6 clutch thrust plate bolts from
the top of the clutch assembly. Remove the
thrust plate. (Fig. 9)
35. Remove the 6 clutch springs.
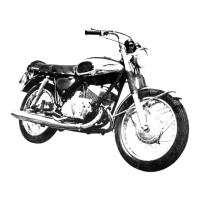
36. Flatten the up turned sides of the bend
washer and remove the clutch retaining nut
on the 90cc engine after shifting the
transmission into first gear. Use the shift lever
to shift the gears rather than a pliers to avoid
damaging the splined end of the gear shift
shaft. The sprocket stopper (special tool) must
be slipped over the gear shift shaft on the
opposite side of the engine and the steel pegs
on this special tool are positioned between the
teeth of the small sprocket. This holds the
sprocket stationary, enabling you to remove
the clutch retaining nut. (See figure 10). On
the 50cc and 60cc rotary valve engines, remove
the clutch retaining snap ring to remove the
clutch assembly.
37. Remove the clutch assembly as a unit. NOTE:
On more recent models of the 90cc series, a
thrust spring fits over the drive gear of the
clutch. In these models, remove the clutch
bracket, the splined washer, lift out the gear
drive assembly, and then remove the thrust
spring.
38. With the clutch wrench (special wrench),
remove the pinion gear nut from the end of the
crankshaft. (On the newer models this
retaining nut can be removed with a socket
wrench.) CAUTION: This is a left hand
thread. The crankshaft can be kept from
rotating during the removal of the pinion gear
retaining nut if the piston seat is put in place.
39. Remove the pinion gear from the end of the
crankshaft.
40. Remove the 6 rotary valve cover screws and
remove the rotary valve cover.