Classic Cycles Technical Resources
15
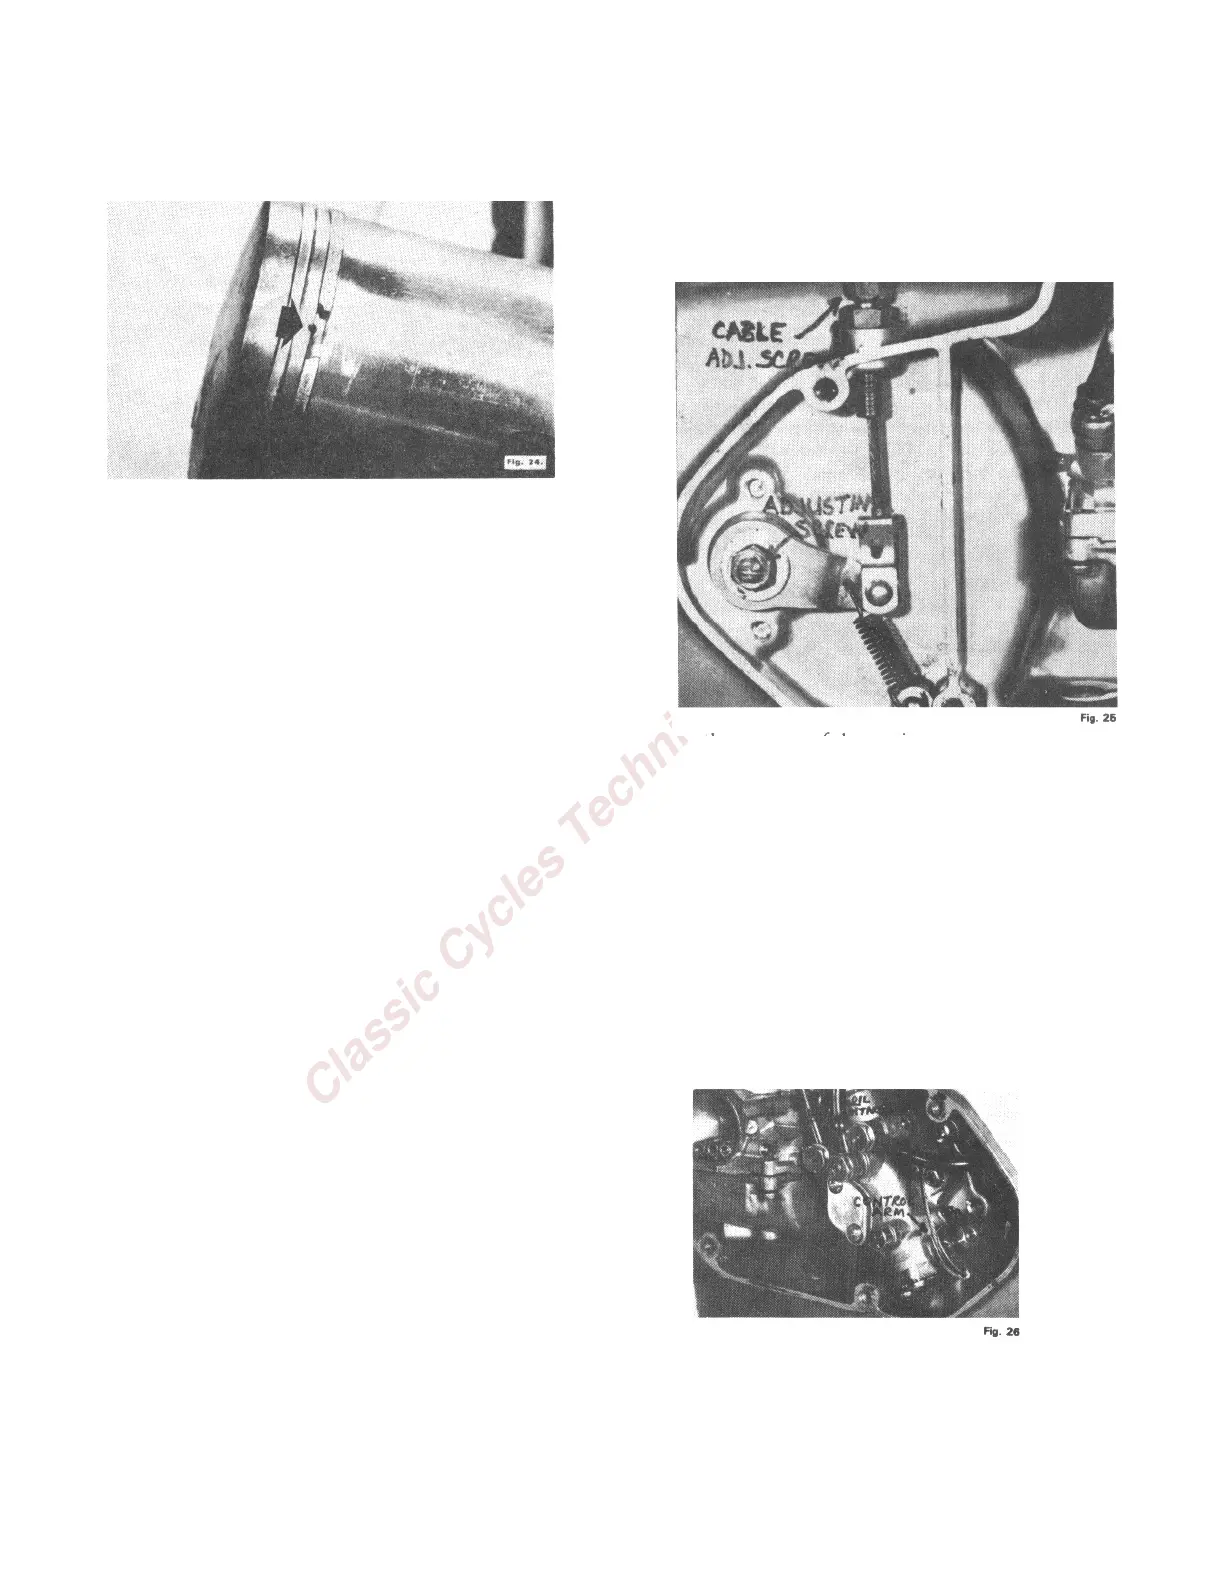
that the locating pin on the piston is located in
the ring gap. (Fig. 24) The notch in the ring
gap should face up. If the notch faces down,
the rings cannot be compressed enough to
permit installation of the cylinder.
37. Install the cylinder onto the mounting studs
and install the lockwashers and nuts securely.
38. Install the cylinder head gasket and cylinder
head. Four flat washers are used under the
cylinder head nuts. Tighten the head nuts
progressively and evenly to 125 inch lbs. of
torque.
The engine is now completely reassembled and
ready for remounting in the cycle frame. The
engine mounting procedure is to be done in the
reverse order of the dismounting procedure.
BRIDGESTONE 175 DT ENGINE
DISASSEMBLY AND REASSEMBLY
I. Removing Engine From Frame
1. Drain transmission oil into a suitably large
container.
2. Raise the right hand rubber carburetor cap.
3. Remove the air cleaner duct from the
carburetor cap.
4. Remove the carburetor cover from the right
hand side of the engine.
5. Remove the rubber plug from the front of the
carburetor enclosure and loosen the carburetor
retaining bolt.
6. Remove the right hand carburetor. It can be
allowed to hang suspended from the throttle
cable.
7. Loosen the clutch adjusting screw lock nut and
remove the clutch adjusting screw.
8. Remove the clutch release arm and disconnect
it from the clutch cable.
9. Unscrew the clutch cable adjusting screw all
the way out of the engine.
10. Remove the kick starter lever.
11. Remove the cover plate on which the
transmission selector lever is mounted.
12. Remove the gear shift pedal.
13. Raise the carburetor rubber cap from the top
of the left carburetor enclosure.
14. Remove the air cleaner duct from the rubber
carburetor cap.
15. Remove the left carburetor cover.
16. Remove the left carburetor.