17 | DEDisplay Remote // Display Central // Assembly and adjustment
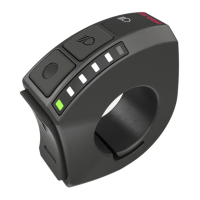
10 Display Remote E41227 control unit
10.1 Installing and adjusting the Display Remote E41227 control unit
›
Fig.D, page4
1. Carefully remove the handle and open
the attachment of the brake, gears
and all other components mounted
on the selected handlebar side.
› Please observe the respective
manufacturer's instructions for the
components and the e-bike.
2. Carefully loosen the grub screw (9)
with a hexagon socket (WAF 2) on the
control unit.
› HINT: The grub screw cannot be
removed from the control unit.
3. Slide the
control unit
onto the handle-
bars from the side.
› Position the control unit close to the
handle so that all buttons can be
easily pressed with the thumb.
› Make sure that the connection cable
is not crushed or kinked.
4. Lightly tighten the grub screw with a
hexagon socket (WAF 2).
› Do not tighten the grub screw yet.
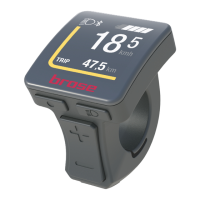
5. Check the position of the control unit.
› Are all buttons accessible with the
thumb?
› Is the display clearly visible?
6. Tighten the grub screw with the
hexagon socket.
› Torque 0.3 Nm (max. 0.5 Nm).
7. Connect the plug (8) of the control
unit to the plug of the motor cable.
› This can vary depending on the
equipment of your e-bike.
10.2 Adjusting the Display Remote E41227 control unit
›
Fig.D, page4
1. Carefully loosen the grub screw (9)
with a hexagon socket (WAF 2) on the
control unit.
› HINT: The grub screw cannot be
removed from the control unit.
2. Adjust the position of the control unit.
› Are all buttons accessible with the
thumb?
› Is the display clearly visible?
3. Tighten the grub screw with the
hexagon socket.
› Torque 0.3 Nm (max. 0.5 Nm).