DE | 18 Assembly and adjustment // Display Remote // Display Central
11 Display Central E41229 display unit
11.1 Mounting and adjusting the Display Central E41229 display unit
›
Fig.F, page5
(10)
(12)
(13)
(15)
(17)
(11)
(13)
(15)
(14)
(16)
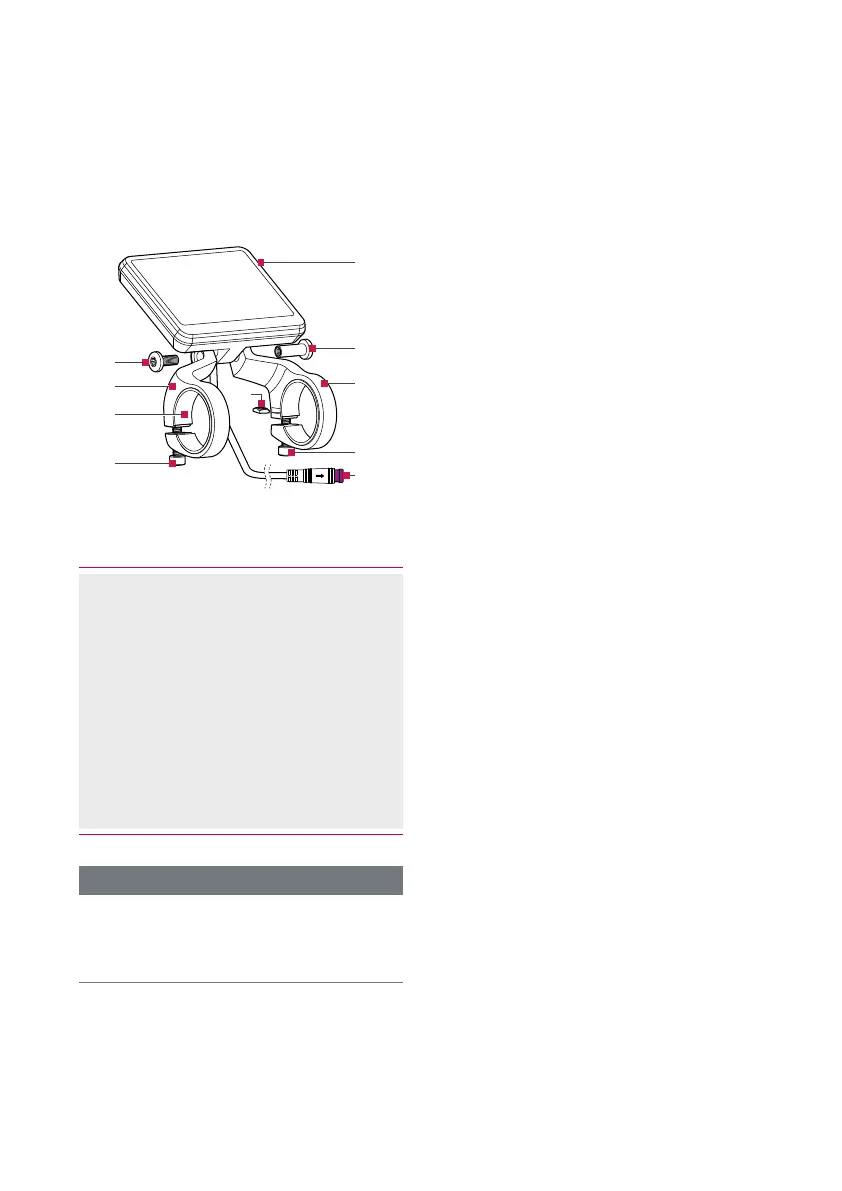
Fig. 1: Mounting Brose Display Central E41229
(10) Brose Display Central E41229
display unit
(11) Screw (1x)
(12) Sleeve nut (1x)
(13) Retaining bracket (2x)
(14) Silicone adapter (2x)
(15) Screw (2x)
(16) Lock nut (2x)
(17) Display Central connector
› Connection to the motor unit
INFORMATION
To combine the display unit with the
control unit, you need an additional
Y-cable E96506.
1. Fit the retaining brackets (13) to the
display unit(10).
› Make sure that the lock nuts(16) do
not fall out of the retaining brackets.
› Do not tighten the screw (11) and
sleeve nut(12) yet.
2. Position the display unit centrally
above the stem.
› The power cable must point
forwards/downwards in the direction
of travel.
3. Carefully bend the retaining brackets
open and slide them carefully over the
handlebars.
› Make sure that the silicone
adapters(14) do not slip.
4. Insert the screws (15) and tighten
them lightly.
› Do not tighten the screws yet.
5. Check the position of the display unit
and align it if necessary.
› Is the display clearly visible?
6. Tighten the fastening screws.
› Torque 0.3 Nm (max. 0.5 Nm).
7. Tighten the fastening screw and
sleeve nut.
› Torque 0.8 Nm.
8. Connect the plug (17) of the display
unit to the plug of the motor cable.
› This can vary depending on the
equipment of your e-bike.