2 Burner installation
28 Installation and maintenance instructions Logano GE315 • Issue 02/2006
We reserve the right to make any changes due to technical modifications.
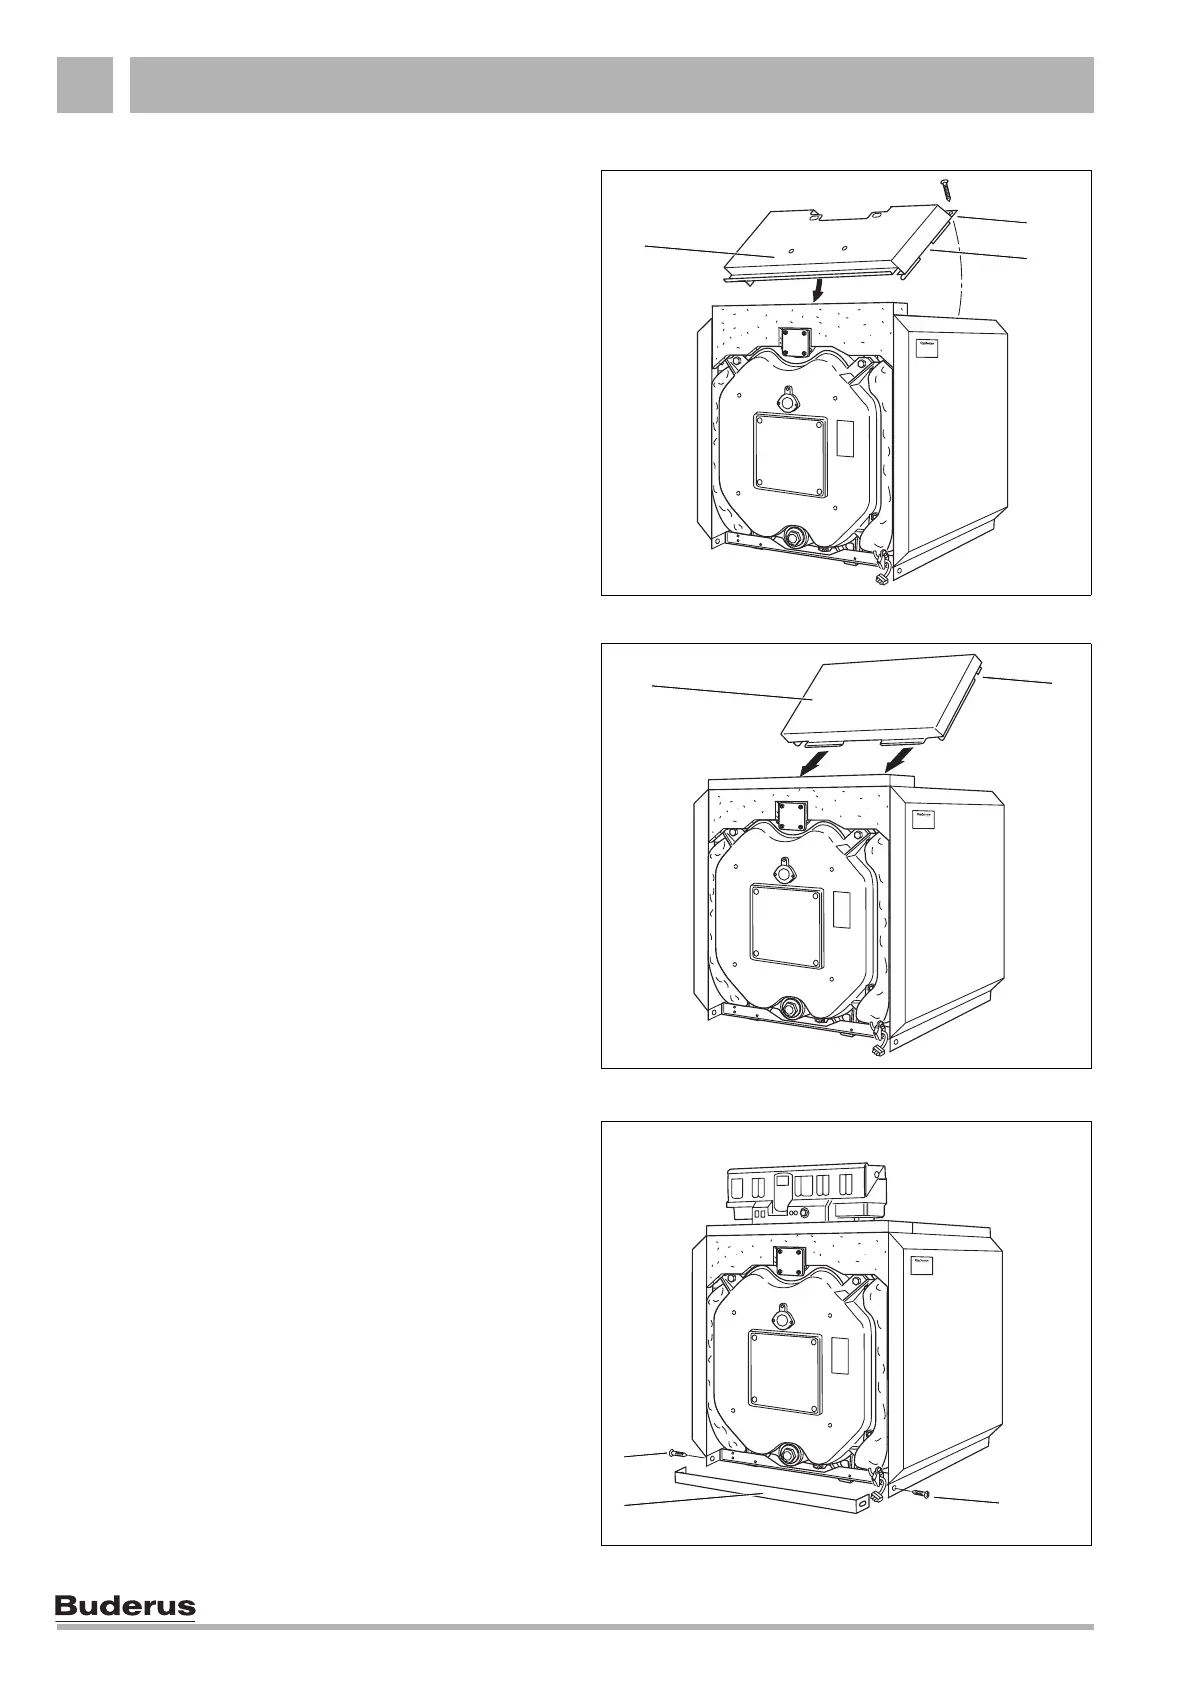
z Position the top at the front (Fig. 36, Item 1) between
the side walls so that the cut-out engages (Fig. 36,
Item 3) above the cross support bracket.
z Secure the top with one self-tapping screw on each
(Fig. 36, Item 2) of the side walls.
Install the control unit, position the capillary tubes
and the sensor well and insert the sensors into the
wells, before any other hood components are
positioned (
see chapter 2.8 "Control unit", page 30).
z Position the rear hood (Fig. 37, Item 1) between the
side walls, so that the cut-out engages (Fig. 37,
Item 2) above the cross support bracket.
Push the plinth rails (front and back) (Fig. 38, Item 2) on
the lower side wall edge and secure on their sides with
one self-tapping screw each
(Fig. 38, Item 1 & 3).
Fig. 36 Installation of the front hood
Fig. 37 Installation of the rear hood
Fig. 38 Installation of the front plinth rail
1
3
2
1
2
1
2
1
3
2
 Loading...