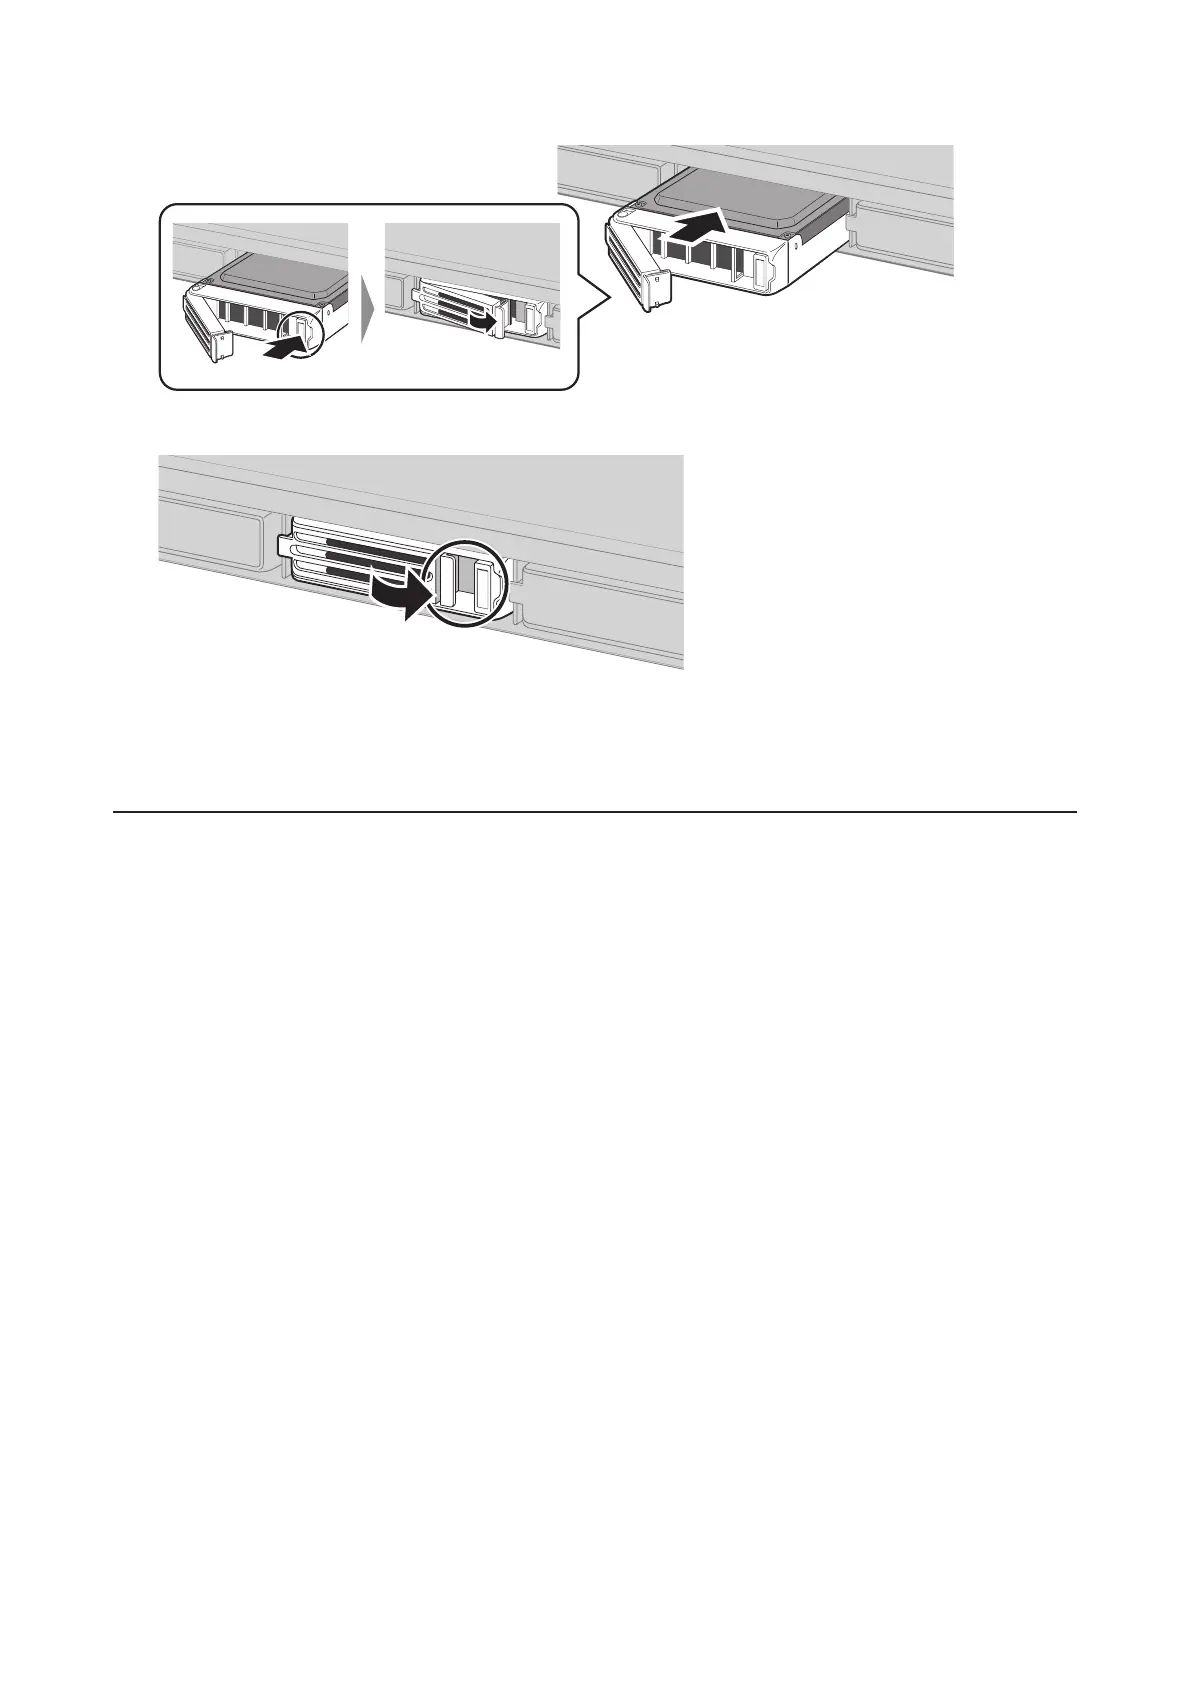
3 Insert the new drive into the empty slot. Slide the drive in with the locking mechanism open.
4 Swing the lock back down until it clicks into place.
5 Replacing a defective hard drive is finished. Go to the "Step 2 - Rebuild the RAID Array" section below.
Step 2 - Rebuild the RAID Array
Depending on your RAID configuration, the rebuilding procedure will be different. Follow the corresponding
procedure below that matches your RAID configuration.
Using a Redundant RAID Mode (Other Than RAID 0)
This section describes rebuilding a drive if you configure the RAID mode from RAID 1, 10, 5, or 6.
If you enabled auto-shutdown, your TeraStation will automatically shut down if a drive fails so your TeraStation will
be off.
If you disabled auto-shutdown disabled, your TeraStation will work in degraded mode if a drive fails so your
TeraStation will be on.
1 Follow the drive replacement procedure described above and replace a failed drive with a new drive.
2 If your TeraStation is off, turn it on and wait until the bootup finishes.
3 When the replacement hard drive is recognized, an I31 message will be displayed in NAS Navigator2.
52