24
English
Assembly
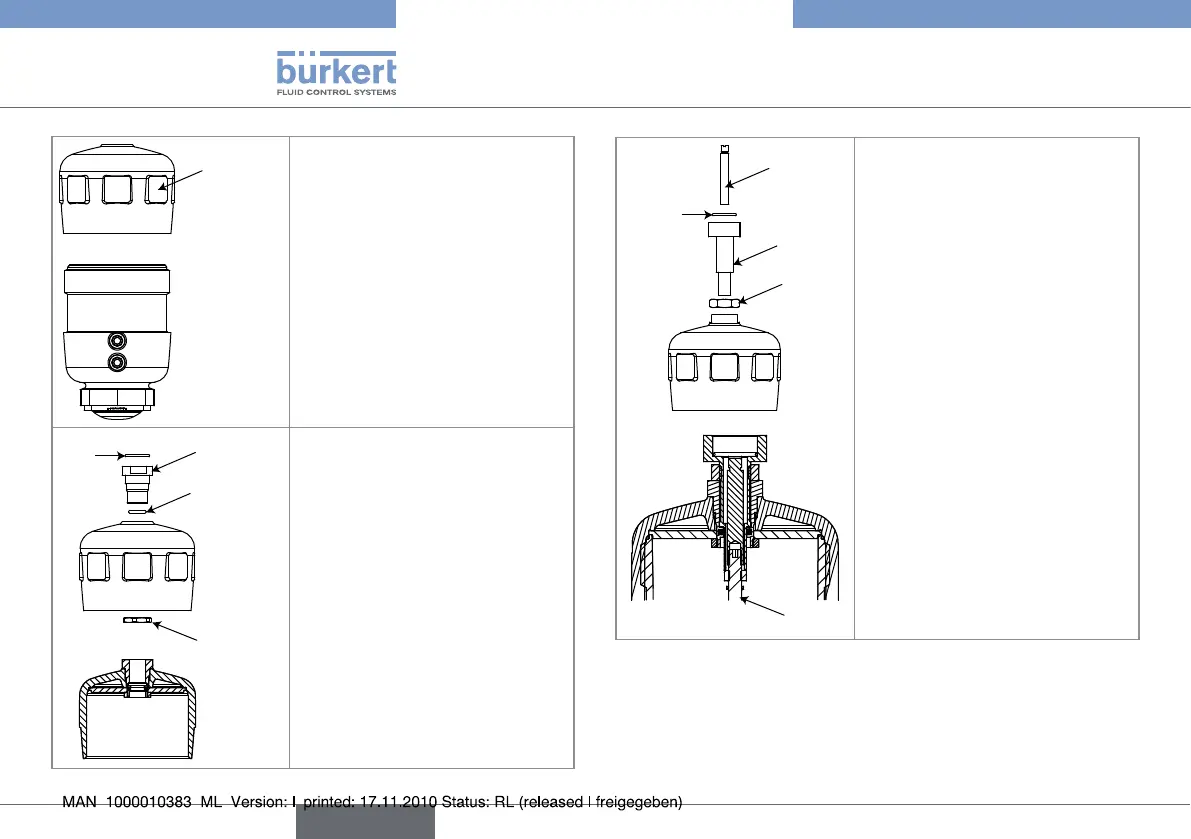
Removethetoppart"H"ofthe→
actuator,by unscrewing it with
thespanneravailableinacces-
sories(itemnumber639172for
anactuatorsize100mmoritem
number639173foranactuator
size125mm).
Inserttheseal"J"intothegroove→
oftheadaptaternut"K".
Screw the adaptaternut "K" in
→
thetoppartoftheactuator.
Screw the locknut "L" on
→
"K", inside the top hat of the
actuator.
Inserttheseal"M"intotheadap-
→
taternut"K".
Screwbackthetoppartofthe
→
actuator.
Screwtheconnectingpin"N"→
withthelocknut"O"inthe
adapternut"K".
Adjustthestrokeoftheactuator
→
(bymoreorlessscrewingthe
connectingpin"N")depending
ontheoperatingmodeofthe
valve:
ifthevalveoperatesasnor--
mallyclosed(NC),adjust
thestrokebystartingvalve
closed.
ifthevalveoperatesasnor--
mallyopen(NO),adjustthe
strokebystartingvalveopen.
Blockthelocknut"O".
→
Inserttheseal"P"inthe→
connectingpin"N".
Screwthestem"Q"onthe
→
stem"R"oftheactuator.