Using Aria
82 ©2021 CAE 905K690052 v1.0
CAEAria
2. Place the StethoSym speaker module over a sound tag on the manikin for approximately
10 seconds. This ensures that StethoSym connects to the proper manikin. StethoSym
displays a solid blue light when it is connected to the manikin.
Note: This step is only required when moving the StethoSym to a new manikin which it is
not already paired to.
When a patient is running in Maestro, you can listen to any available physiologic sounds by
placing the StethoSym in the proper location. To control the volume and specific sound
played at a sound location, use the Sounds controls on Maestro.
3. To turn the StethoSym off, press the power button.
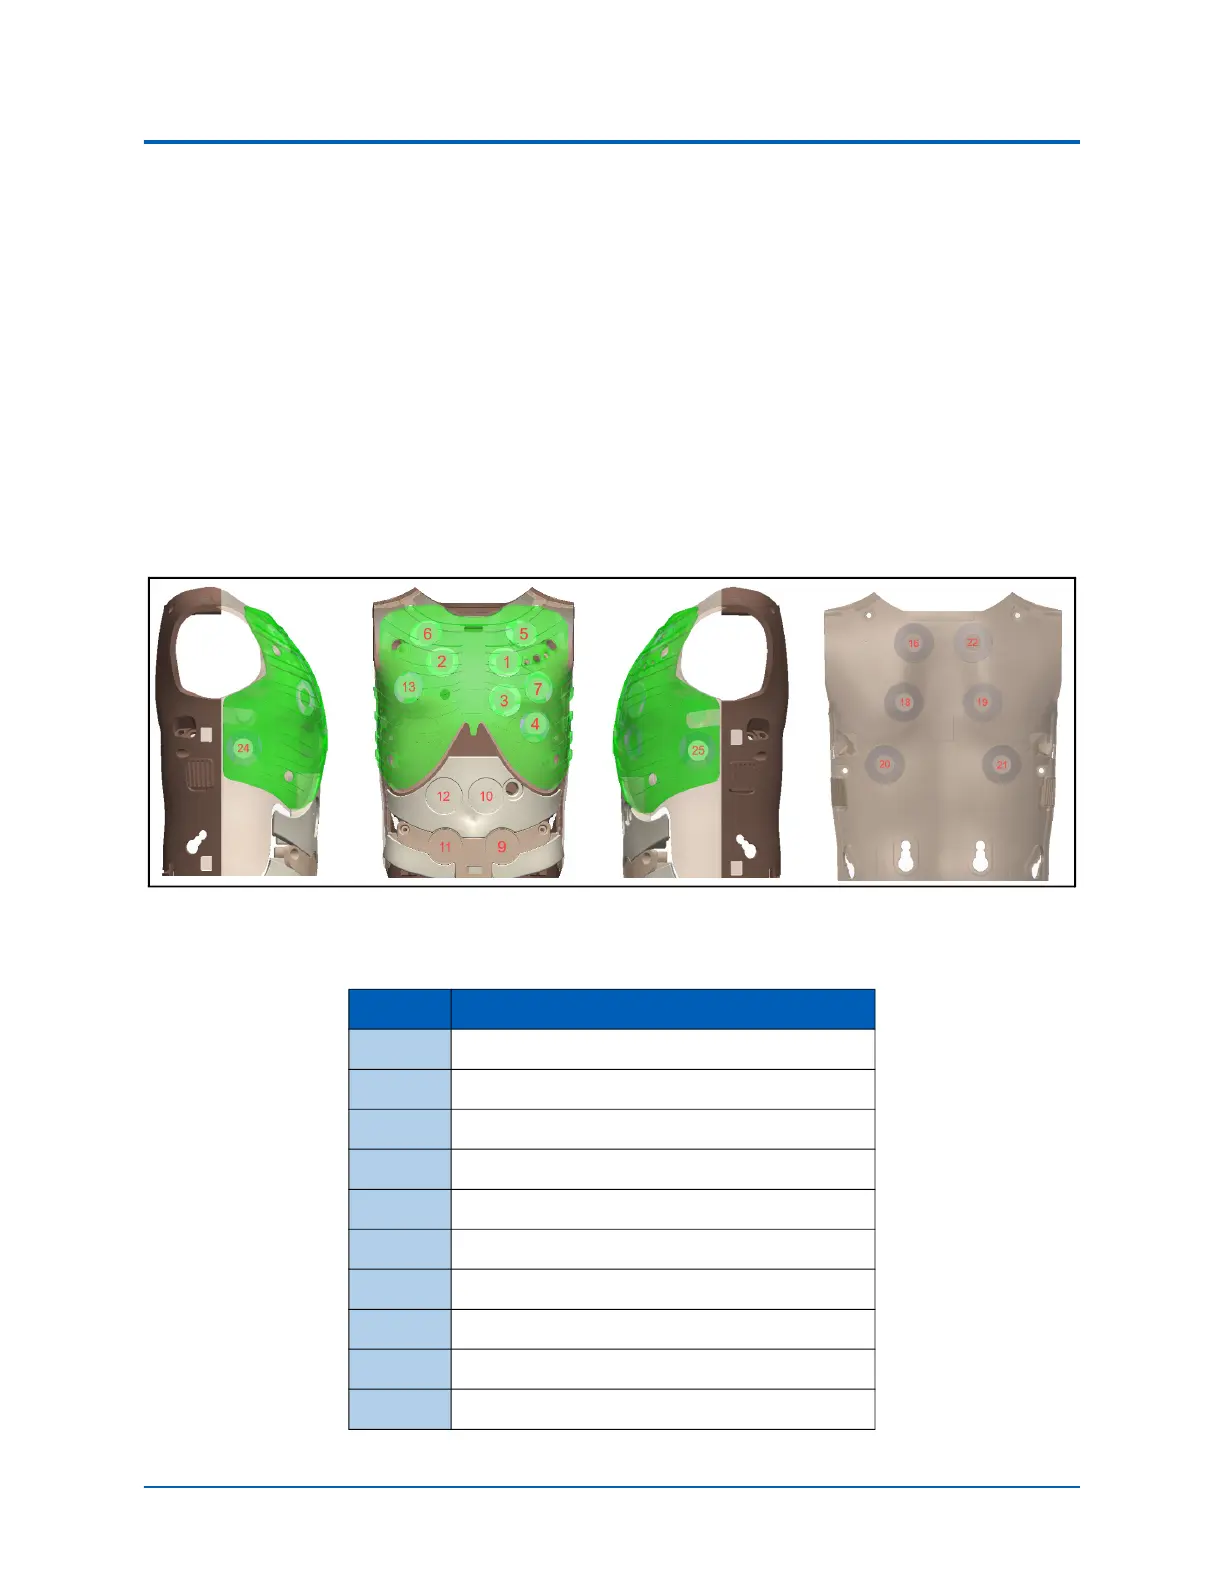
Note: The following diagram of the internal chest identifies the RFID tag locations for using the
StethoSym.
Aria RFID Tag Locations
Tag # Location Sound
1 Heart: Pulmonary Valve
2 Heart: Aortic Valve
3 Heart: Mitral
4 Heart: Tricupsid
5 Lungs: Anterior - Left Upper Lobe
6 Lungs: Anterior - Right Upper Lobe
7 Lungs: Anterior - Left Lower Lobe
8 Lungs: Anterior - Right Lower Lobe
9 Bowel: Lower Left Quadrant
10 Bowel: Upper Left Quadrant