MAINTENANCE PROCEDURES
Spark Plug Installation
Prior to installation make sure that con-
tact surface of cylinder head and spark
plug is free of grime.
Using a feeler gauge, set the spark plug
gap.
SPARK PLUG GAP
0.7 mm - 0.8 mm (.028 in - .031 in)
Apply a small amount of copper-based
anti-seize lubricant over spark plug
threads.
Screw spark plug into cylinde r heads
by hand and tighten with a torque
wrench and a proper socket.
CAUTION Do not overtighen
spark plugs, engine damage can oc-
cur.
TIGHTENING TORQUE
Spark plug
20 N•m ± 2.4 N•m
(15lbf•ft ± 2lbf•ft)
CVT Cover
NOTE: For a better understanding,
some illustrations are taken with en-
gine out of vehicle. To perform the
following instructions, it is not neces-
sary to remove engine.
This CVT is lubrication free. Never lu-
bricate any components except drive
pulley bearing.
WARNING
Never touch CVT while engine is
running. Never drive vehicle when
CVT cover is removed.
WARNING
Engine must be cool before cover
is removed. Always wear protec-
tive gloves when removing cover.
Place the vehicle on a level surface.
Select PARK position.
CVT Cover Access (All Models)
Tilt cargo box.
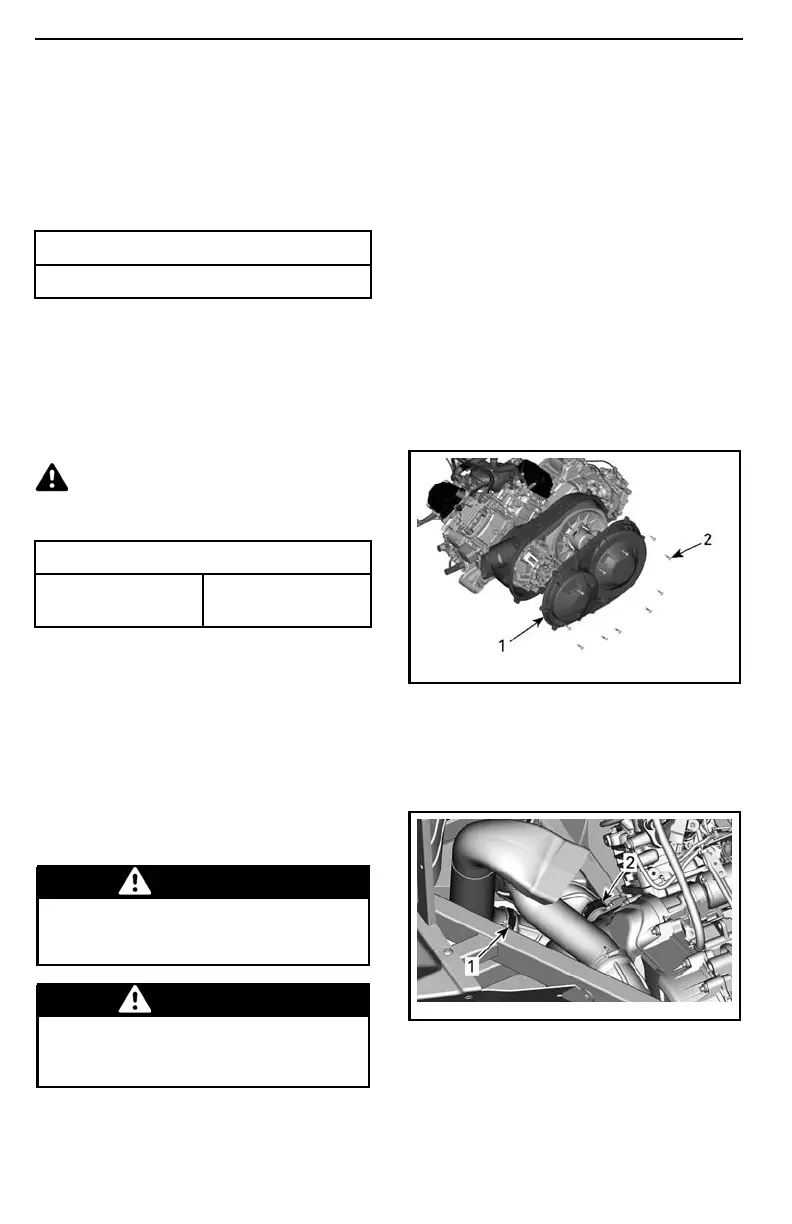
CVT Cover Removal (HD8 and HD10)
Remove all CVT cover retaining
screws. Use tool included in tool kit.
NOTE: Remove the center top screw
last to support the cover during re-
moval.
NOTE: Do not use an impact tool to re-
move CVT cover screws.
Remove the CVT cover and its gask et.
tmo2016-010-035_a
1. CVT cover
2. CVT cover screws
CVT Cover Removal (HD5)
Disconnect CVT cooling ducts.
219001750-004_a
1. Outlet duct clamp
2. Front inlet duct clamp
116
______________

 Loading...