MAINTENANCE PROCEDURES
219001750-005_a
1. Rear inlet duct clamp
Remove all CVT cover retaining
screws. Use tool included in tool kit.
NOTE: Remove the center top screw
last to support the cover during re-
moval.
NOTE: Do not use and impact tool to
remove CVT cover s crew s.
Remove the CVT cover and its gask et.
219001750-006_a
1. CVT cover
2. CVT cover
CVT Cover Installation (All
Models)
Install the center top screw of first.
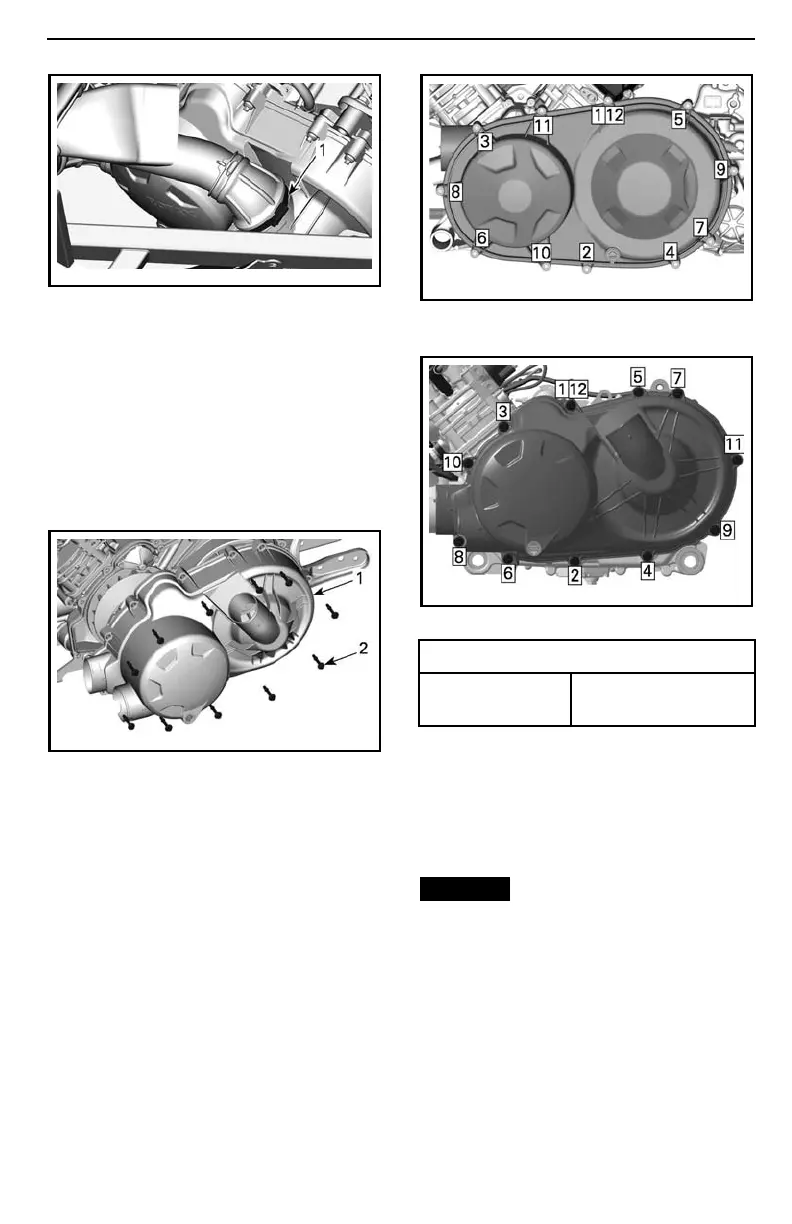
Tighten the CVT cover screws as per
following sequence.
tmo2016-010-036_a
HD8 AND HD10 - CVT COVER TIGHTENING
SEQUENCE
RHD5MY17-008-004_a
HD5 - CVT COVER TIGHTENING SEQUENCE
TIGHTENING TORQUE
CVT cover
screws
7N•m ± 0.8N•m
(62 lbf•in ±7lbf•in)
On HD5 models, reinstall the CVT cool-
ing ducts.
Drive Belt
Drive Belt Removal (HD8 and HD10)
NOTICE
In case of a drive belt fail-
ure, the CVT, cover and air outlet
must be cleaned.
Please refer to
TIPS FOR MAXI MIZ-
ING DRIVE BELT DURABILITY
in
BA-
SIC PROCEDURES
section for some
IMPORTANT information.
Remove
CVT COVER
.
Open driven pu lle y.
______________
117

 Loading...