Recording
Before You
Begin
Recording
Make a test recording first to check if the camcorder operates correctly. Since
recordings made on a DVD-R cannot be deleted, we recommend you use a DVD-RW
disc to make the test recordings.
I
To
change the operating mode, refer to About the Operating Modes (1Il
11).
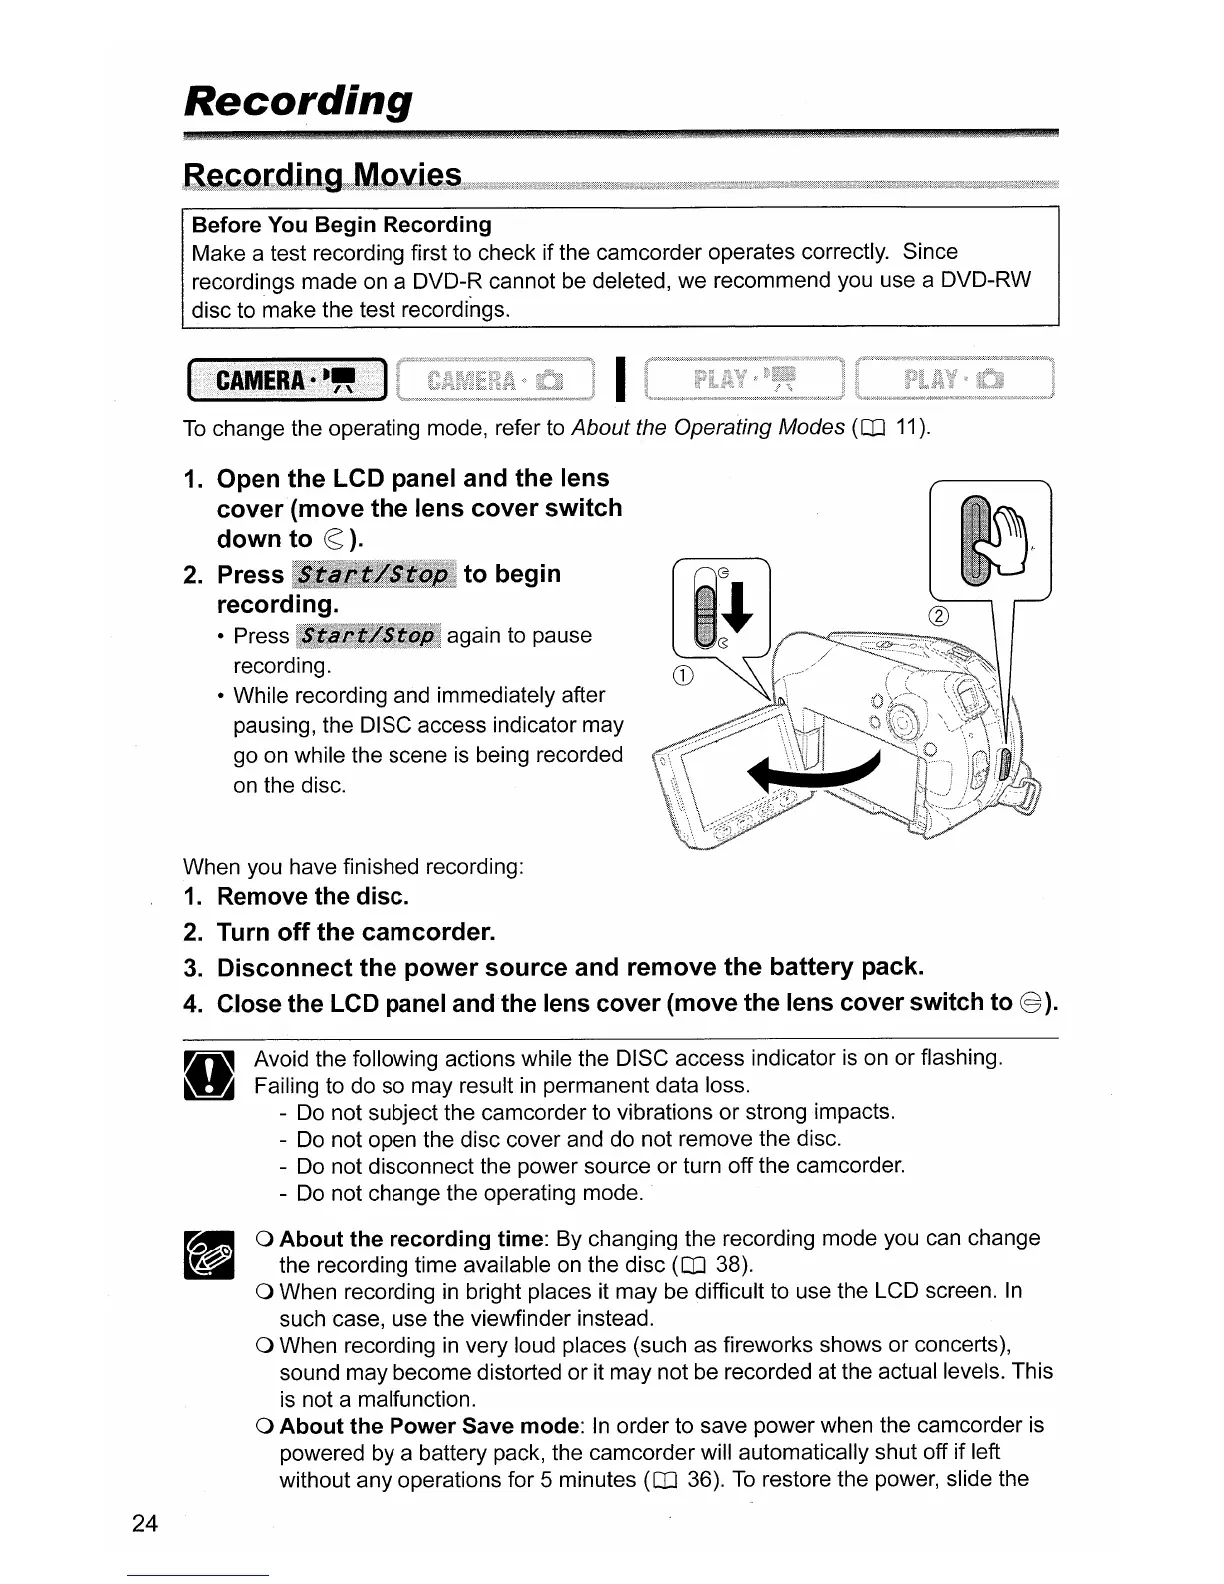
1.
Open
the
LCD panel and the lens
cover(move
the
lens
cover
switch
down
to
~).
2.
Press
!11~1[lllllllllilll~1
to
begin
recording.
• Press IIIIIIIIBIIII;I again to pause
recording.
• While recording and immediately after
pausing, the DISC access indicator may
go
on
while the scene
is
being recorded
on
the disc.
24
When you have finished recording:
1.
Remove the disc.
2.
Turn
off
the
camcorder.
3.
Disconnect
the
power
source
and remove
the
battery
pack.
4.
Close the
LCD
panel and the lens cover (move the lens cover switch
to
@).
Avoid the following actions while the DISC access indicator
is
on
or flashing.
Failing to do so may result
in
permanent data loss.
-
Do
not subject the camcorder to vibrations or strong impacts.
-
Do
not open the disc cover and do not remove the disc.
- Do not disconnect the power source or turn off the camcorder.
- Do not change the operating mode.
a
About
the
recording
time: By changing the recording mode you can change
the recording time available
on
the disc (1Il 38).
a When recording
in
bright places it may be difficult to use the LCD screen.
In
such case, use the viewfinder instead.
a When recording
in
very loud places (such as fireworks shows or concerts),
sound may become distorted or it may not be recorded at the actual levels. This
is not a malfunction.
a
About
the
Power
Save mode:
In
order to save power when the camcorder
is
powered by a battery pack, the camcorder will automatically shut off if left
without any operations for 5 minutes
(1Il
36).
To
restore the power, slide the