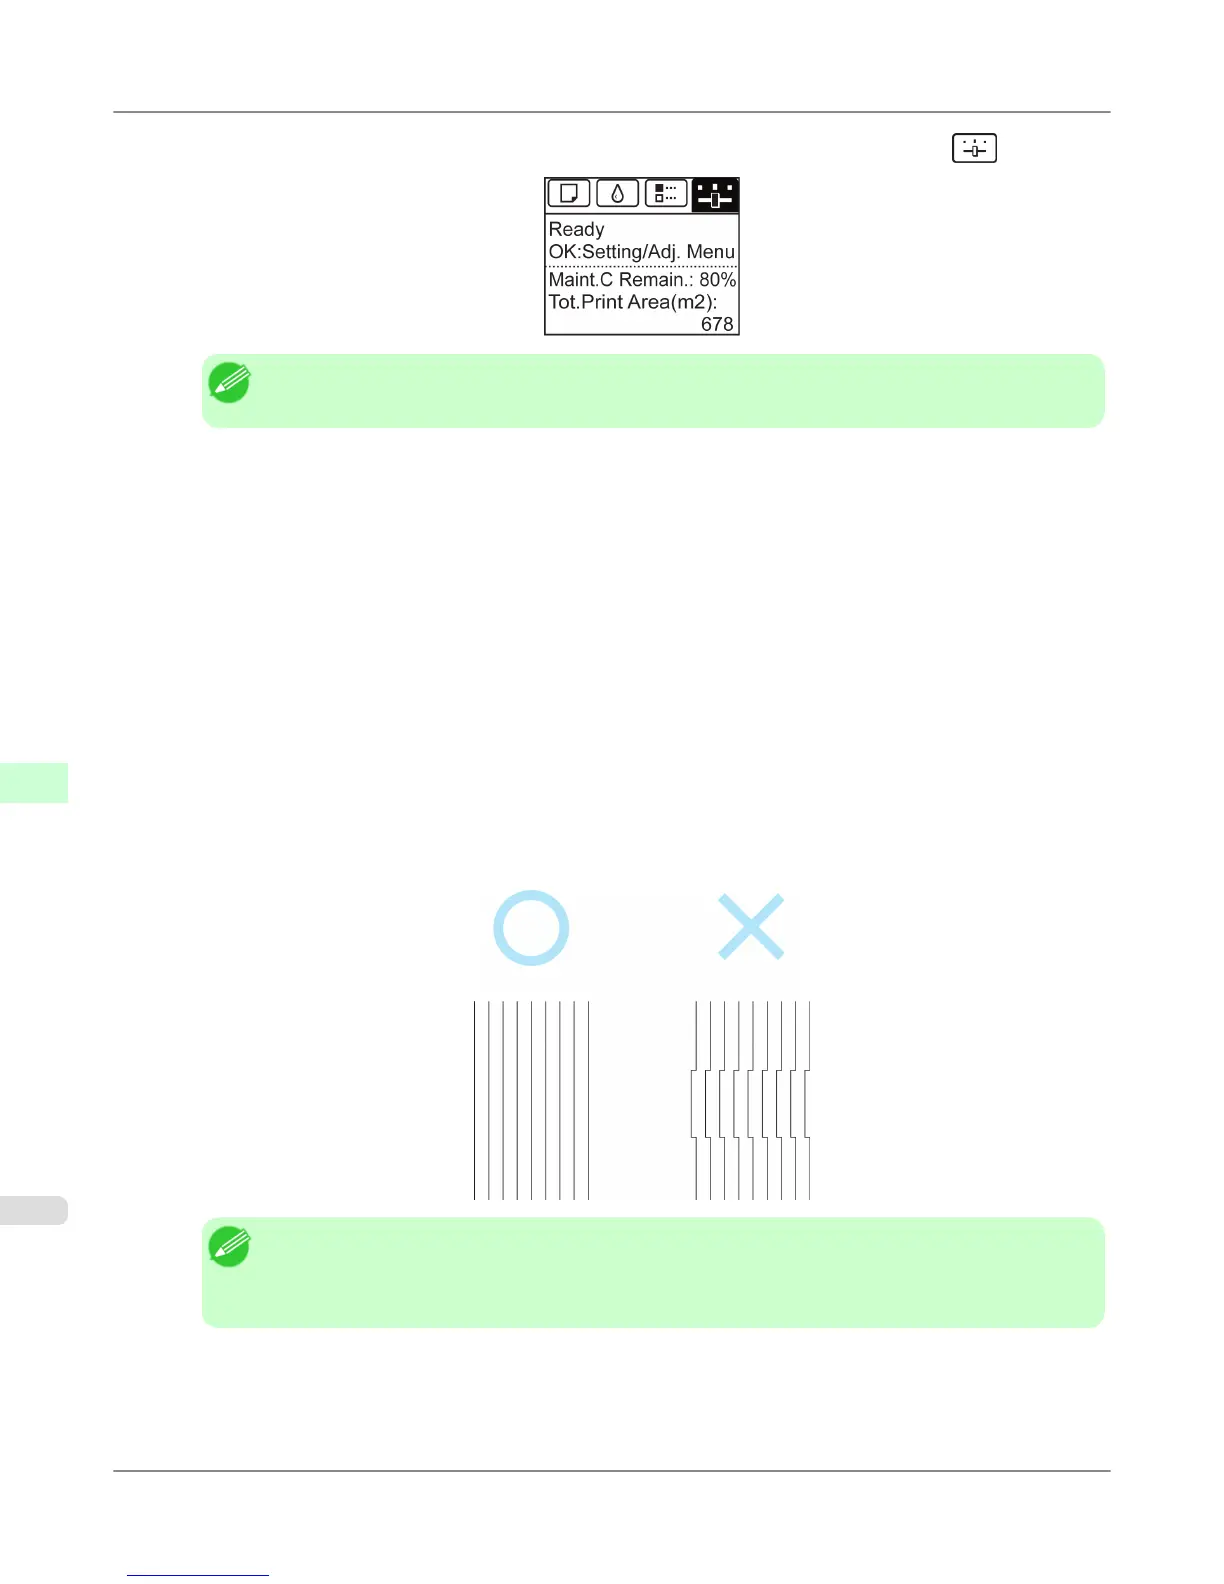
2. On the Tab Selection screen of the Control Panel, press ◀ or ▶ to select the Settings/Adj. tab ( ).
Note
• If the Tab Selection screen is not displayed, press the Menu button.
3. Press the OK button.
The Set./Adj. Menu is displayed.
4. Press ▲ or ▼ to select Adjust Printer, and then press the OK button.
5. Press ▲ or ▼ to select Head Posi. Adj., and then press the OK button.
6. Press ▲ or ▼ to select Manual, and then press the OK button.
A test pattern is printed for adjustment.
7. Press ▲ or ▼ to select D, and then press the OK button.
8. Press ▲ or ▼ to select D-1, and then press the OK button.
9. Examine adjustment test pattern D-1 and determine the number with straight lines.
Note
• If two patterns seem equally good and you cannot decide which one is better, choose an intermediate
value.
For example, choose 11 if you cannot decide whether pattern 10 or 12 is better.
10. Press ▲ or ▼ to select the pattern number you have decided, and then press the OK button.
11. Repeat steps 8–10 to specify the adjustment value for D-2 to D-5 and D-7 to D-11.
Adjustments for Better Print Quality
>
Adjusting the Printhead
>
Manual Adjustment to Straighten Lines and Colors (Head Posi. Adj.) iPF655
8
668
 Loading...