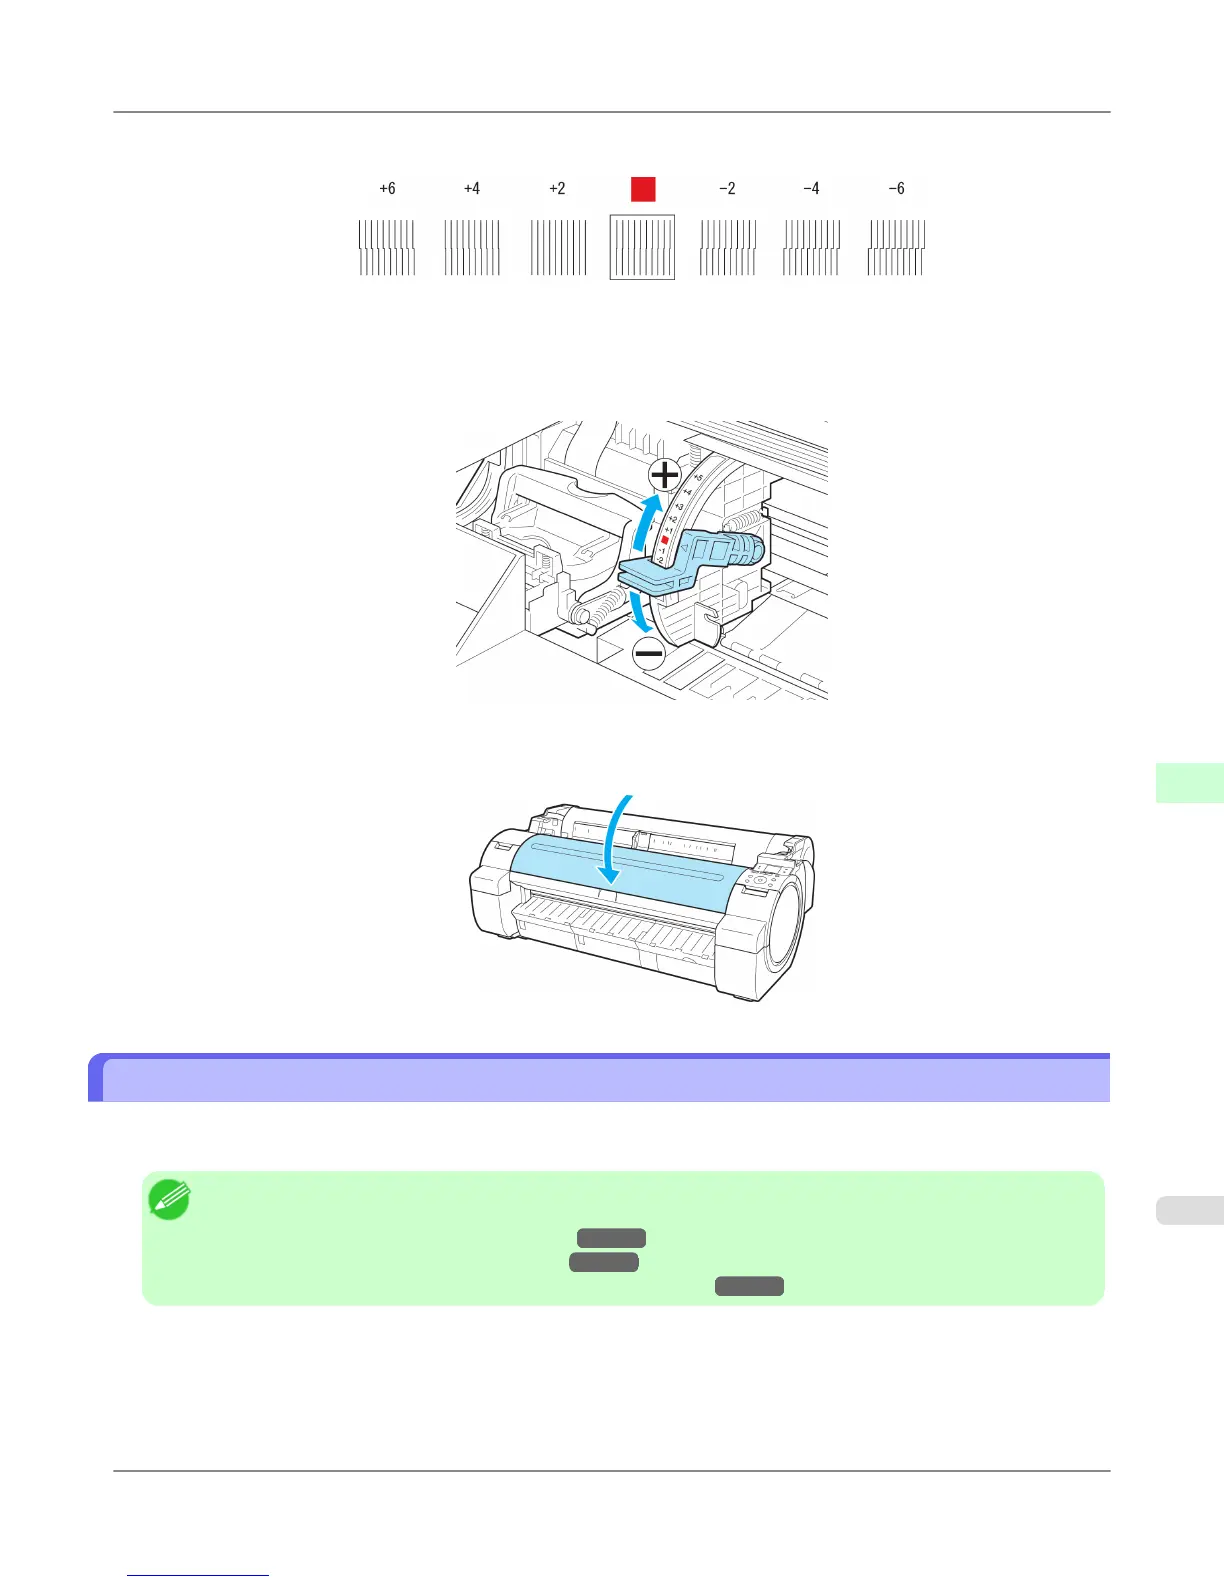
8. Examine the test pattern for adjustment. Determine the straightest set of lines.
9. Open the Top Cover and move the Angle Adjustment Lever to match the number (or the square) of the straightest
set of lines.
If no single set of lines is perfectly straight, move the Angle Adjustment Lever to a position between the numbers (or
between the number and the square) of the two sets of lines that are least misaligned.
10. Close the Top Cover.
The Printhead is now straight, and adjustment is complete.
Troubleshooting Paper Abrasion and Blurry Images (Head Height)
If the Printhead rubs against paper during printing, adjusting the Printhead height may improve results.
If image edges are blurred, it may help to lower the Printhead.
Note
• Raise or lower the printhead, depending on the nature of the problem.
(See "Paper rubs against the Printhead.") →P.839
(See "The edges of the paper are dirty.") →P.840
(See "Image edges are blurred or white banding occurs.") →P.843
Adjustments for Better Print Quality
>
Adjusting the Printhead
>
iPF655 Troubleshooting Paper Abrasion and Blurry Images (Head Height)
8
671
 Loading...