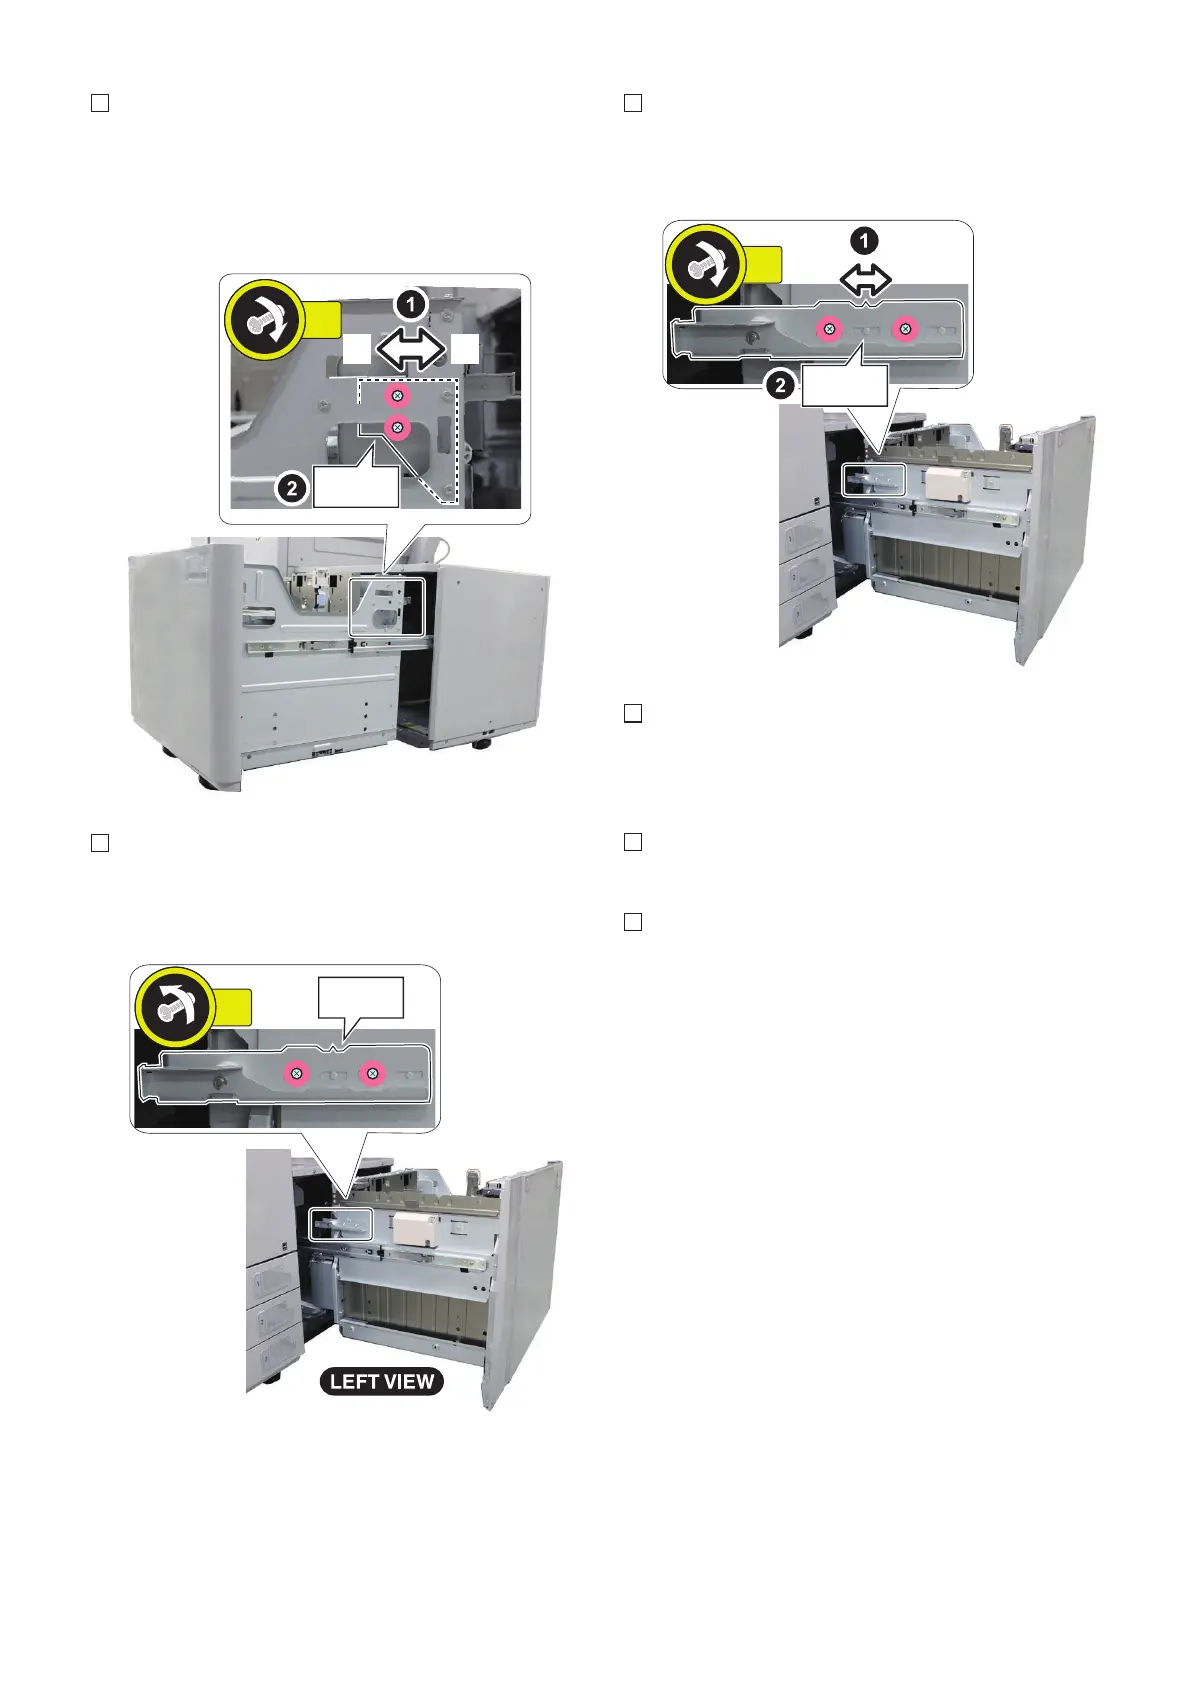
4. Move the latch plate toward front [A] or rear [B] (1
scale = 1mm) and then fasten the 2 screws. The
adjusted value is used at procedure 6.
• When L1 is large, move the latch plate to front [A].
• When L1 is small, move the latch plate to rear [B].
5. Loosen the 2 screws at the latch plate on the left side
of the compartment.
• 2 Screws
6. Move the latch plate in the same scale position as
procedure 4 and then fasten the 2 screws (1 scale =
1mm).
7. Move the front cover fitting to the amount of the latch
plate adjustment. Refer to the next item "Front Cover
Positioning Adjustment" for detail.
8. Close the compartment.
9. Print sheets of paper from the POD Deck Lite. Check
that L1 is 2.5+/-1.5mm. Re-adjust L1 in case that it is
out of standard.
6. Installation
137