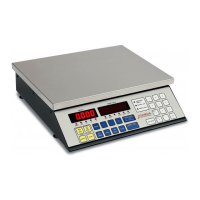
CALIBRATION and SETUP
This scale was calibrated at the factory and should not require adjustment. In the event that the
scale should need recalibration, the following describes the Calibration of the Digital Counting
Scale. A qualified technician should perform this function to maintain the instrument's high
degree of accuracy.
Before beginning calibration, the following equipment is required:
Calibrated test weights (Full capacity for all models, e.g. 5 lbs for 5 lb, . . . 100 lbs for 100 lb)
Small Flat Blade screwdriver (to remove calibration sealing screw)
If sealing wires require breaking for purposes of calibration, proper procedures under
National Institue of Standards and Technology Handbook 44 must be adhered to.
CALIBRATION PROCEDURE - LOCAL SCALE
1. With the scale power off, remove the calibration sealing screw on the right side panel, see
Figure No.7.
2. With the screw removed, place the power switch in the ON position. The scale will perform a
brief lamp test. This test consists of illuminating all display segments and annunciator LED's
for approximately three (3) seconds to allow the operator to make a visual verification that
the display is operational. After completion of the lamp test, the scale will display the model
number and software revision level, then the weight display will change to SCALESCALE.
3. Select the LOCAL scale by pressing the LOCAL SCALE key.
4. The weight display will change to LOAD LOAD and the count display will change to xxxxxx. Note
that xxxxxx is the capacity of the scale and the load required to calibrate the scale. This will
vary depending on the capacity of the scale and the units of measurement selected.
5. Press the lb/kg key to select the units of measurement for calibration. Note that the "lb" or
"kg" annunciator will be illuminated to indicate which unit of measurement has been selected
and the count display will show the corresponding load.
6. Press the + key to cycle up through or the - key to cycle down through the folowing
capacity values: 5, 10, 20, 50, 100 for pounds (lb) or 2, 5, 10, 20, 40 for kilograms (kg).
CAUTION: The capacity value selected must match the load cell installed in the
scale. Proper operation of the scale may be inhibited and the warranty will be
voided if the required load cell is not used. Refer to the Load Cell Table in the
Parts Identification section of this manual for the required load cell for the
capacity selected.
7. Place the required calibrated test weight on the scale platform, wait about 5 seconds for the
scale to stabilize, then press the ENTER key to start calibration.
24
Calibration Sealing Screw

 Loading...