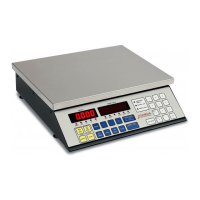
CALIBRATION and SETUP, Cont.
CALIBRATION PROCEDURE - LOCAL SCALE, CONT.
8. The display will start to fill with dashes from the left of the weight display and proceed to the
right of the count display. When finished, the unit will display UNLOAD UNLOAD on the count display.
9. Remove the weight from the scale, wait about 5 seconds for the scale to stabilize, then
press the ENTER key to finish calibration.
10. The display will start to fill with dashes from the left of the weight display and proceed to the
right of the count display. When finished, the display will change to calib doNEcalib doNE.
11. If operational setup is required (or a remote scale is to be used) proceed to the Operational
Setup procedure.
12. If only calibration was required and the LOCAL (integral) scale is the only scale, turn the
scale off and replace the calibration sealing screw on the right side panel of the scale. Place
the power switch in the ON position. The scale is now ready for use.
OPERATIONAL SETUP
The Operational Setup of the Digital Counting Scale is accomplished entirely by using the scale
keypad and can easily be performed using one of the following methods:
Calibration Method (sealing screw REMOVED)
At the completion of the Calibration procedure (Local or Remote scale), the display will
change to calib doNEcalib doNE. Press the ENTER key. The weight display will show SCALESCALE. Press
the ENTER key again. The weight display will change to scal2scal2, the first setup prompt.
The scale is now ready to begin setup.
Operation Method (sealing screw INSTALLED)
With the scale power off, apply power by placing the power switch in the ON position.
While the weight display is showing 2240 2240 or 2241 2241 (the model number) and the count
display is showing xx r?.?r?.? (the capacity and the software revision level), press the
ENTER key. The weight display will change to the first setup prompt, scal2scal2. The scale is
now ready to begin setup.
During the setup process it will be necessary to enter operational parameters using the
counting scale's keypad. Pressing the ENTER key will cause the data entered or
displayed to be retained and the setup process will advance to the next prompt.
NOTE: If an incorrect entry is made, pressing the CE key will clear the display and
allow re-entering the correct data.
ZERO TRACKING
The display will show 0trac0trac, the prompt to enable or disable the automatic Zero Tracking
feature and display the current setting. This feature, when enabled will automatically maintain
the center-of-zero within one division. To change the setting, press the YES/1 key to enable
or the NO/0 key to disable, then press the ENTER key to save the setting and proceed to the
next prompt.
FOUR PERCENT ZERO RANGE LIMIT
The display will show 4 Pct4 Pct, the prompt to select whether a 4% limit be placed on the push
button zero and display the current setting. If enabled, the push button zero is limited to 4%
of the scale capacity. If disabled, the push button zero will operate up to the full capacity of
the scale. Press the YES/1 key to enable or NO/0 to disable, then press the ENTER key to
save the setting and proceed to the next prompt.
UNITS OF MEASUREMENT
The display will show unitsunits, the prompt to select the Units of Measurement and display the
current setting. To change the setting, use the keypad to select a new value (1 to 3) for the
units, then press the ENTER key to save the setting and proceed to the next prompt.
1 = Pounds (lb) only 2 = Kilograms (kg) only 3 = Pounds/Kilograms (lb/kg)
25

 Loading...