30 Chapter 7 Capturing Images on a Monitor and Transferring Images to a Computer
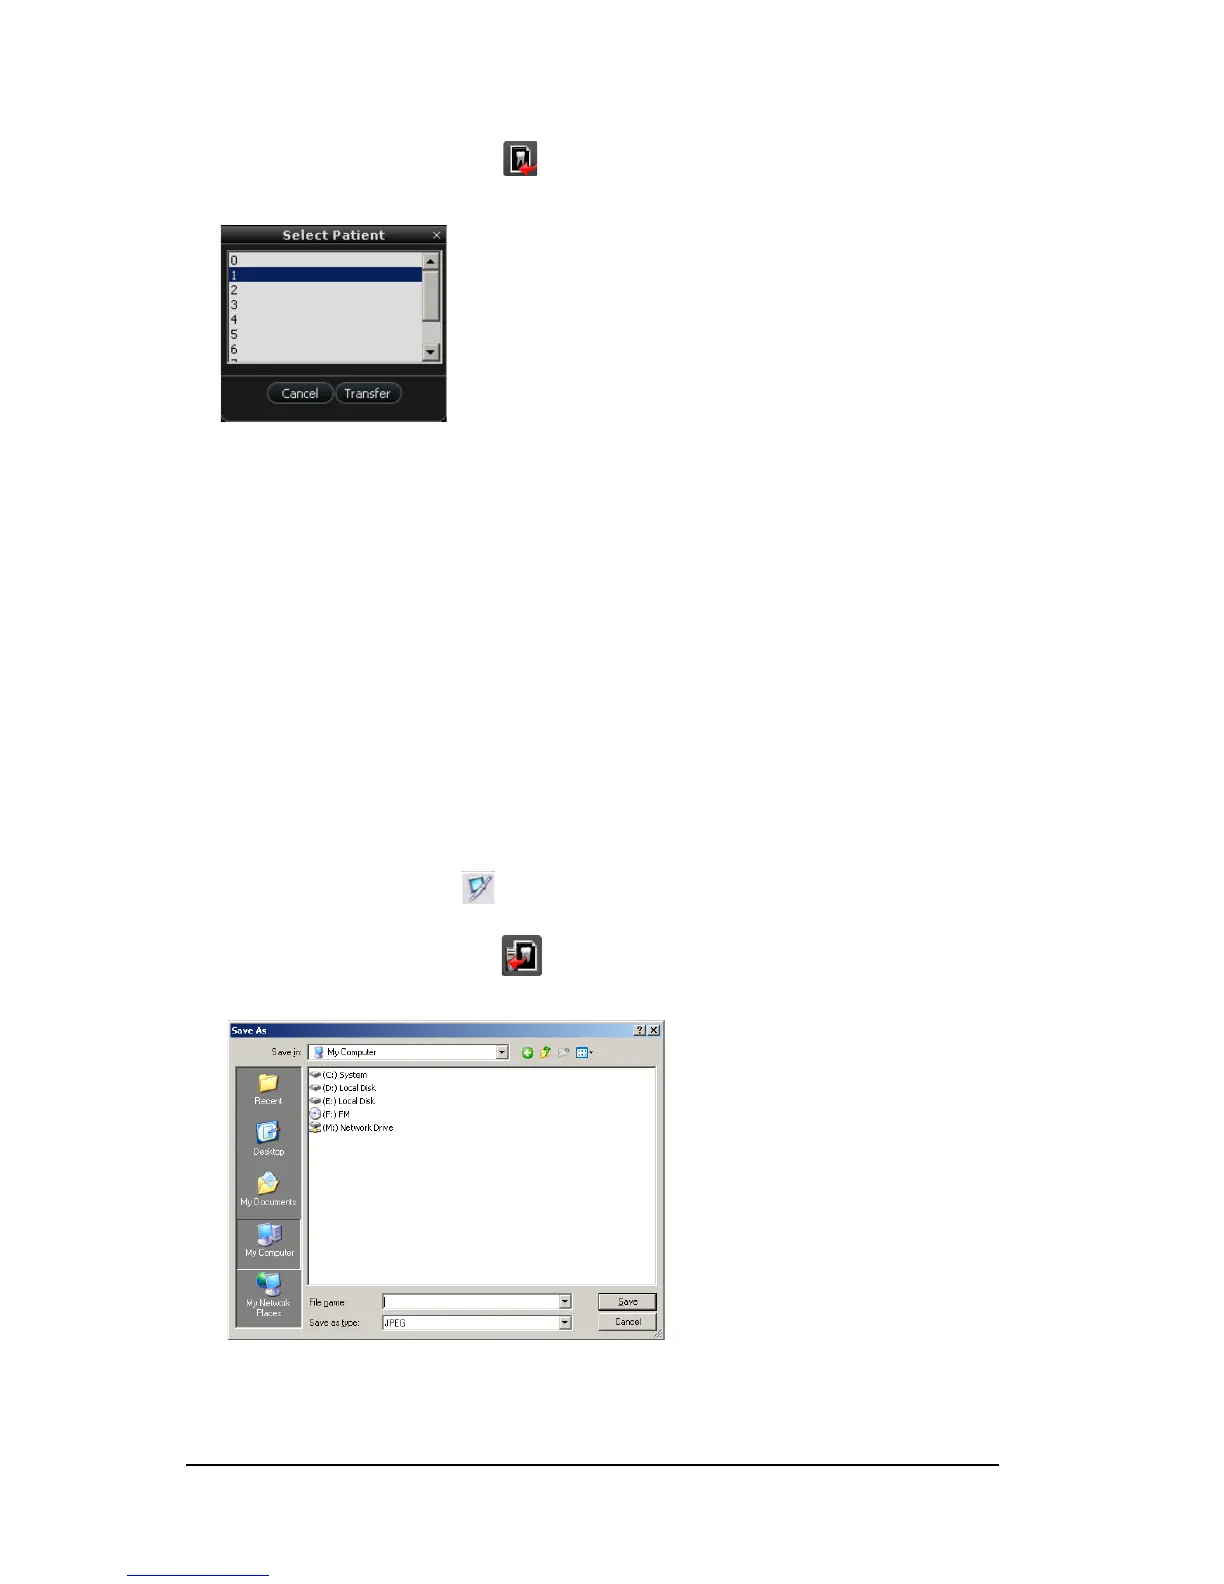
5 On the Acquisition interface, click Transfer to Software button. The Select Patient dialog
box displays.
6 Select the patient number and click Transfer.
After the transferring is completed, the images are deleted automatically from the camera.
Transferring Images to the Computer Hard Disk
To transfer images from the camera to the computer hard disk, follow these steps:
1 Press the ON/OFF button 3 seconds to turn off the camera.
2 Disconnect the camera from the monitor and connect it to the computer which has the
Acquisition interface.
To connect the camera to the computer, see “Connecting the Camera to a Computer and Installing
the Software” on page 13.
3 Press the ON/OFF button 3 seconds to turn on the camera.
4 In the Imaging window, click and select your camera. The Acquisition interface is displayed.
5 On the Acquisition interface, click Transfer to Hard disk button. The Save as window is
displayed.
6 Select a folder or create a new folder to save the images. Click Save.
After the transferring is completed, the images are deleted automatically from the camera.