CS 1200 Intraoral Camera User and Installation Guide (9H1809)_Ed04 23
6 Click to close the Acquisition interface and return to the imaging software interface.
The recorded video is saved and displayed in the Patient history.
7 Remove and dispose of the protective sheath.
Capturing and Viewing Images
To capture or view an image, follow these steps:
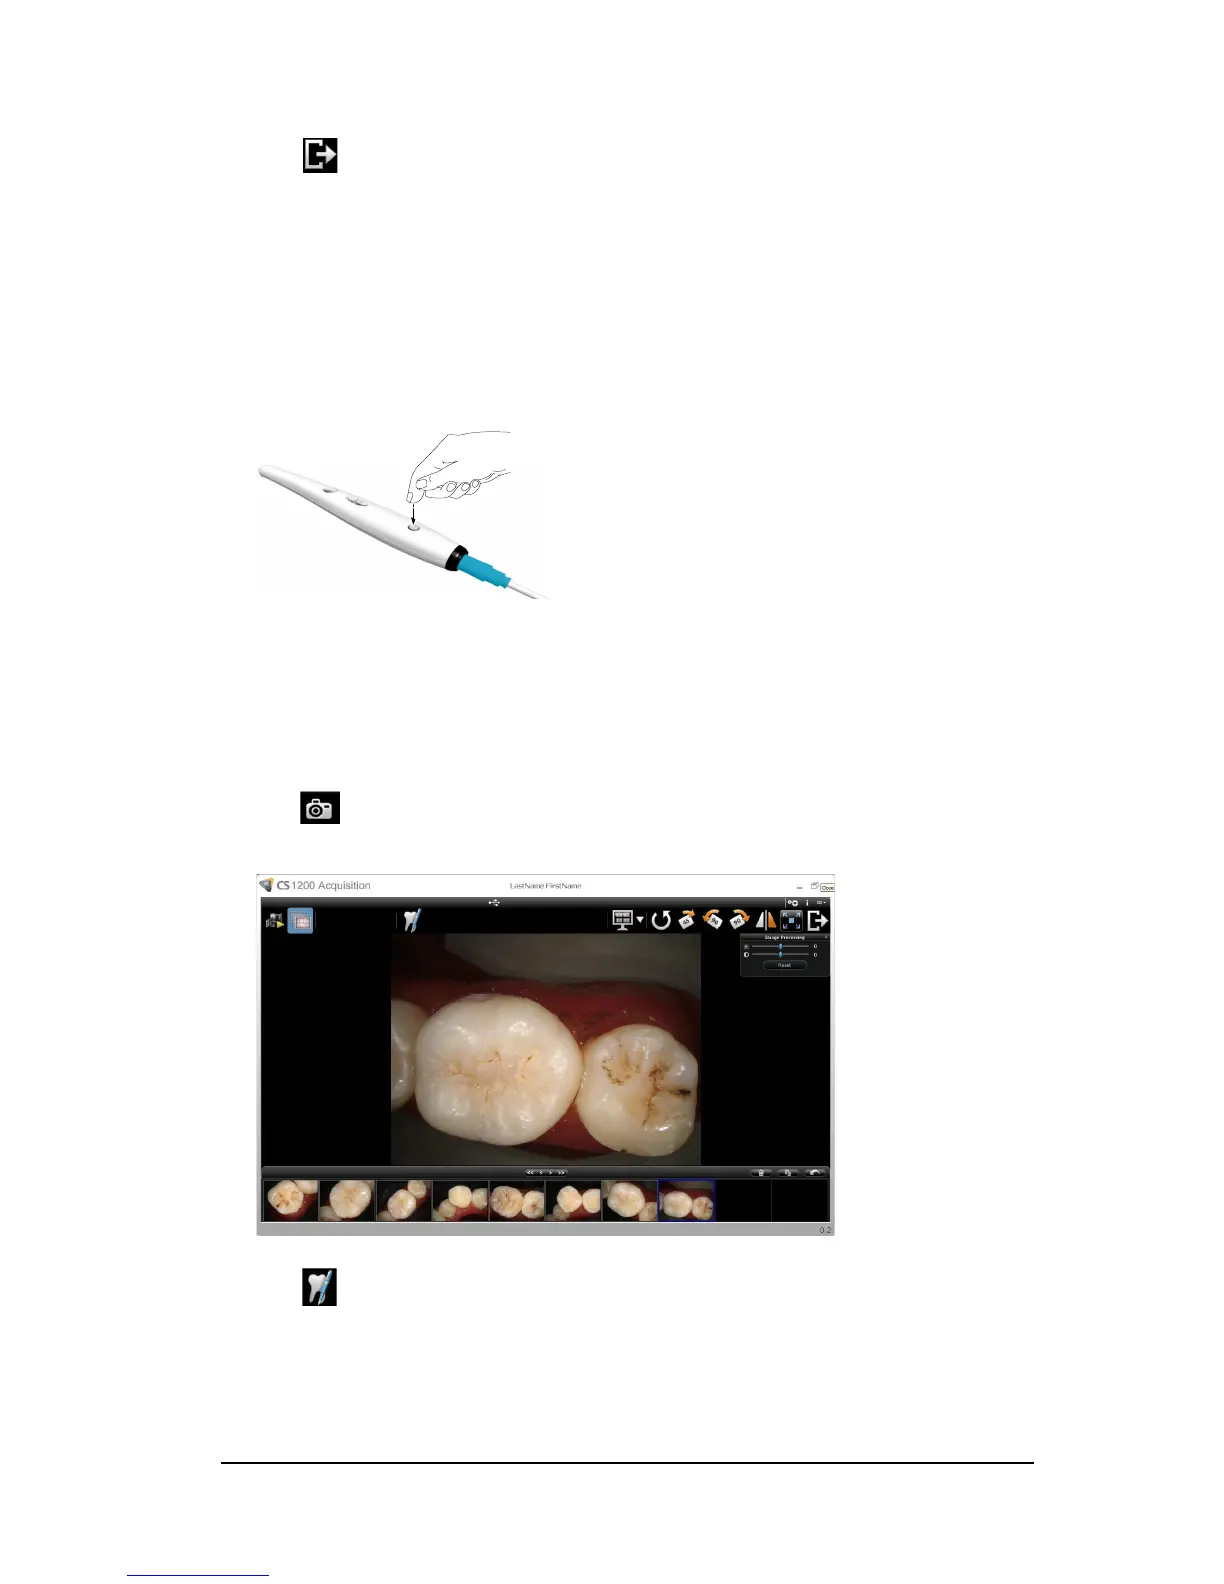
1 Press the ON/OFF button 3 seconds to power on the camera.
2 Hold the camera over the area you want to view. Live video appears on the Preview screen.
3 To capture an image, do the following:
Press the Capture button on the camera.
OR
Click
on the Acquisition interface.
The Review screen of the Acquisition interface shows the image.
4 Click to access the Tooth Chart dialog box and select the relevant tooth and write comments
in the Comments field (see “Tooth Chart Dialog Box” on page 9).
The selected images are displayed and saved temporarily in the image gallery.
5 Use the toolbar to view the image (see “Image Toolbar” on page 7).