Refrigerant piping
Connection
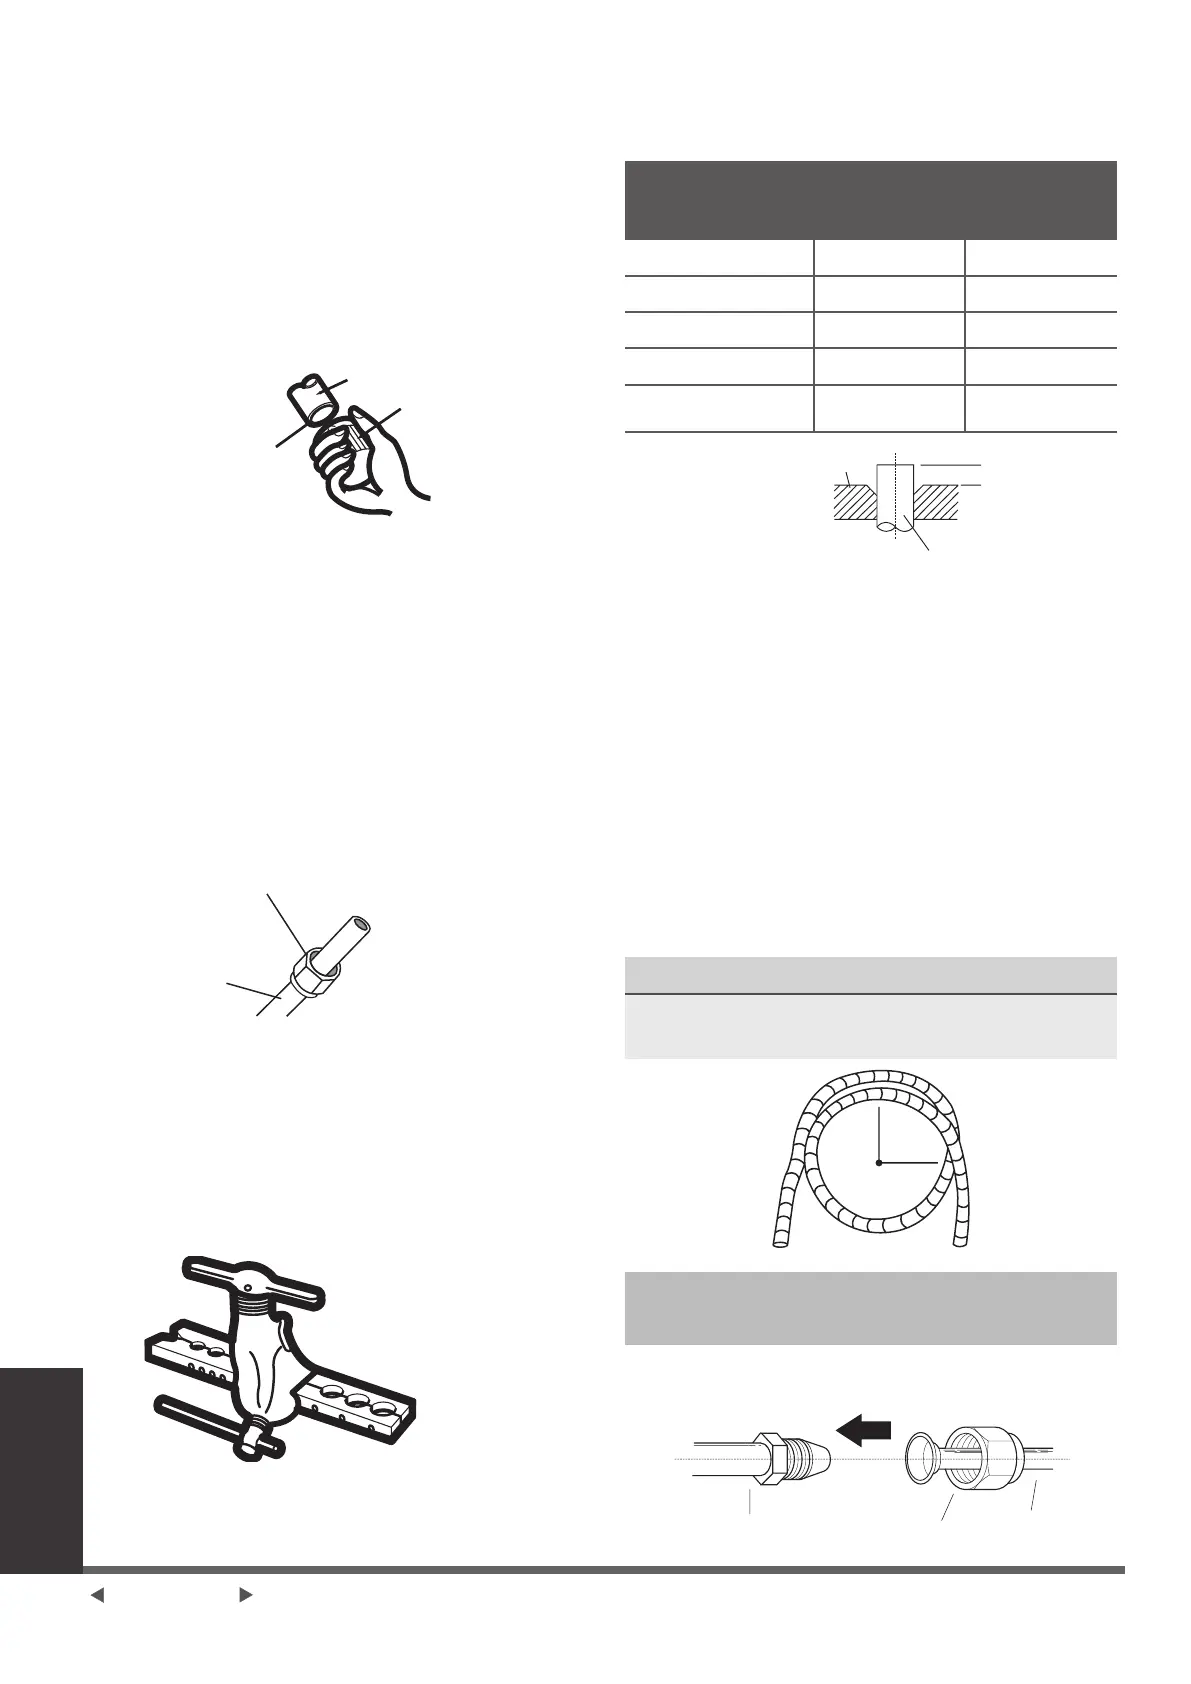
Step 2: Remove burrs
Burrs can affect the air-tight seal of
refrigerant piping connection. They must be
completely removed.
1. Hold the pipe at a downward angle to
prevent burrs from falling into the pipe.
2. Using a reamer or deburring tool,
remove all burrs from the cut section of
the pipe.
Pipe
Reamer
Point down
Step 3: Flare pipe ends
Proper aring is essential to achieve an
airtight seal.
1. After removing burrs from cut pipe,
seal the ends with PVC tape to prevent
foreign materials from entering the pipe.
2. Sheath the pipe with insulating material.
3. Place are nuts on both ends of pipe.
Make sure they are facing in the right
direction, because you can’t put them on
or change their direction after aring.
Flare nut
Copper pipe
4. Remove PVC tape from ends of pipe
when ready to perform aring work.
5. Clamp are form on the end of the pipe.
The end of the pipe must extend beyond
the edge of the are form in accordance
with the dimensions shown in the table
below.
PIPING EXTENSION BEYOND FLARE
FORM
Outer Diameter
of Pipe (mm)
A (mm)
Min. Max.
ø6.35 (ø0.25”) 0.7 (0.0275”)
1.3 (0.05”)
ø9.52 (ø0.375”) 1.0 (0.04”) 1.6 (0.063”)
ø12.7 (ø0.5”) 1.0 (0.04”) 1.8 (0.07”)
ø16 (ø0.63”) 2.0 (0.078”) 2.2 (0.086”)
ø19 (ø0.75”) 2.0 (0.078”) 2.4 (0.094”)
A
Flare form
Pipe
6. Place aring tool onto the form.
7. Turn the handle of the aring tool
clockwise until the pipe is fully ared.
8. Remove the aring tool and are form,
then inspect the end of the pipe for
cracks and even aring.
Step 4: Connect pipes
When connecting refrigerant pipes, be
careful not to use excessive torque or to
deform the piping in any way. You should
rst connect the low-pressure pipe, then the
high-pressure pipe.
MINIMUM BEND RADIUS
When bending connective refrigerant piping,
the minimum bending radius is 10cm.
Radius
≥10cm (4in)
Instructions for Connecting Piping to
Indoor Unit
1. Align the center of the two pipes that you
will connect.
Indoor unit tubing Flare nut Pipe
Page 16-GB
 Loading...