2.7 SYSTEM CHECKS PRIOR TO SWITCHING ON
2.7.1 Setting Detector Address
Correct operation of the system depends on all Detector heads being correctly addressed.
This is carried out after installation (refer to Figure 39).
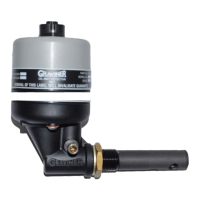
Figure 39 Detector Head 1-E3561-301
1. Remove the adhesive label covering the access port to the address switches.
2. Use an instrument screwdriver to set the switches.
The left-hand switch sets the TENS, the right-hand switch sets the UNITS.
3. Detectors are supplied with the switches set to 00 as factory default.
4. The Detector addresses must be sequential and should run in sequence from engine to
engine, i.e. if the last Detector head on the first engine is address 08, then the first
Detector head on the second engine must be 09. It is essential that if Detector heads
are removed for overhaul they are returned to their original position or they must be re-
addressed.
Where a detector is re-addressed the power must be removed from the detector before
the address change will take effect.
5. Clean the Detector head in the area around the address switches and indicator lights
with wet and dry wipes to ensure any oil or grease is removed. Attach the switch window
label so that both the indicator lights are visible through the clear window and the
switches are covered by the opaque area. Ensure the label is fully adhered to maintain
the IP65 rating of the Detector and the product guarantee.
6. The engine/cylinder number and address should be written on the invalidate guarantee
label in the position shown.
2.7.2 Check that the Detector addressed 01 is connected to the Detector 1 position in the Junction
Box, and the Detector addressed 02 is connected to the Detector 2 position in the Junction Box
 Loading...