Page 15 of 45
13. Connect power
14. Start the pump. The electrical pump is started on the button “PUMP” which is turned to 1. The air-
powered pump is started by connecting air and possibly regulating it.
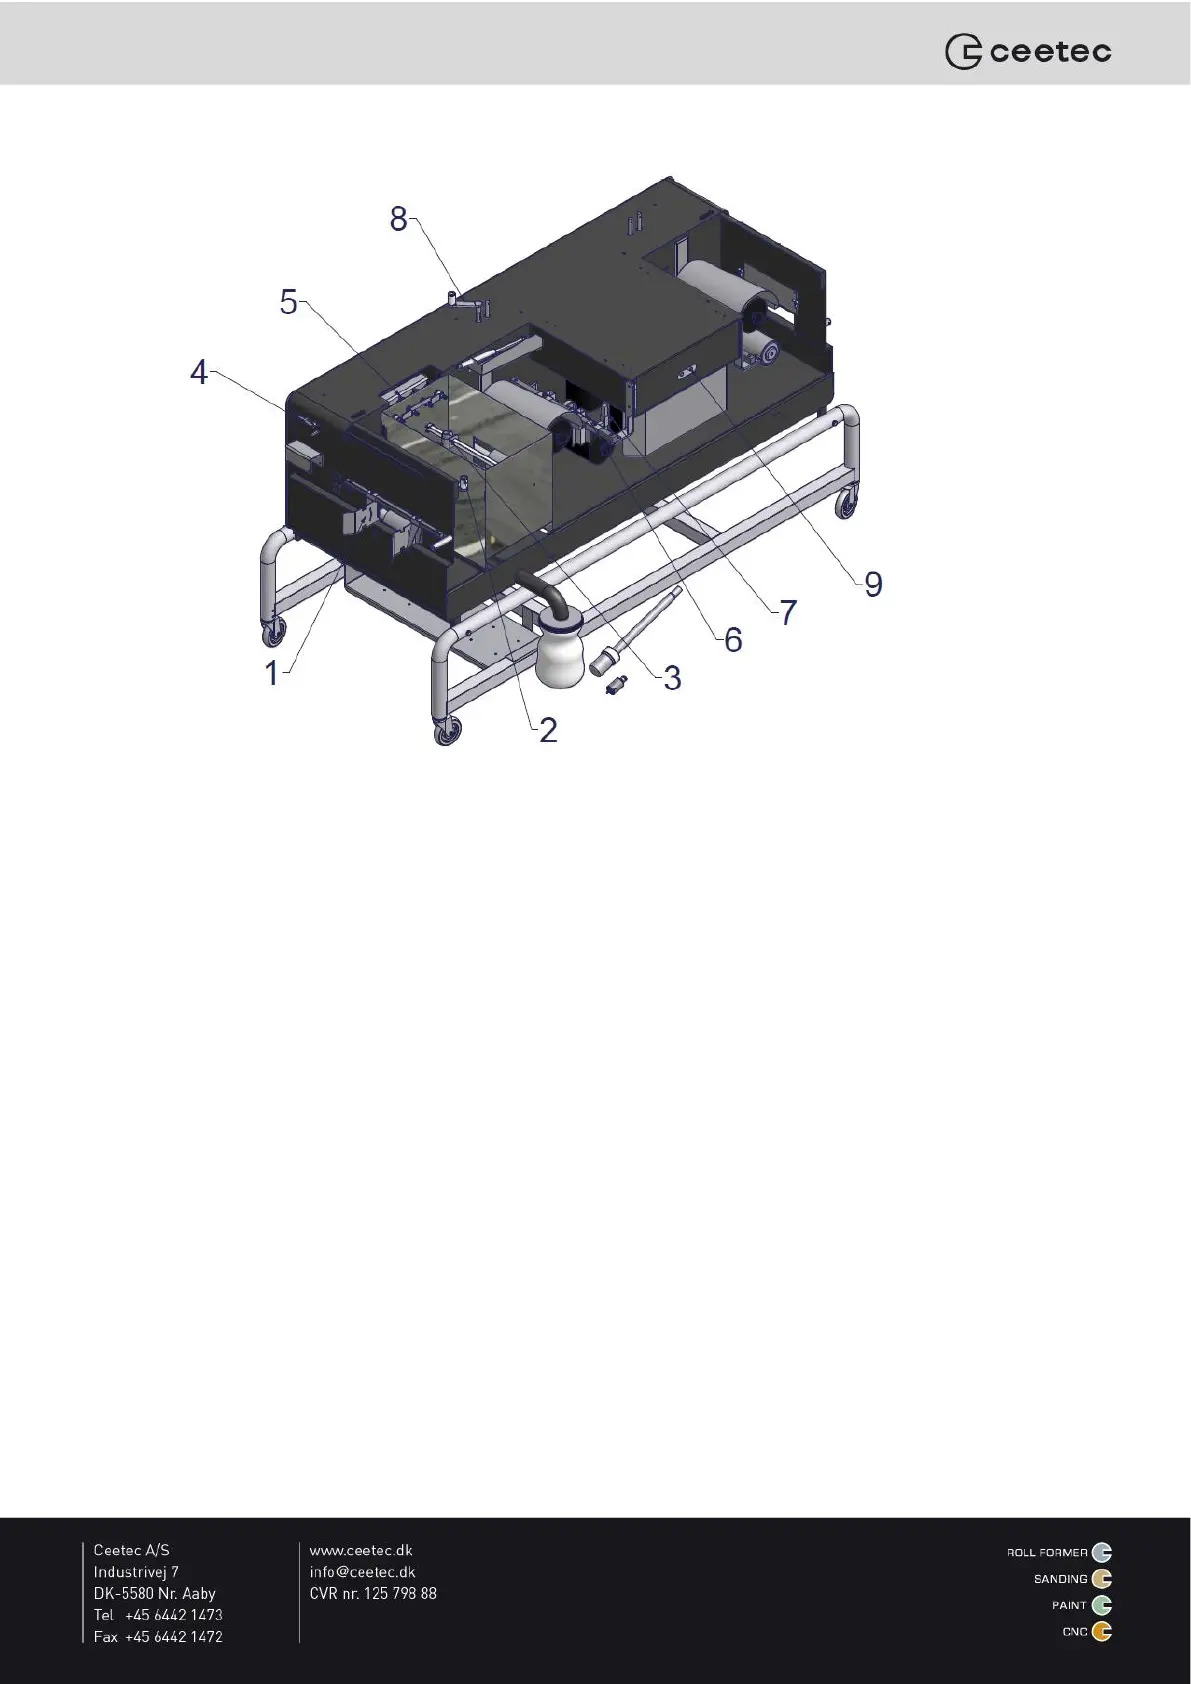
15. Carefully open the main tap (4) in order to put paint in the nozzle box.
16. Carefully open the desired number of taps (5). Always open the top nozzles first. The machine can
treat 1, 2, 3 or 4 sides of the item at once. Only open for the liquid on the sides to be treated. It is
only necessary to open the vertical nozzles if the item is more than 20 mm high, or if there is a
groove or similar which has to be treated.
17. Mount the side plate and close the doors.
18. Activate the button ”brushes” and adjust the brush speed with the button to the desired speed.
19. Activate the button ”forward drive” and adjust the forward drive with the button to the desired speed.
20. Take the item from the machine’s outlet. Note: The item will come out on its own if the machine is set
correctly! If the item stops it may be because the item has hit an intake guide, guide, nozzles or
brushes. Adjust them.
21. Have a test run with the same item 2-3 times. This ensures that the brushes are moisturised.
22. Then have a test run with an untreated item and make sure the result is as intended. Then the
machine is ready for normal operation. Check the items regularly. If necessary adjust:
a. Paint amount
b. Forward drive speed
c. Brush speed
d. Brush pressure