3-49
Cisco Aironet 1552 Series for Hazardous Locations Installation Guide
Chapter 3 Installing the 1552 Series Access Points in Hazardous Locations
Mounting on a Wall or a Pole
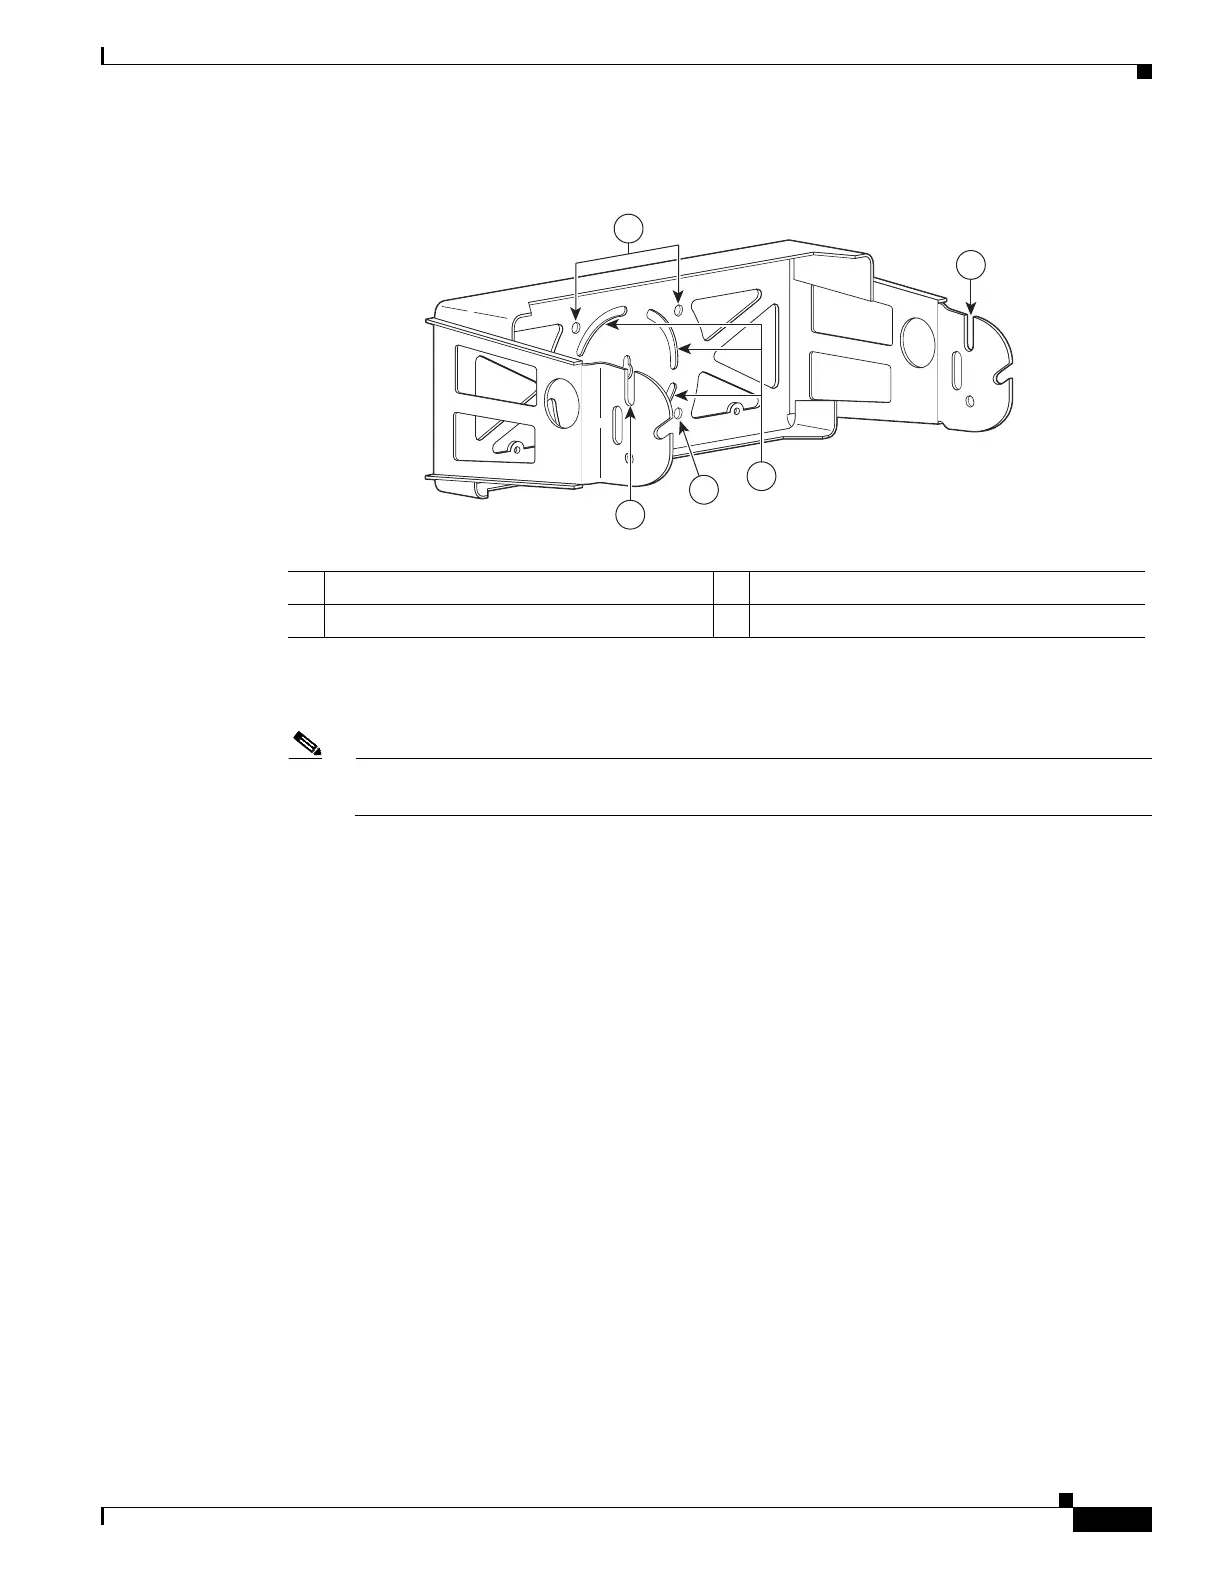
Figure 3-1 Mounting Bracket for Wall Mounting
Step 2 Use four customer-supplied screws and optional screw anchors to attach the mounting plate to the
mounting surface.
Note If necessary, use suitable screw anchors and an exterior-grade plywood backboard to mount the
access point to stucco, cement, or drywall.
Step 3 Screw a M8 x16 bolt in the top support bolt hole on each side the access point (see Figure 3-2). Do not
screw the bolt all the way in; leave approximately a 0.25 inch (0.635 cm) space.
1 Access point quick mount notch 3 Mounting slots (allows bracket rotation)
2 Mounting holes
2
3
1
2
255253
1