3-59
Cisco Aironet 1552 Series for Hazardous Locations Installation Guide
Chapter 3 Installing the 1552 Series Access Points in Hazardous Locations
Working with the Access Point Hinged Cover
To open the access point hinged cover, follow these steps:
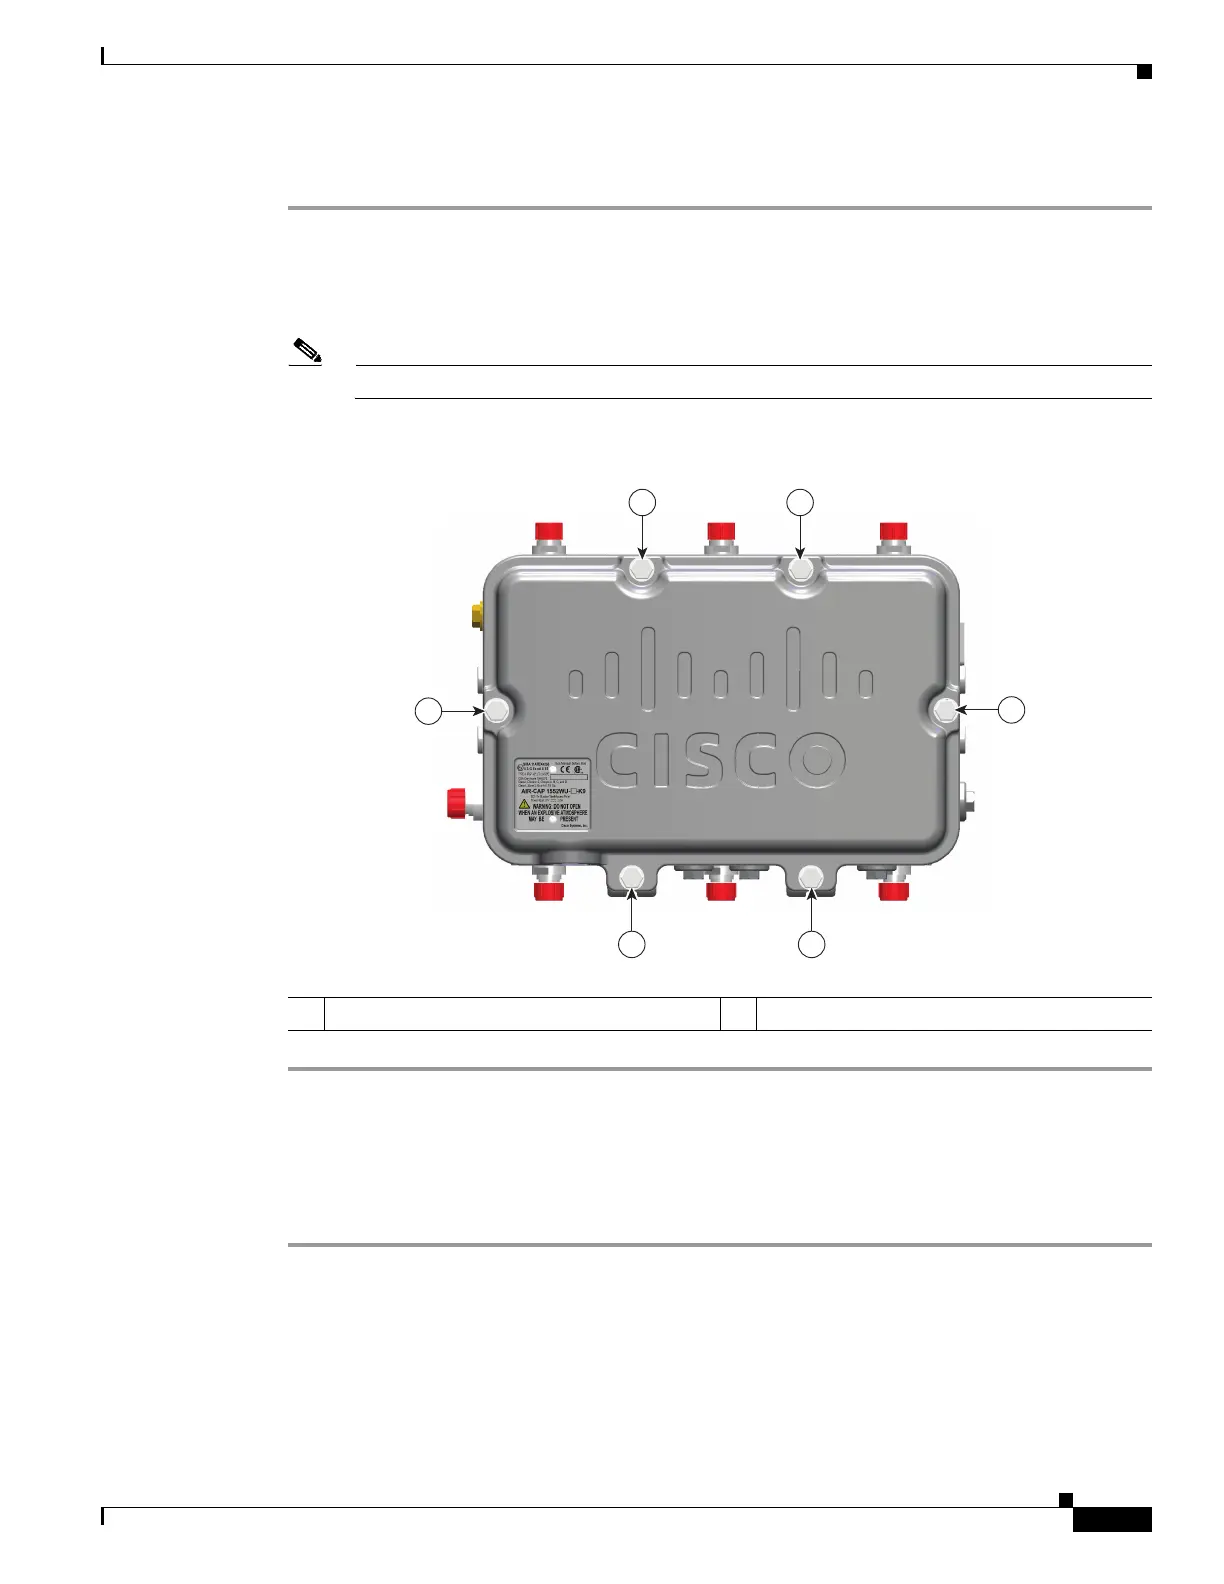
Step 1 Use 0.5-in (13-mm) box-end wrench or socket set to unscrew and remove the four bolts on the front cover
of the unit. Only unscrew the hinge bolts about 2 turns until they are easily turned by hand, do not remove
the bolts on the hinge (Figure 3-10).
Step 2 The cover is hinged on the bottom. Carefully open the cover and remove the cover.
Note If the cover does not open easily, carefully loosen the hinge bolts again.
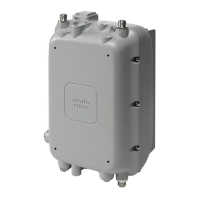
Figure 3-10 Access Point Front View of Hinged Cover
Closing the Access Point Hinged Cover
To close the access point cover, follow these steps:
Step 1 When closing the access point cover, be careful not to pinch internal wires.
Step 2 Carefully position the cover flush with all sides of the access point, then slowly hand-tighten each bolt.
Step 3 When all bolts are hand-tightened, use a 13-mm closed-end wrench or socket to partially tighten the bolts
in the tightening sequence shown in Figure 3-11. Tighten each bolt to 3 to 4 ft lbs (0.34 to 0.45 Nm).
Step 4 Repeat Step 3 using the same tightening sequence to fully tighten each bolt to 6 to 7 ft lbs
(0.68 to 0.79 Nm).
1 M8 x32 bolts 2 Cover hinge M8 x32 bolts
255250
1
2
1
1
1
2