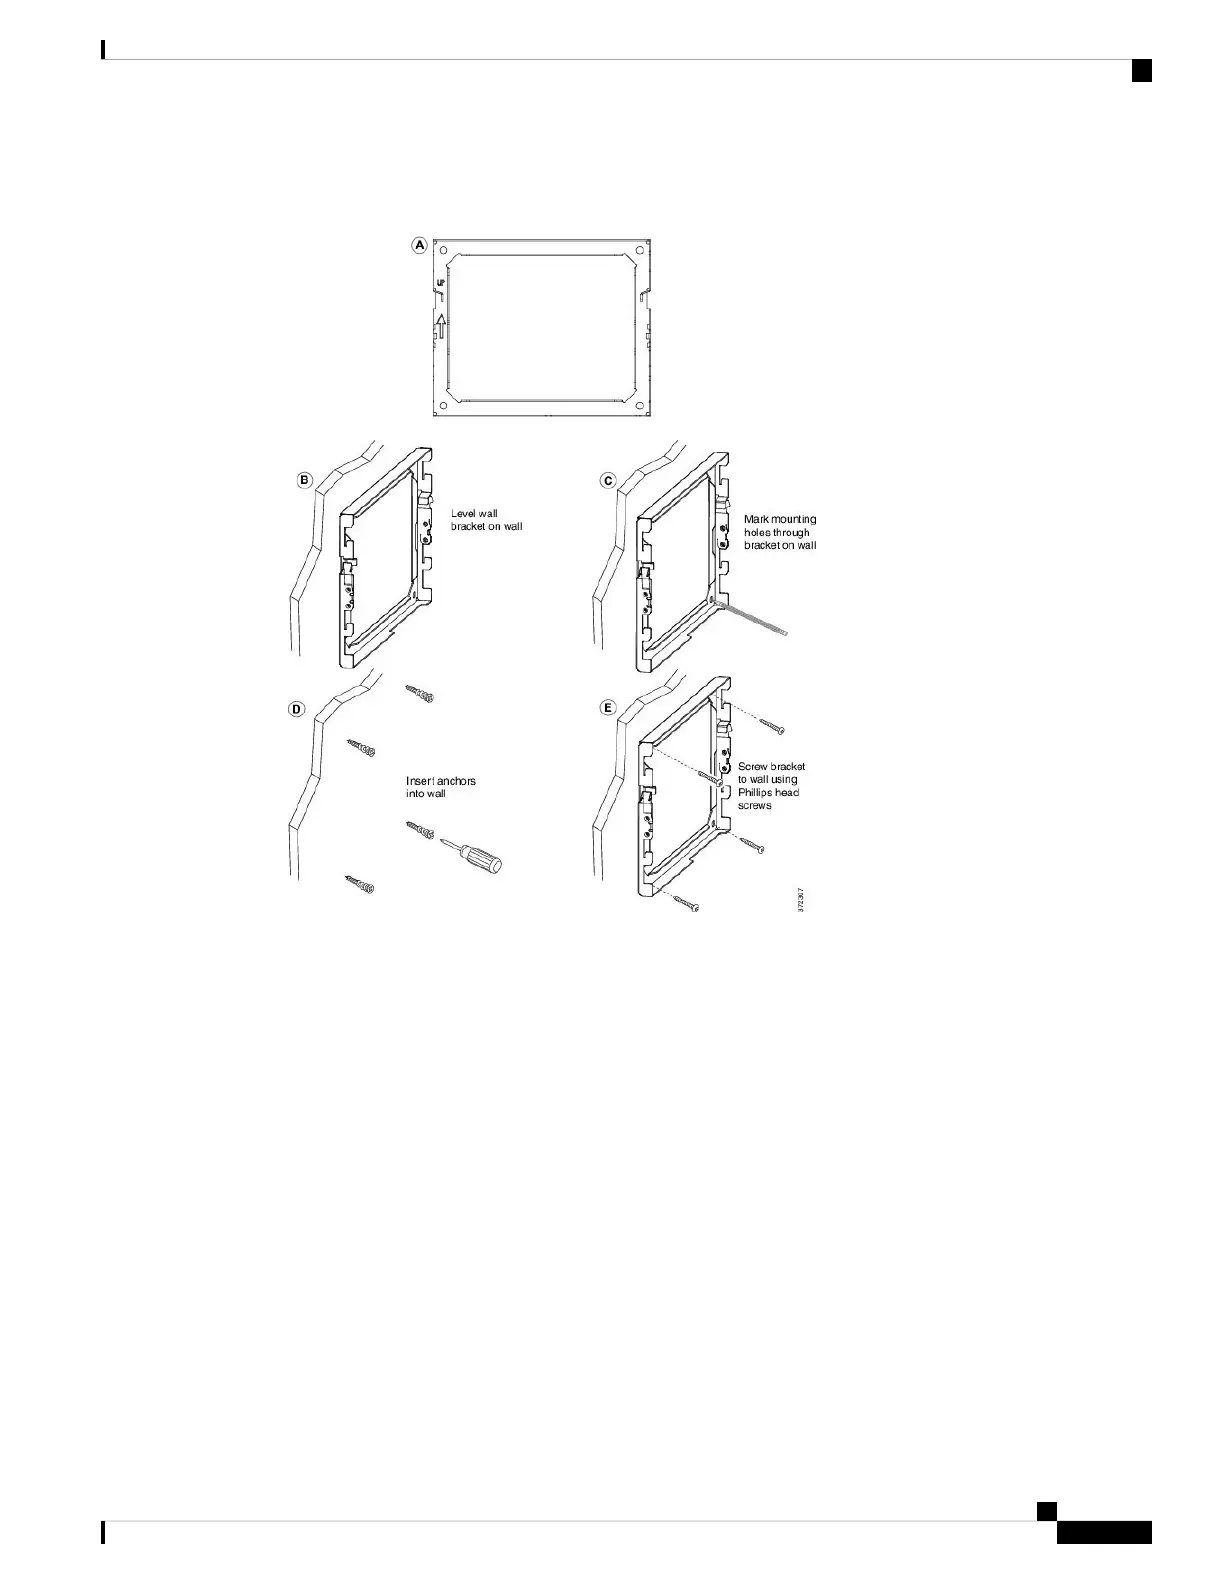
Figure 11: Bracket Installation
The following figure shows the bracket installation steps.
Step 2 Attach the phone bracket to the IP Phone.
a) Detach power cord, and any other attached cords from the base of the phone, except the handset cord (and
headset cord, if there is a headset).
b) Attach the phone bracket by inserting the tabs into the mounting tabs on the back of the phone. The phone
ports should be accessible through the holes in the bracket.
c) Secure the phone bracket to the IP phone with the self-tapping screws, using the #1 Phillips-head
screwdriver.
d) Reattach the cords and seat them in the clips that are incorporated into the phone body.
Cisco IP Phone 8800 Series Multiplatform Phone Administration Guide for Release 11.3(1) and Later
495
Cisco IP Phone Accessories
Cisco IP Phone Accessories

 Loading...


