2-6
Cisco UCS C460 Server Installation and Service Guide
OL-22326-01
Chapter 2 Installing the Server
Installing the Server In a Rack
e. Ensure that the two slide-rail assemblies are level and at the same height.
f. Pull the inner slide rails on each assembly out toward the front of the rack until they hit the internal
stops and lock in place.
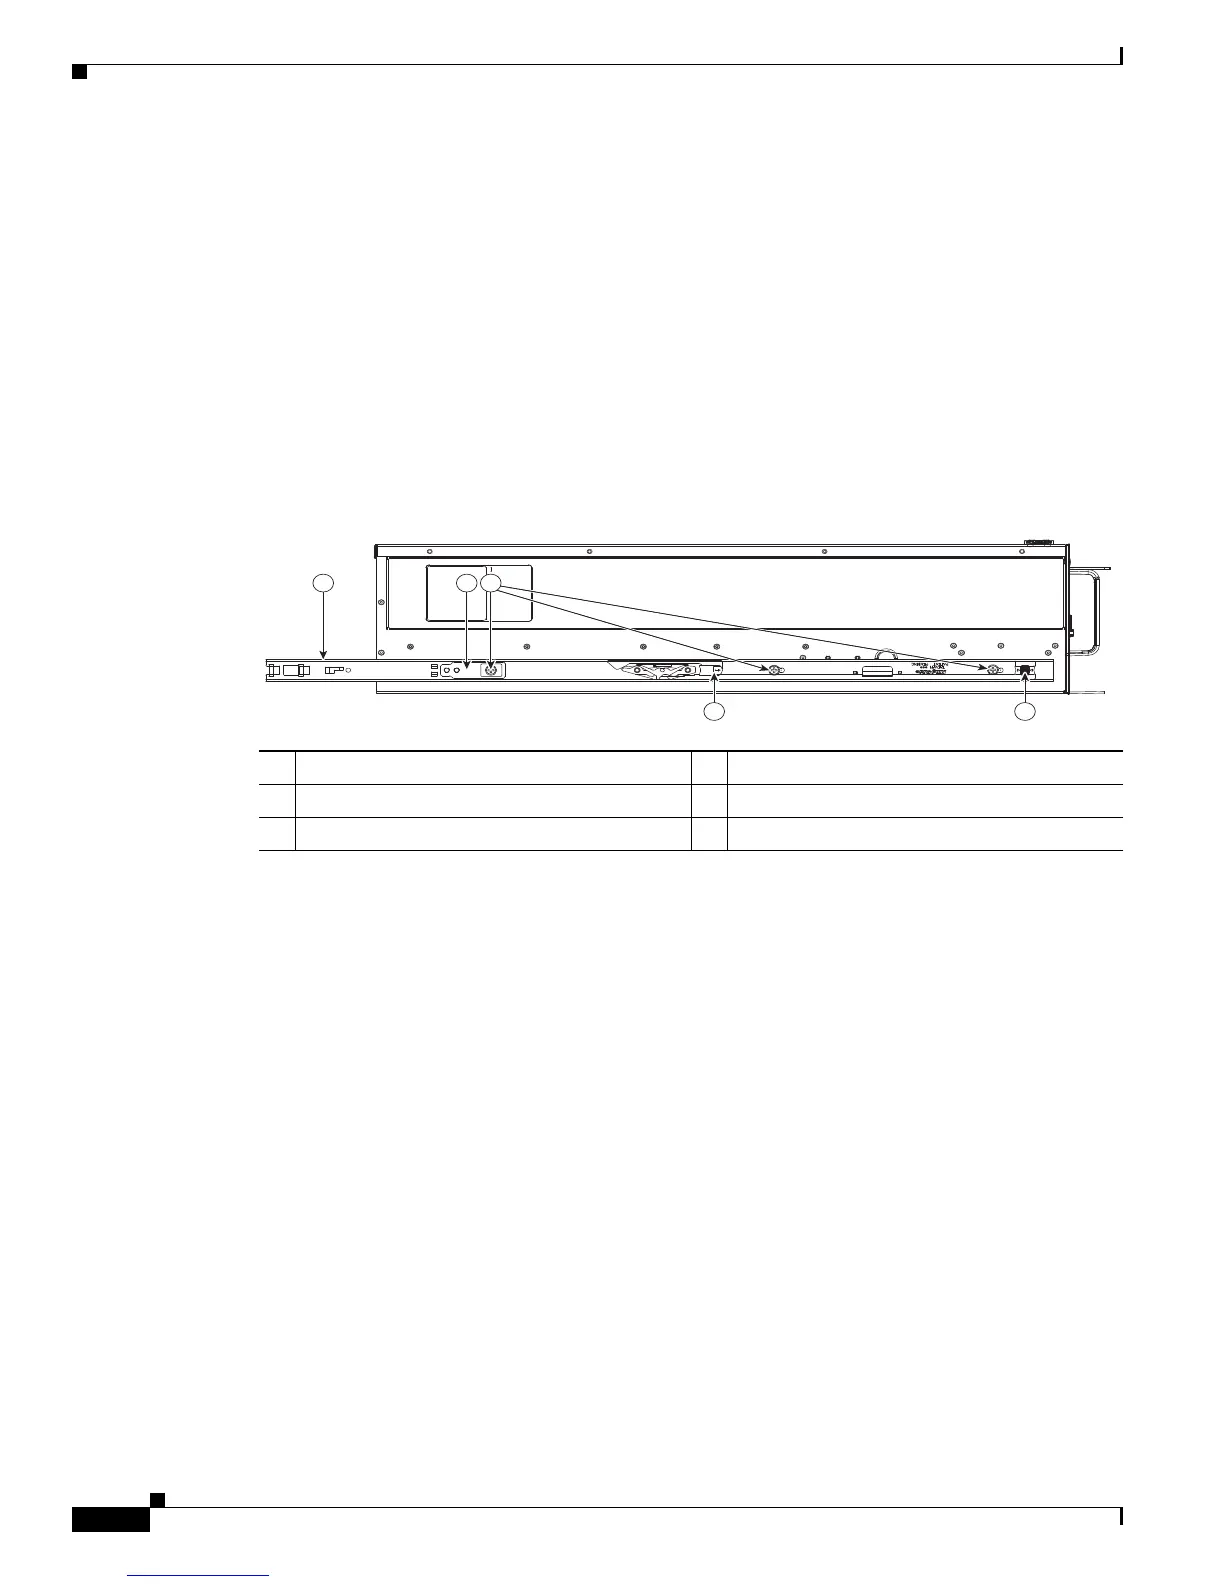
Step 2 Attach mounting brackets to the server. See Figure 2-3:
a. Place the mounting bracket (item 1) against the side of the server, with the end of the bracket marked
Front toward the front of the server.
b. Match the three bracket mounting holes with the three mounting pegs (item 3) on the side of the
server.
c. Slide the bracket toward the rear of the server until the metal tab on the bracket (item 2) locks over
the rear mounting peg.
Figure 2-3 Attaching the Mounting Brackets to the Server
Step 3 Insert the server into the slide rails:
a. Align the rear of the mounting brackets with the front of the empty slide rails that you installed in
Step 1.
b. Push the server into the slide rails until it stops at the internal stops.
c. Push the plastic installation release clip on each mounting bracket toward the server rear (see item
5 in
Figure 2-3).
d. Continue pushing the server into the rack until its front flanges touch the rack posts and the thumb
latches engage.
Step 4 (Optional) Attach the Cable Management Arm (CMA) to the rear of the slide rails. Directions in this step
use the orientation of facing the rear of the rack and server. See
Figure 2-4.
a. Attach the square metal connector with the blue tab (item 4) to the rear of the left slide rail assembly.
Push in the clip until it locks in place.
b. Attach Connector B (item 5) to the metal connector that you attached to the left slide rail in step a.
c. Attach Connector A (item 2) to the rear end of the right slide rail. Snap the rectangular hole in the
end of the connector over the rectangular peg at the end of the slide rail.
d. Attach the blue clip connector (item 3) to the right slide rail.
e. Attach the metal connector (item 1) to the rear of the mounting bracket that is attached to the right
side of the server.
1 Mounting bracket 2 Metal tab
3 Mounting pegs 4 Removal release clip
5 Installation release clip
198152
1 2
4 5
3

 Loading...