3-35
Cisco UCS C460 Server Installation and Service Guide
OL-22326-01z
Chapter 3 Maintaining the Server
Installing or Replacing Server Components
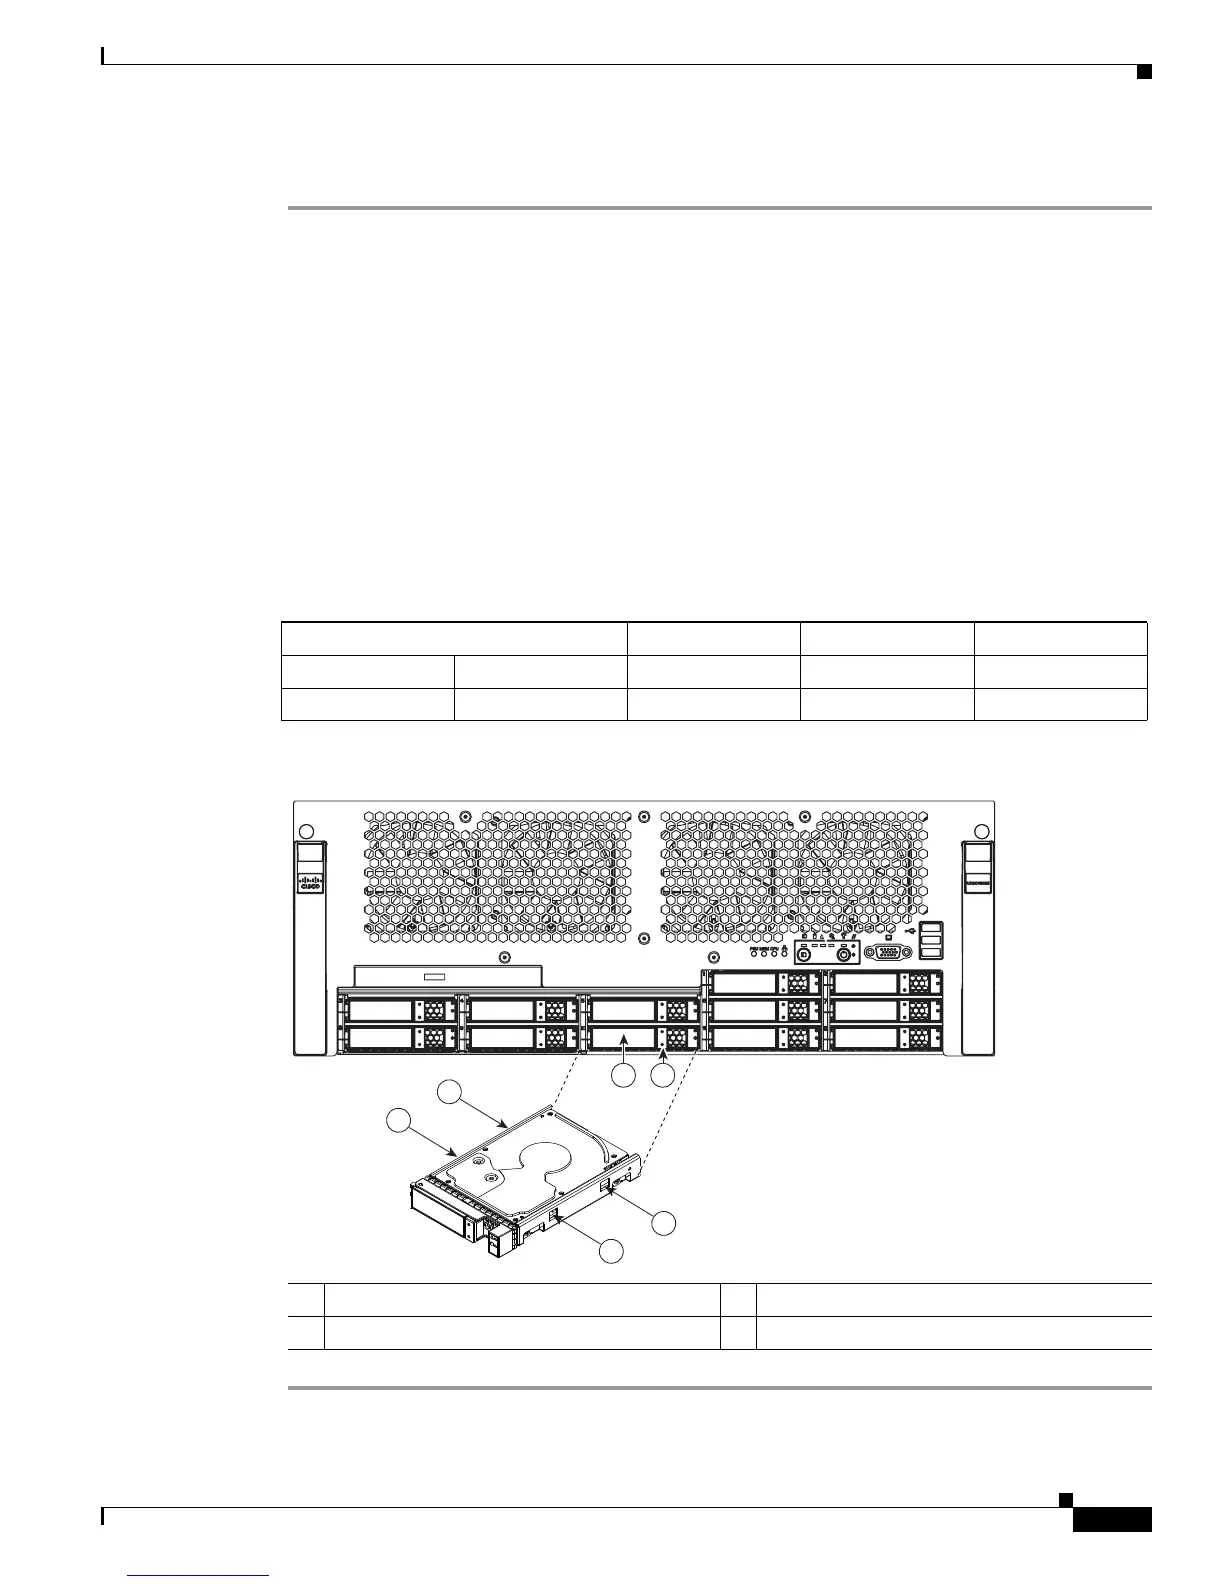
To replace or install a hot-pluggable hard drive, follow these steps:
Step 1 Remove the drive that you are replacing or remove a blank panel from an empty bay (See Figure 3-25):
a. Press the release button on the face of the hard drive.
b. Grasp the ejector lever and pull the hard drive tray out of the slot.
c. If you are replacing an existing drive, remove the four drive tray screws that secure the drive to the
tray and then lift the drive out of the tray.
Step 2 Install a new drive:
a. Place a new hard drive in the empty drive tray and replace the four drive tray screws.
b. Insert the drive tray into the empty drive bay.
c. Push the tray into the slot until the drive connectors are fully seated in the backplane.
d. Press the ejector lever flat to lock the drive and tray in place.
Figure 3-24 Drive Numbering and Physical Orientation, Facing Server Front
Figure 3-25 Removing and Replacing Hard Drives
HDD_01 HDD_02
HDD_03 HDD_04 HDD_05 HDD_06 HDD_07
HDD_08 HDD_09 HDD_10 HDD_11 HDD_12
1 Ejector lever 2 Release button
3 Drive tray securing screws
197444
198937
1 2
3
3
3
3
HDD 3
HDD 8
HDD 4
HDD 9
HDD 5
HDD 10
HDD 6
HDD 11
HDD 7
HDD 1 HDD 2
HDD 12

 Loading...