Adjustment Procedures
5-10
750-96 (revised 2010)
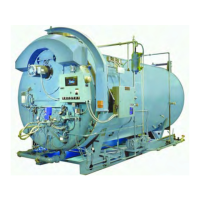
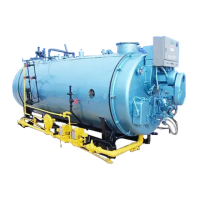
Model CB Packaged Boiler Manual
Although it is possible to visibly adjust the size of the pilot flame, it is preferable to obtain a micro-amp reading of
the flame signal.
The amplifier of the standardly used program relay has a meter jack for this purpose. This reading may be mea-
sured with a good quality micro-ammeter or a suitable multi-meter with a 0 to 25 micro-amp DC rating.
The meter is connected to the jack using a meter connecting plug harness (Cleaver-Brooks 884-72). Connect the
plus (red meter lead) to the red tab of the harness and the minus (black meter lead) to the black tab before insert-
ing the plug in the meter jack.
The program relay used may be of the type that provides message information that includes a constant flame sig-
nal of DC voltage. In this case a separate DC voltmeter is not required.
To measure and adjust the pilot:
1. When making a pilot adjustment, turn the manual-automatic switch to “manual” and the manual flame control to
“close.” Open both the pilot shutoff cock and the pilot adjusting cock. The main gas cock should remain closed.
The regulator in the pilot line, if provided, is to reduce the gas pressure to suit the pilot’s requirement of
between 5” to 10” W.C. Regulator adjustment is not critical, however, with a lower pressure the final adjustment
of the pilot flame with adjusting cock is less sensitive.
2. Connect the micro-ammeter as outlined above.
3. Turn the burner switch on. Let the burner go through the normal pre-purge cycle. When the ignition trial period
is signaled, set the test switch to the TEST position to stop the sequence.
4. If the pilot flame is not established within ten seconds, turn off the burner switch. Repeat the lighting attempt.
5. When the pilot flame is established, and with the pilot adjusting cock wide open, remove the flame detector
from the burner plate. The pilot flame can then be observed through this opening.
6. To make the final adjustment, slowly close the gas pilot adjusting cock until the flame can no longer be seen
through the sight tube. Then slowly open the cock until a flame providing full sight tube coverage is observed.
This adjustment must be accomplished within the time limit of the safety switch or approximately 30 seconds
after the detector is removed. If the control shuts down, manually reset it. Replace the detector and repeat
from step 5.
7. When a suitable flame as indicated in step 6 is obtained, replace the detector. Observe the reading on the
micro-ammeter. The reading should be between 2-1/4 and 5 micro-amps when using a lead sulfide detector
and a standard amplifier. See the flame signal table in the manufacturer’s bulletin for values of other combina-
tions.
The flame signal indicated on the annunciator type relay should not be less than 10 volts D.C. and may be as
high as 20 or greater.
NOTE: On an initial starting attempt, portions of the fuel lines may be empty and require “bleeding” time. It is better to
accomplish this with repeated short lighting trial periods with intervening purge periods than to risk prolonged fuel
introduction. If the pilot does not light after several attempts, check all components of the pilot system.
Keep eyes sufficiently away from the sight tube opening and wear a protective shield or suitable safety glasses. Never
remove the flame detector while the main burner is firing.