ComNav 1500 / 1510 Autopilot - 42 -
7. DOCKSIDE TESTING
7.1 Preparations
Start checking the following:
• Familiarize yourself with the operating procedures by reading
sections Operation, Function and Setup.
• Double check all wiring connections and DIP Switch settings
prior to connecting power to the system.
• Make sure rudder angle limit [LIM] is set to 99° (OFF).
• Ensure that the oil reservoir is 3/4 full and maintain that level
throughout the test procedure.
Warning! Do not activate any of the 3 Autopilot functions
Compass, Nav or Wind at dock as the rudder may go hard over,
since the APC routine has not been carried out yet. It will be done
as explained in Sea Trials.
7.2 Dockside First Start Up
7.2.1 Power On
At each power on, the instrument will perform a self test. The
display will first show all segments, then the software version and
the NX2 Network ID number.
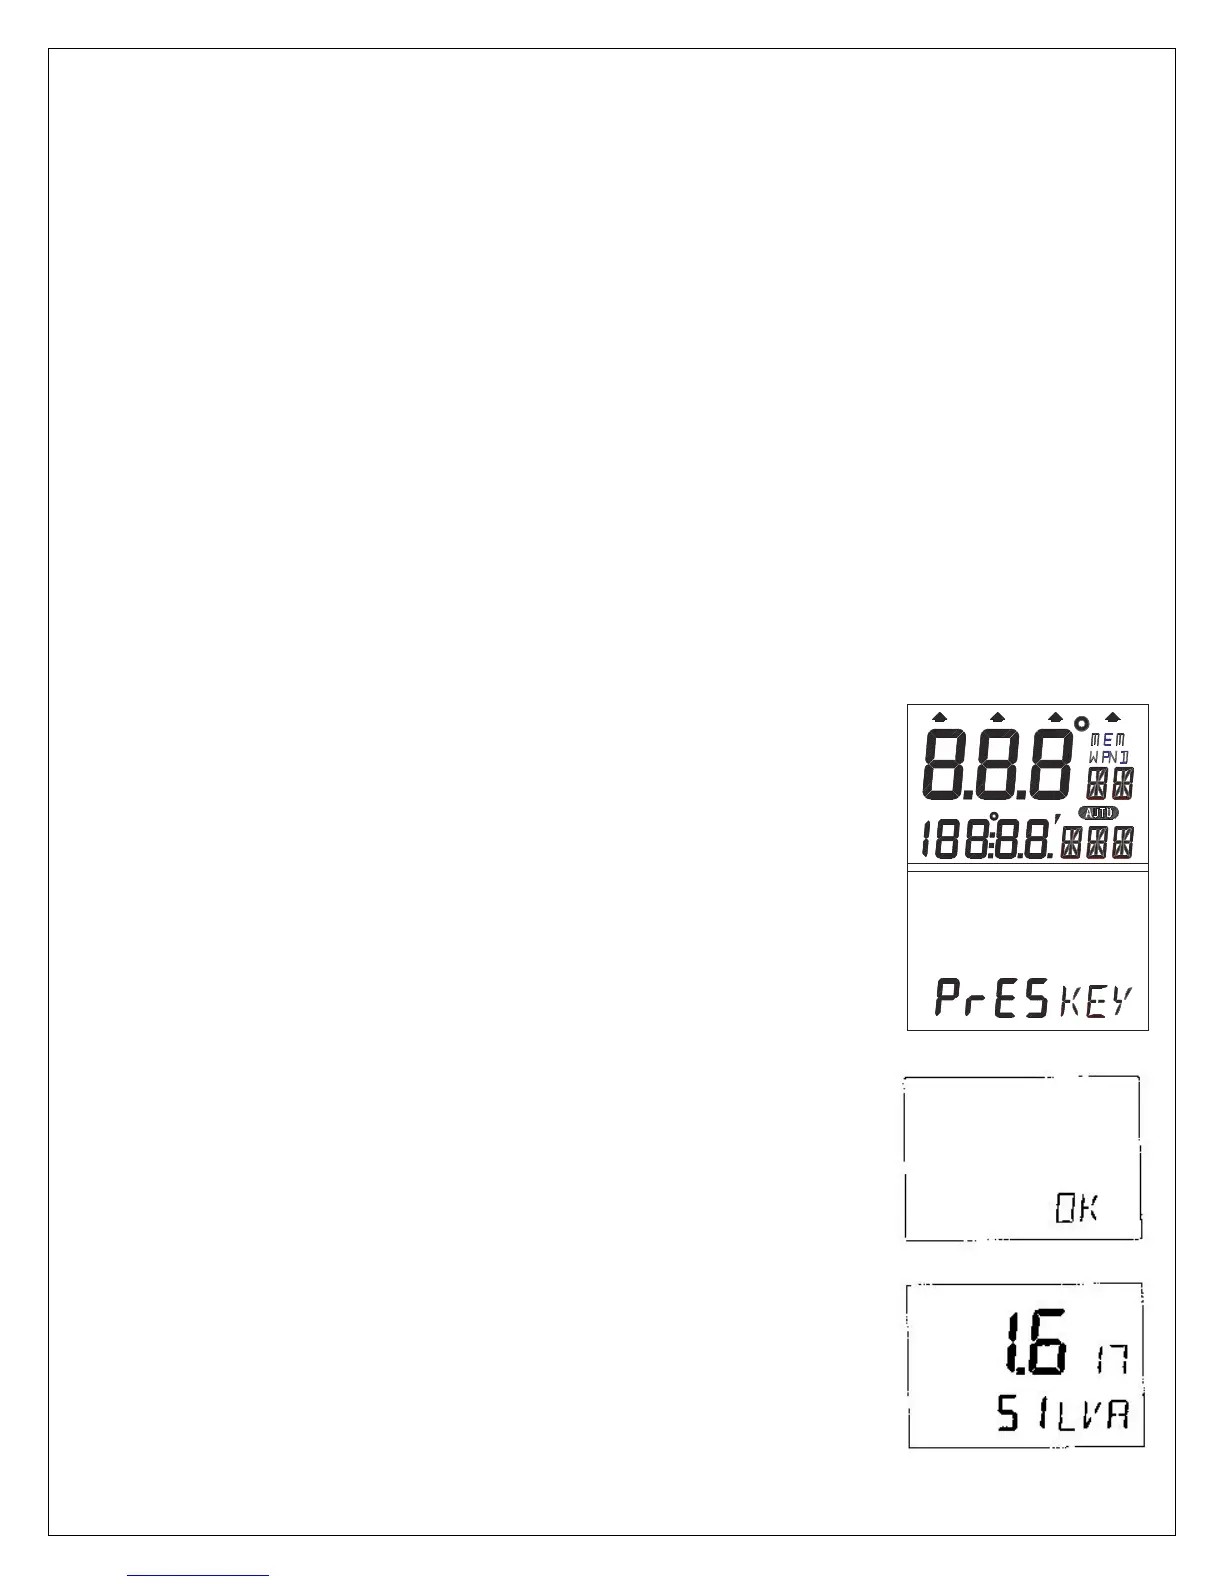
7.2.2 Initializing the Instrument in a NX2 Network
At the first power on after installation, you will be asked to press
SET [PrSKEY]. This will give the instrument a logical ID number
from 16 and upwards on the NX2 Network.
To initialize the instrument, press SET, one instrument at a time,
on all installed digital instruments,.
Warning! Always wait for the text [Init OK]
to be displayed, before you press SET
on the next instrument!
The NX2 Distribution Unit or the Server automatically gives the
first unit ID number 16, then 17 and so on. The order in which
you press SET, will be the same order as the instruments will be
given a logical ID number on the NX2 Network, and the same
order they will be addressed by the Remote Control instrument
if used.
The example shows that the instrument version number is
1.6 and the logical ID number given is 17.