ComNav 1500 / 1510 Autopilot - 11 -
GROUND
SYMBOL
SILICONE GREASE
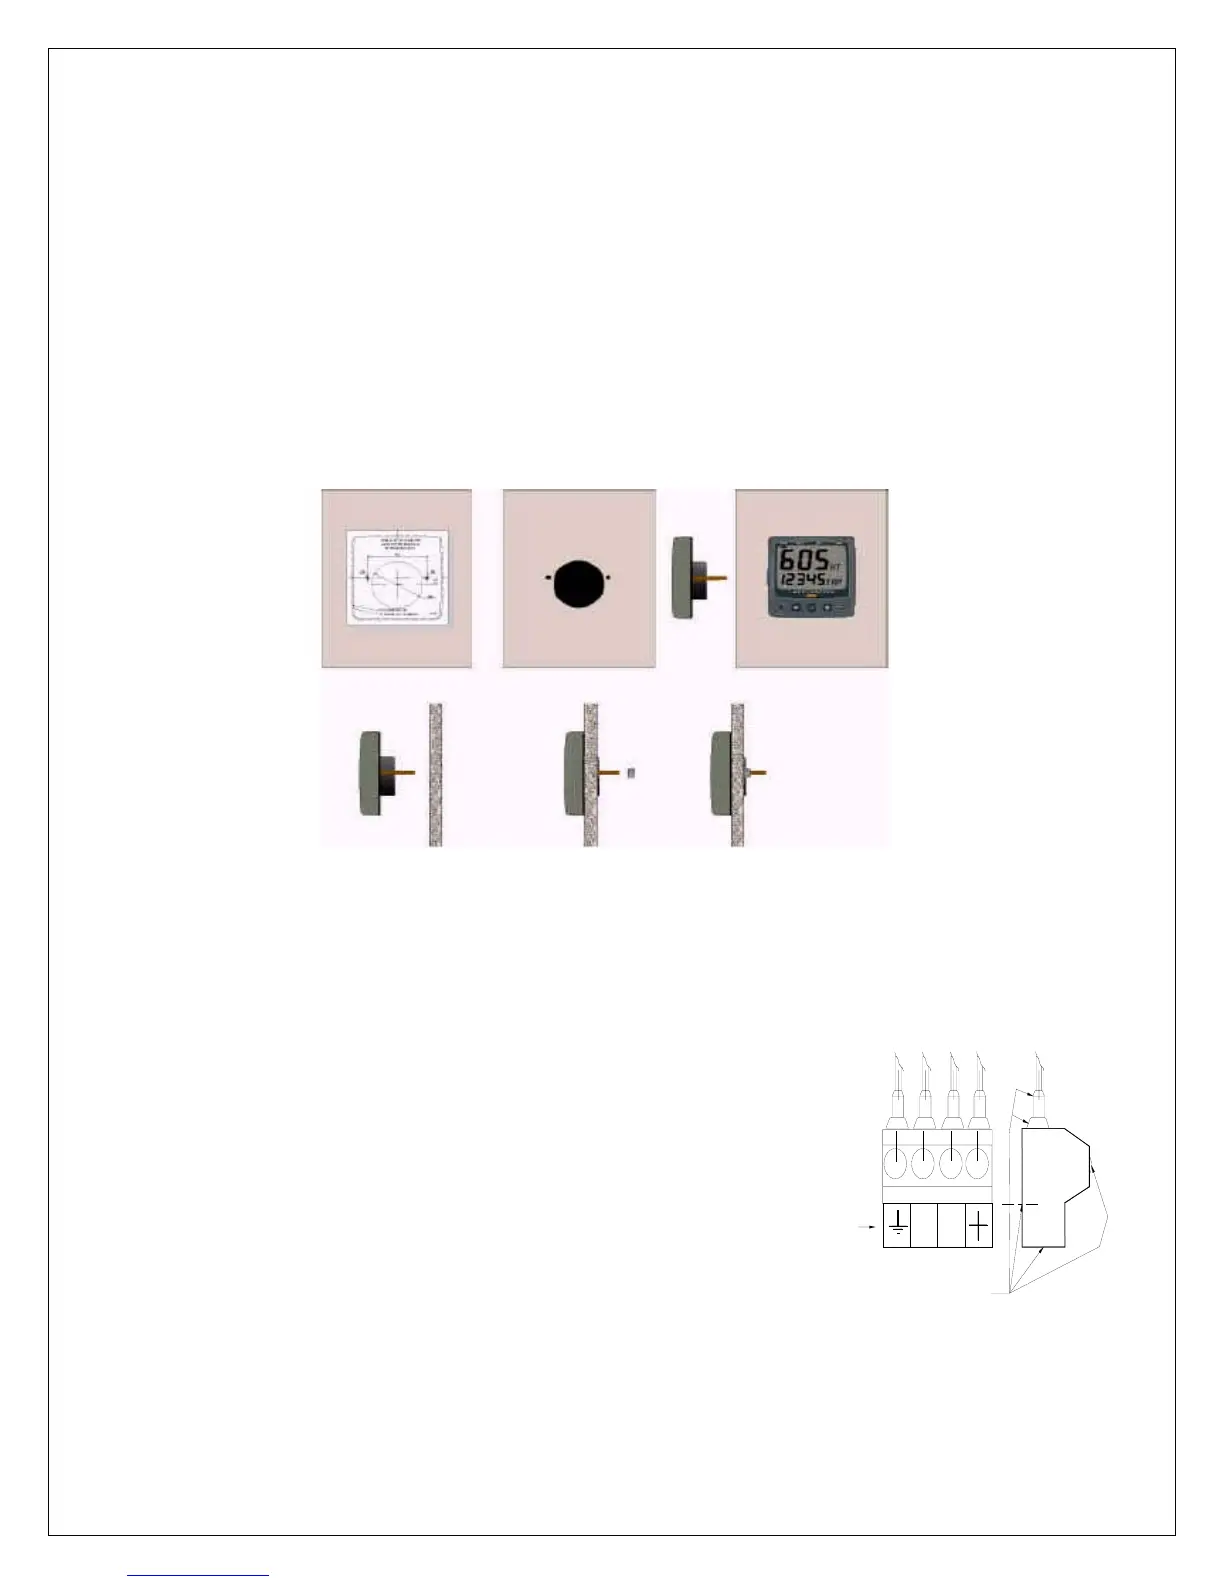
2.3 Control Head
Location
The Control Head is waterproof when gasket mounted to a flat surface. It should be
mounted near the steering position for ease of visibility and transfer from manual to
automatic.
Installation
Place the adhesive drill template on the desired location for the Control Head. Drill
the 2 holes using a 5mm (1/4") drill for the two pin bolts. Use a 63mm (2½") hole
saw to machine the clearance hole for the Control Head connection socket.
Remove the template.
• Screw the two pinbolts to the instrument.
• Put the instrument in place.
• Screw the two nuts from the back.
Note! The two nuts should only be hand tightened. Do not use a wrench.
• Run the NX2 Network cable from the Distribution Unit
to the Autopilot Instrument Control Head. Connect to
terminals #1, 2, 3 and 4 (see System Wiring
Diagram).
• If you want to cut the NX2 Network cable to length,
disconnect 4-pole jack plug and cut the cable. Peel
off about 35 mm (1,4") of the cable insulation.
Remove about 6 mm (1/4") from the 3 isolated wires
(the 4th wire is an earth / screen).
Attach the 4 cable protectors to the wires using a pair
of flat pliers.
• Connect the 4 cable protectors to the 4-pole jack plug
as shown.
• Apply silicon grease on all locations as shown.
This must be done to avoid corrosion.