-9-
7- Put the extracted target again on its place, following the inverse procedure already
described (
see paragraph 2.2.1
).
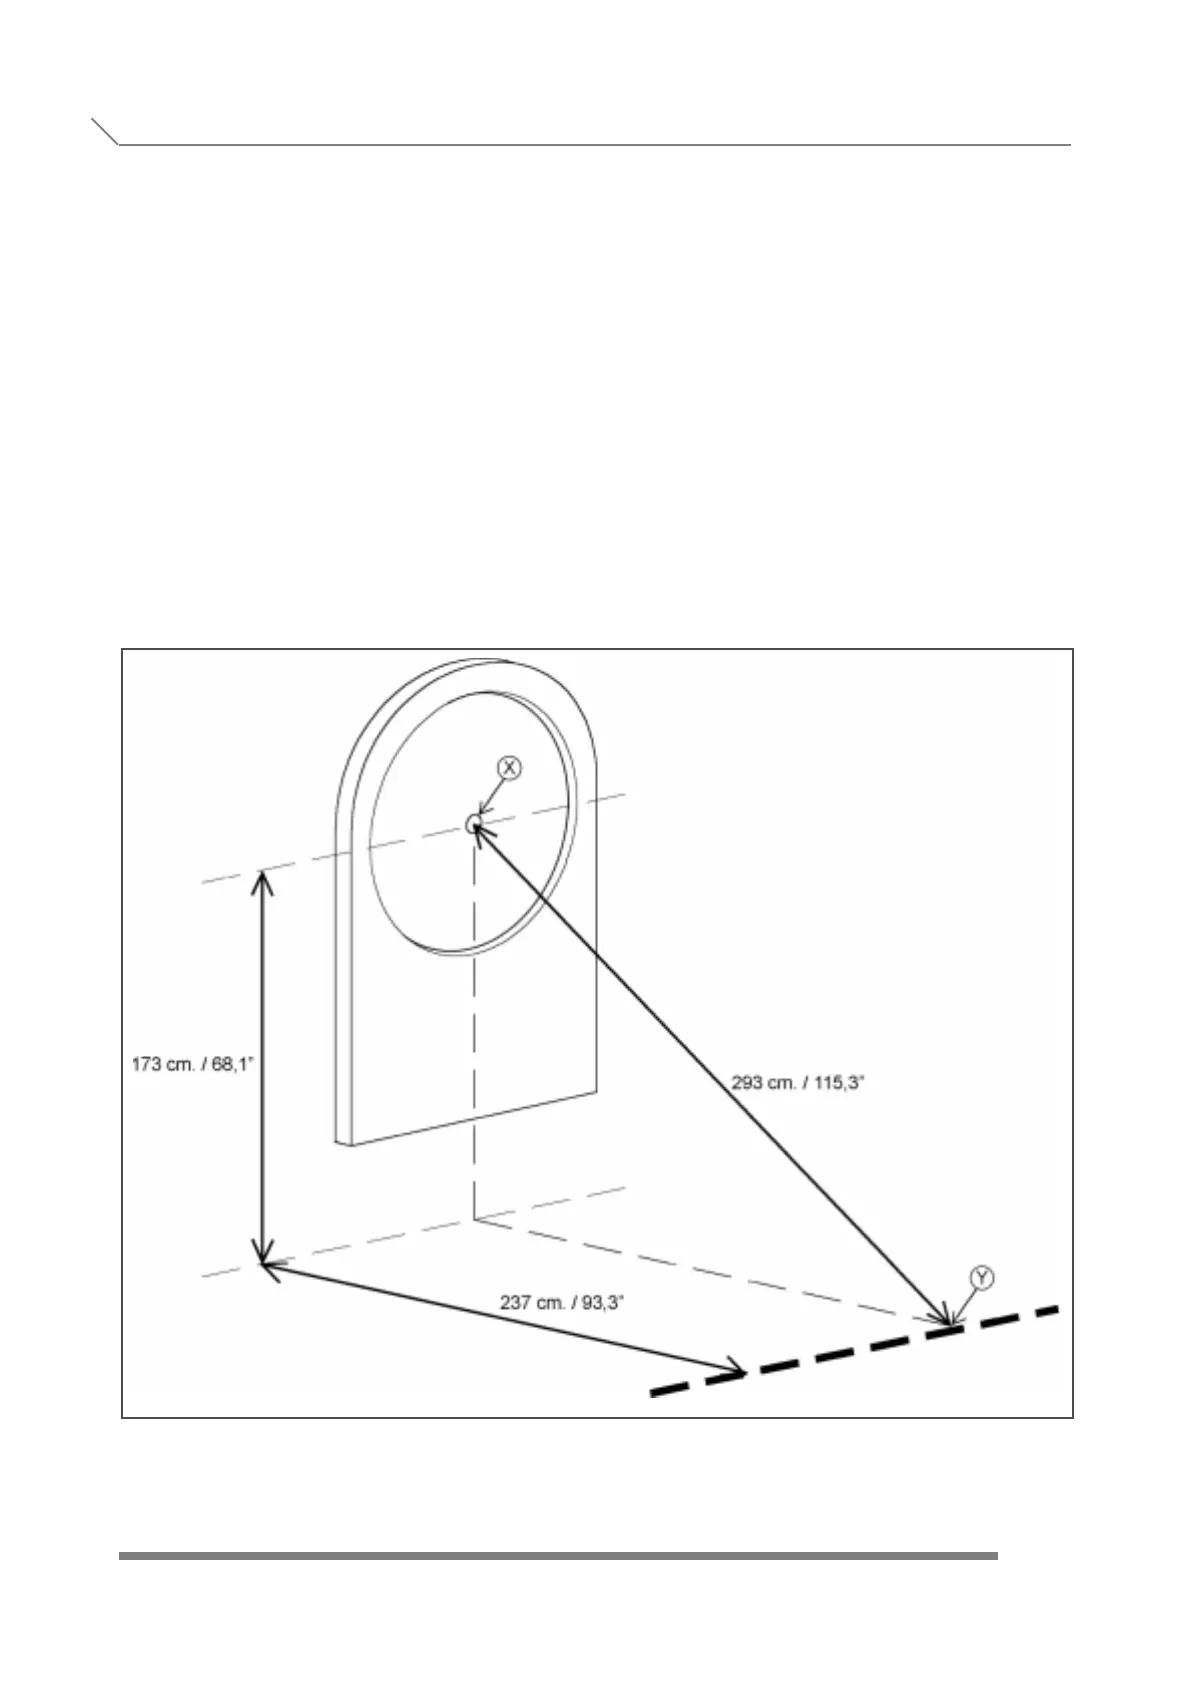
8- Measure the 2,93 m. / 115,3" from center of the target X to the edge of throw line Y.
See figure 3.
9- Check the surface of the floor, it should be flat (unadorned). Any other surface can't
be suitable for the adhesive.
10- Clean the zone of the floor with alcohol or some appropiate product.
11- Take out the cover of adhesive side and put the throw line parallel to the wall.
See figure 3.
FIGURE 3
THROW LINE
INTRODUCTION AND
OBSERVATIONS
2.3- HOW TO FIX MACHINE TO WALL AND THROW LINE