12
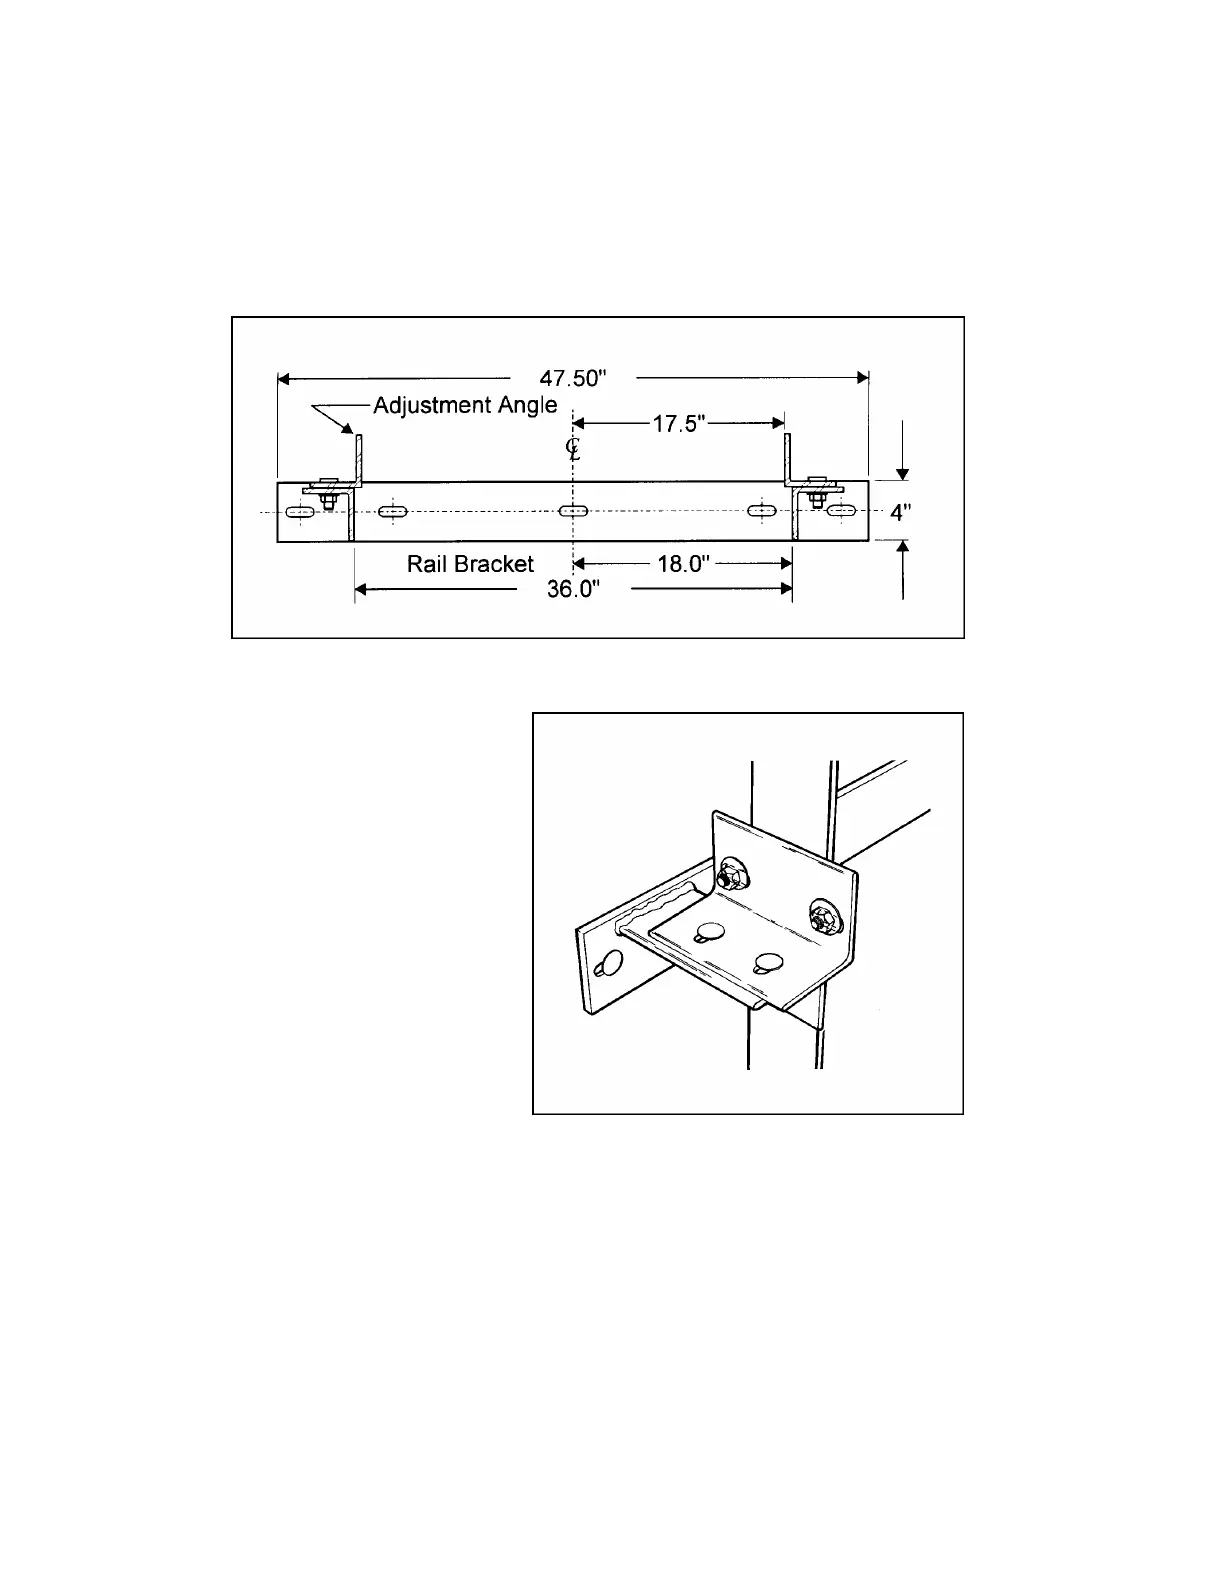
Figure # 4 Adjustment Angle
9) Starting at the top most rail bracket, begin to install the 90
o
adjustment angles. (See
Figure # 3 and Figure # 4). The face of the 90
o
adjustment angles is placed 17½ inches
from the rail centerline. Once the rails have been installed, a final measurement of 30
inches between rail faces will exist. This 30-inch measurement is an important
measurement and is called the “D.B.G.", (Distance Between Guides). Standard D.B.G. is
30 inches but this will change to 42 ½ inches if a larger cab is being used. This will also
require that you change the layout of the template on the carpenter’s level to reflect a
greater distance between the rails. Refer to your site drawing for confirmation.
10) The centerline of the adjustment
angles is a vertical line at the
center between the two rail-clip
holes. This centerline must
measure 5 inches from the wall at
the tightest point in the shaft.
To locate the adjustment angles at
the correct distance from the wall,
begin by temporarily installing the
top most adjustment angle with its
centerline approximately 5 inches
from the wall. Mark the centerline
of this adjustment angle at the top
of the adjustment angle with
hacksaw and place a plumb line in
the hacksaw cut. Tie the end of the
plumb line off and let the plumb
line “steady.” Now, by measurement find the tightest point in the shaft and install
adjustment angles at this point with adjustment angle centerline being 5 inches from the
wall. Move the top adjustment angle to bring plumb line into position with centerline of
adjustment angle at tightest point.
11) Now install all of the other adjustment angles by “lining up” their respective centers with
the plumb line set in step # 9. There is normally enough adjustment on each rail bracket
angle to bring it to the plumb line.
12) Repeat steps # 9 & 10 to install adjustment angles of the opposite side.
Figure # 3 30" DBG Rail Bracket and Adjustment Angles