27
© Control Concepts Inc., 2013
www.ccipower.com 1-800-765-2799
Compact FUSION Installation Manual Revision 3.50.2
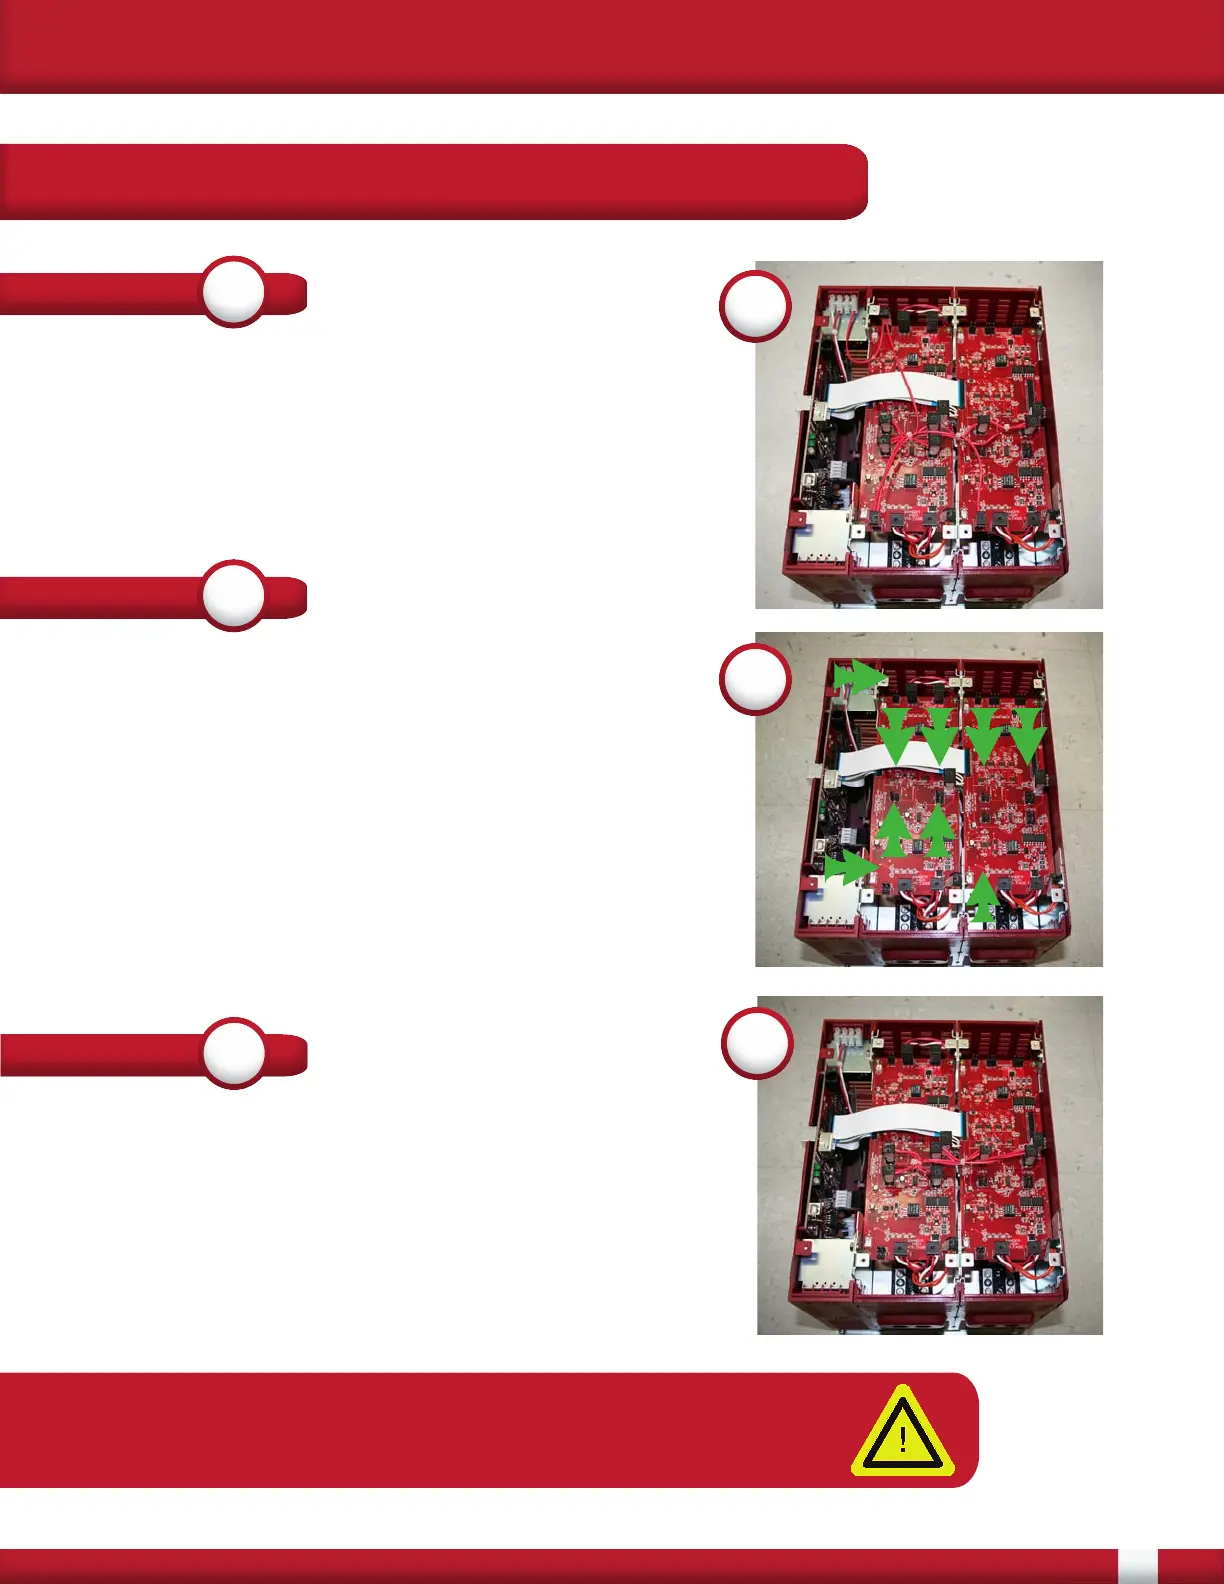
STEP
1
Changing the internal wiring from a 4 Wire Wye to a
Delta or 3 Wire Wye load can easily be done in the field.
First the line power and the control power must be OFF.
Use a screw driver to remove all of the lids. There are
three boards connected together, a Control board and
two Gate Driver boards. It is important to not remove the
flat flex (white) cables.
1
STEP
2
Gently remove the 4 Wire Wye wire harness from the
top of Gate Driver boards by simply pulling up on the
connectors. Do not pull on wires. Label as 4 wire wye
and save the wire harness for future use. Connectors to
be removed are marked with green arrows. The Ref wire
on the terminal block will also need to be disconnected
before the wire harness may be removed.
The silk screen next to the connectors will read P3 (2
pin), P16 (2 pin), P9 (2 pin), P11 (3 pin), P8 (3 pin) and
P10 (3 pin). On one of the boards P8 and P10 will not be
populated.
2
STEP
3
Place the Delta or 3 Wire Wye wire harness on the
connectors. Match the 2 pin connectors of the wire
harness to the 2 pin connectors of the Gate Driver
board. Similarly match the 3 pin connectors together. To
wire the load refer to the Three Phase 3 Leg section of
the manual.
3
APPENDIX B:
Changing from 4 Wire Wye
to Delta or 3-Wire Wye Load
NOTE: Delta loads and 3 Wire Wye loads use the same wire harness.
After changing wire harness, change the load type in the FUSION
Control Panel software.