Repairs
Cornelius Deutschland GmbH
Document no. TD2005100
Version 15/03/2019, Index 0
Installation and service manual Dispensing valve
SFV1
19
6.6 Replacing the microswitch
Dispensing valve SFV1 dosing lever
Finishing tasks
1. Mount the dispensing valve, see chapter 4.1.
6.7 Replacing the pull-type solenoid
Prerequisites References
The dispensing valve has been removed. see chapter 4.2
Spare parts ID/reference Qty/amount Comment
Microswitch 560002596 1
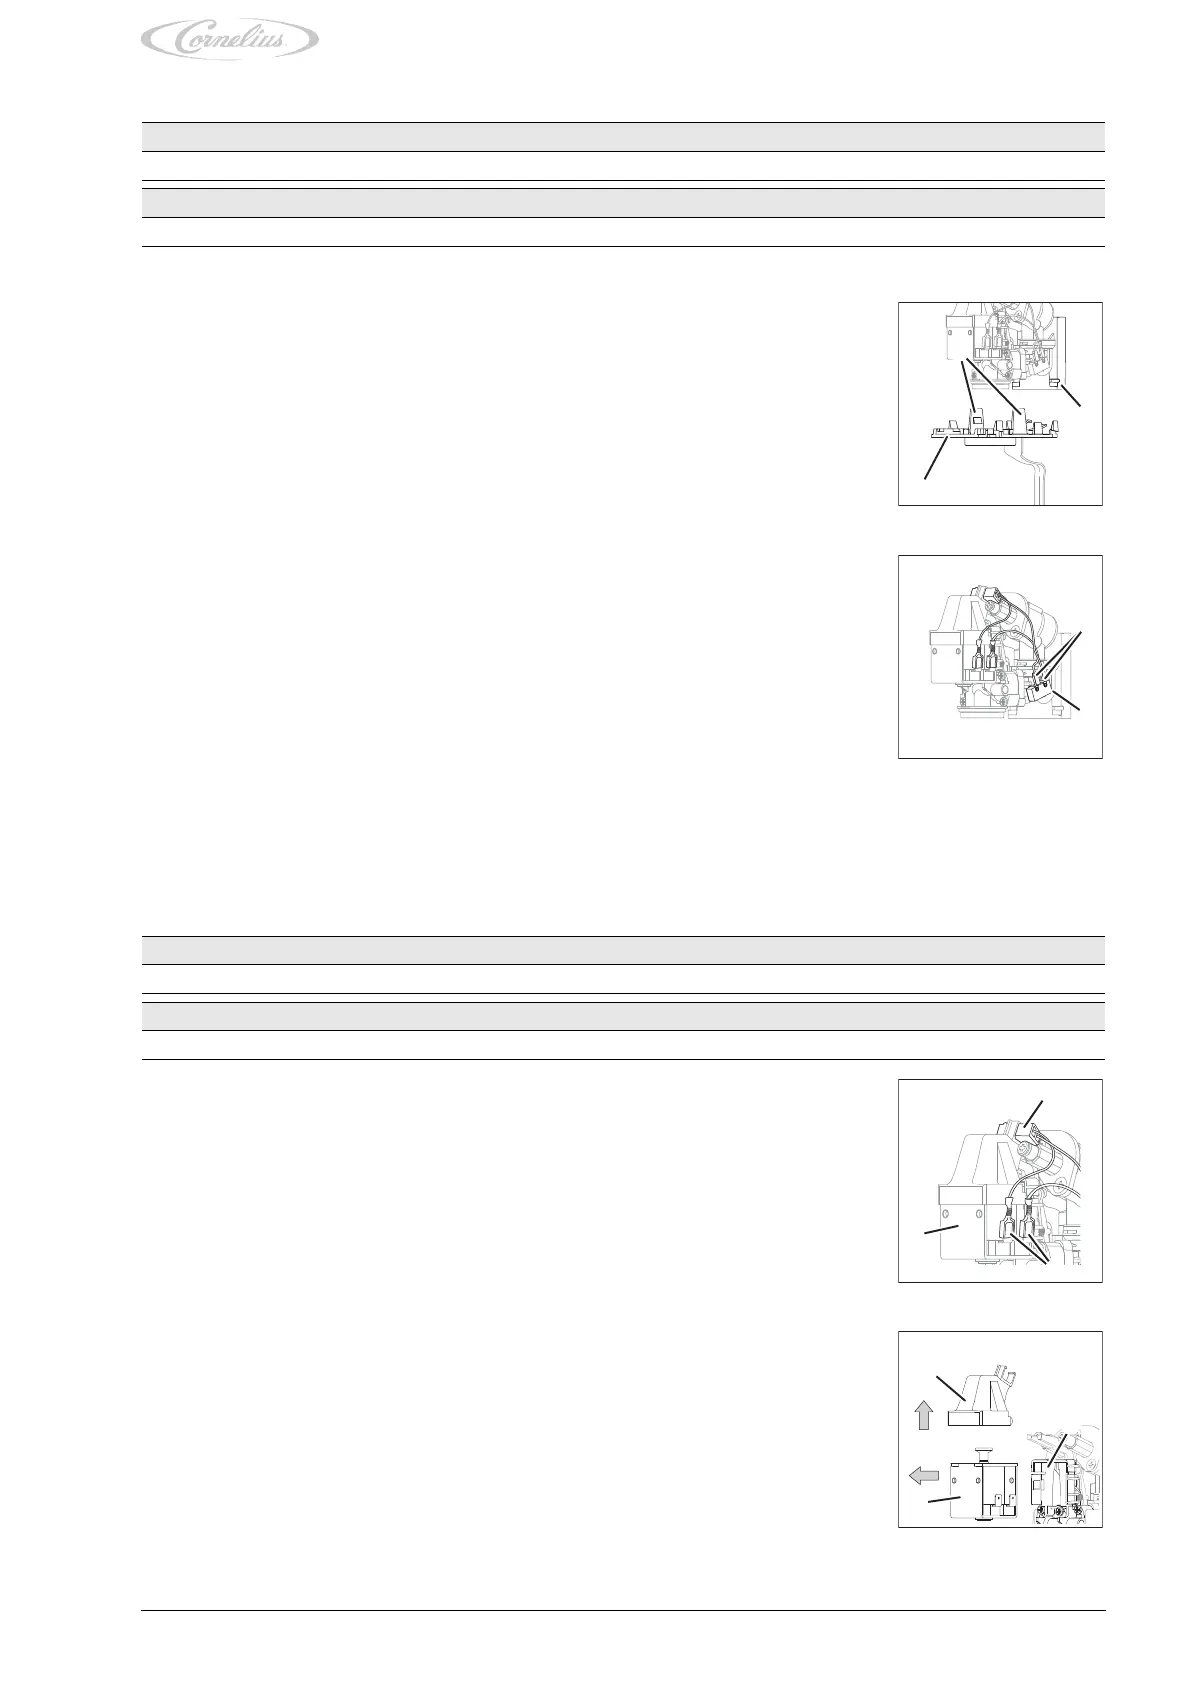
1. Remove the base plate (Fig. 28/3) of the dispensing valve by pushing the two side tabs (Fig.
28/1) apart and carefully pulling the base plate (Fig. 28/3) forwards and downwards from the
valve body (Fig. 28/2).
Fig. 28
1
3
2
2. Disconnect the electrical cables (Fig. 29/1) on the microswitch (Fig. 29/2).
3. Remove the microswitch (Fig. 29/2) from the dispensing valve.
4. Position the new microswitch (Fig. 29/2) on the dispensing valve.
5. Attach the microswitch (Fig. 29/2) by pressing the microswitch onto the mount.
6. Connect the electrical cables (Fig. 29/1) on the microswitch (Fig. 29/2).
7. Fasten the base plate (Fig. 28/3) of the dispensing valve by inserting the base plate (Fig. 28/
3) with the rear tabs into the valve body (Fig. 28/2) and carefully pushing the base plate (Fig.
28/3) upwards until the side tabs (Fig. 28/1) engage.
Fig. 29
Prerequisites References
The dispensing valve has been removed. see chapter 4.2
Spare parts ID/reference Qty/amount Comment
Pull-type solenoid 1918 1
1. Disconnect the plug (Fig. 30/1) and pull the plug (Fig. 30/1) out of the mount.
2. Disconnect the electrical cables (Fig. 30/2) on the pull-type solenoid (Fig. 30/3).
Fig. 30
1
2
3
3. Remove the cover (Fig. 31/1) of the pull-type solenoid (Fig. 31/3).
4. Remove the pull-type solenoid (Fig. 31/3) from the valve head (Fig. 31/2).
Fig. 31
1
2
3



 To Next Page