Viper Low overrun Service Manual
© 2016, Cornelius Inc - 53 - Publication Number: 621360241LOEWSE
SYRUP PRESSURE SWITCH REPLACEMENT
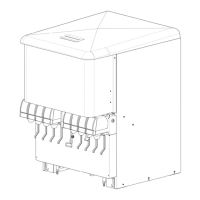
The syrup pressure switches (Sold Out Indicators) are located along the left and right sides of the unit near the
front. There is one switch for each barrel in the system. Figure 47 shows the syrup pressure switch on the left side
of the unit. To replace the syrup pressure switch, perform the procedure in Table 57.
Figure 47. View of Syrup Pressure Switch and Valve
WATER PRESSURE SWITCH REPLACEMENT
The water pressure switch, shown in Figure 48, can be viewed from the rear of the unit. Access to the switch is
obtained by removing the left side panel of the unit, when viewed from the rear. To replace the water pressure
switch, perform the procedure in Table 58.
Table 56.
Step Action
1 Disconnect power from the unit.
2 Remove the side panels.
3 Reclaim refrigerant from the system.
4 Carefully unwrap the foam insulation from around the valve and solenoid.
5 Remove the liquid line valve and solenoid.
6 Replace the liquid line valve and solenoid and insulation.
7 Replace the filter-dryer.
8 Evacuate the system.
9
Restore the proper refrigerant charge to the system and verify proper system
operation.
Table 57.
Step Action
1 Disconnect power to the unit
2 Remove the appropriate side panel.
3 Turn off the syrup supply to the unit.
4 Drain the syrup from the system.
5 Disconnect the wires on the pressure switch.
6 Remove the switch, using two wrenches.
7 Replace the switch with a new unit.
8 Reverse the procedure to install the new switch.
9 Restore the syrup supply and check for leaks.
10 Check switch operation.