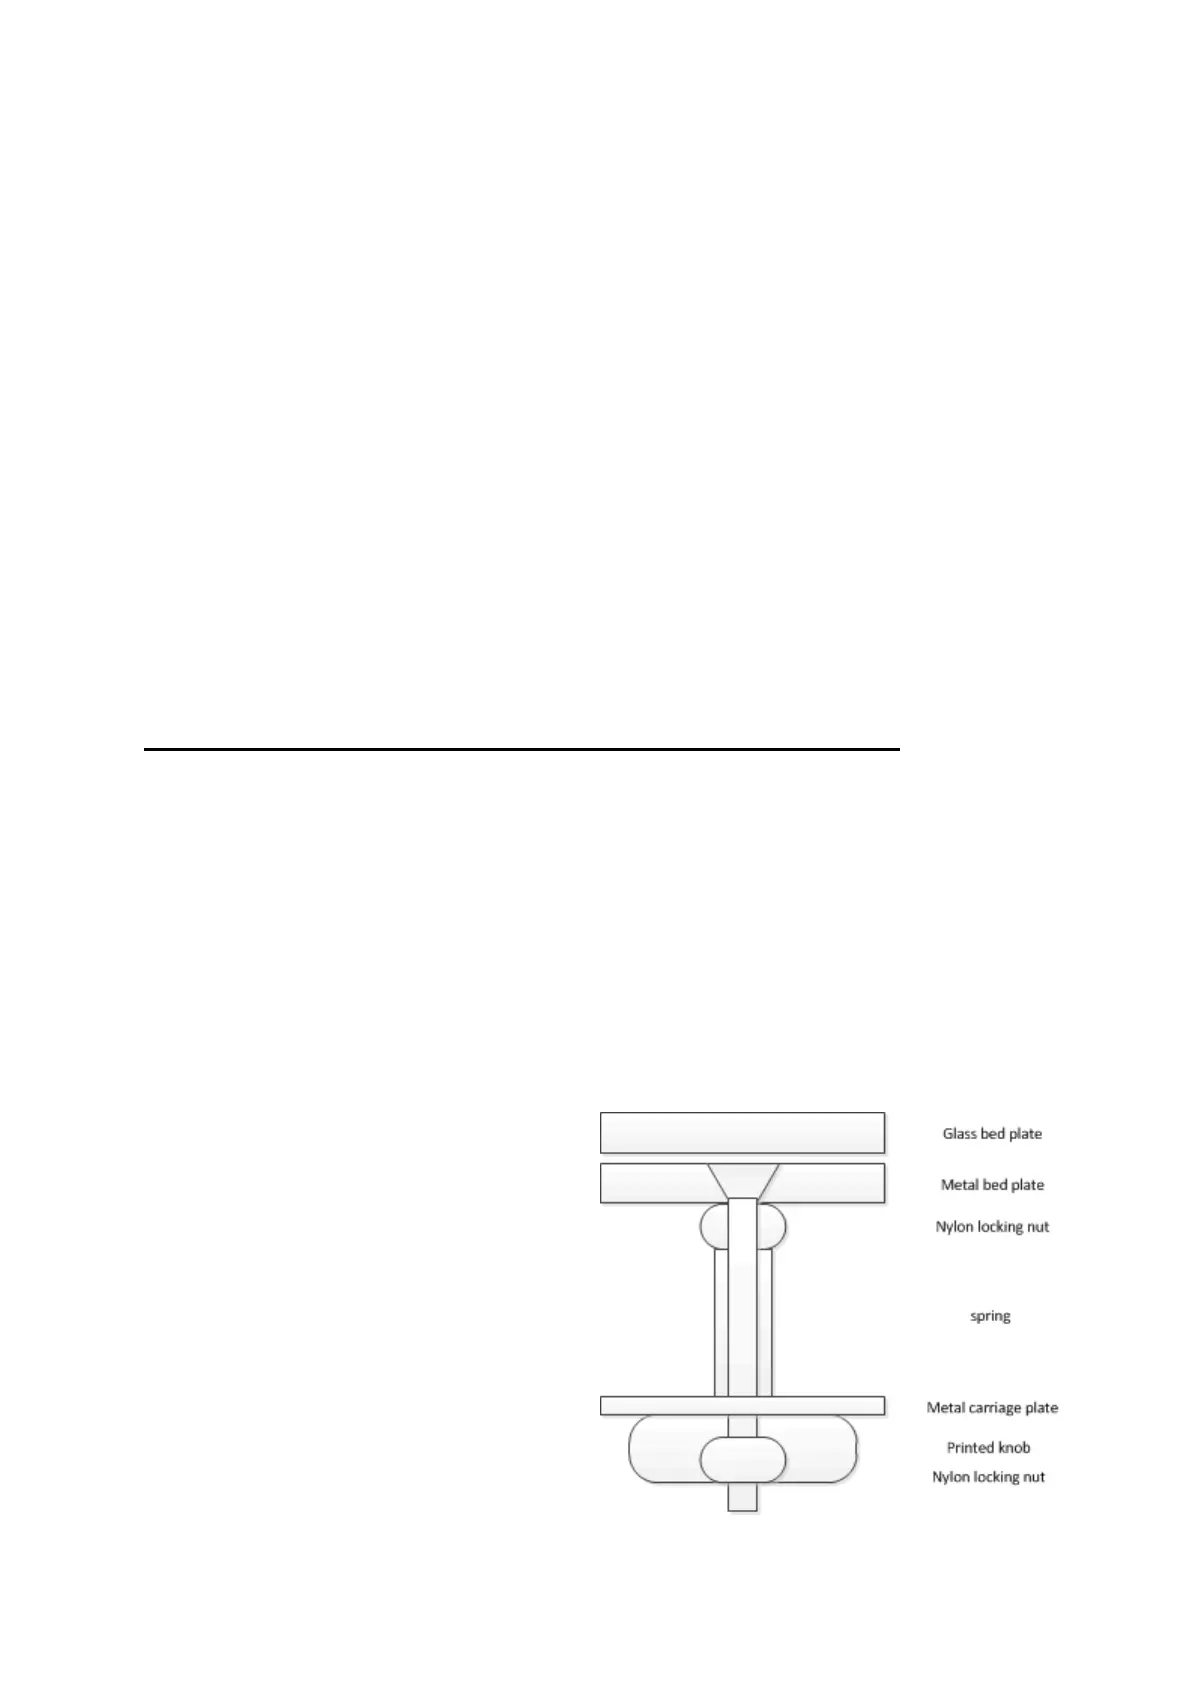
This is a knob that embeds a nylon locking nut and replaces the stock thumb nut.
For this upgrade you need 8 nylon locking nuts in M4 size. Screws are the stock
ones reused.
So first of all, use you preferred slicing software and make sure you position your
print in the area that you have levelled in the front left part of the bed!
When print starts, be ready to adjust live the level of the bed to make your first layer
adhere well to the glass plate.
Please note: I do not recommend using the provided blue tape on top of the glass
plate. Although this works very well for the first prints, it will soon deteriorate and will
need to be replaced. But replacing 50x50cm of blue tape is not a given, and it will
create many issues with time. My personal preference is to use spray glue like
“3DLAC”. For this first print, the glass is perfectly clean, so adherence will be difficult.
I do recommend using sprayed glue for the first prints until the glass is becoming
more “rough”.
When the first leveling knob is printed, even if it is not too nice, you are ready to
dramatically improve your comfort with this printer.
See next section for slicing your STL files for the S5 with Cura 4.1.
OPTIONS: At this stage, you have 2 options:
1/ if the first print went well and you’re confident to print directly 3 other knobs, just
do it! You’ll then change all 4 knobs in one go, sparing extra work.
2/ if you had to fight constantly with your printer to maintain a sufficiently good level
for the print, then change only one knob now, then print the other 3 knobs after that.
Whichever option you choose, here is the procedure to change a levelling knob:
a) Remove the glass plate and paper clips (now you understand the benefit of
option 1)
b) Completely unscrew the thumb nut
of the front left levelling screw.
c) Completely remove the levelling
screw.
d) Catch the yellow spring and keep it
close
e) IF YOU HAVE ALREADY
PRINTED ALL 4 KNOBS: do the
same for the other 3 screws
f) Insert back the levelling screw in its
hole and screw in a nylon nut
immediately under the metal bed
plate. Keep the nut with pliers and
screw in the screw until about half
its size.

 Loading...