PLEASE NOTE: I could not figure out precisely the size of the bolts that were
required to fix the printed parts. I therefore remixed the bottom brace part to
accomodate M4x16 cylindrical head screws, and I also enlarged the hole for the M8
nut. As the printer is still not totally precise on the z-axis, I found that the tolerance
for the hole was a bit too tight.
My remix is found there: https://www.thingiverse.com/thing:3659386
Optional – Permanently syncing the dual Z-axis rods
As can be seen on the above picture, the designer of the back-side braces has also
proposed to add pulleys to keep the two z-axis rods in sync.
I have myself ordered the 50mm timing pulleys and the 1220mm closed GT2 timing
belt. I cannot say it doesn’t work but I am not fully convinced about the thing.
My main concern is that the belt tends to get tension on one side and gets loose on
the other side. Although the size of the wheels and belt seems correct, there seem to
be just a little margin of error and I fear this creates friction back on the stepper
motors, make the motors miss steps, then creates heat or make them even break. It
never happened so far and my Z-rods are kept in sync. On the other hand, as I never
switch off my printer, I’m not sure if my z-axis would have lost sync if I had not
installed these pulleys;
Up to you :)
Optional – Install filament holder on the side of the printer
This upgrade obviously depends on 2 things:
- do you have space on the left handside of your printer?
- where is your controller box positioned and do you plan to use the top plate
for something else than the stock filament holder?
Later in this document I propose an
upgrade for an Octoprint box with touch
screen to be fixed on top of the
controller box. I also have clearance on
the left handside of the printer.
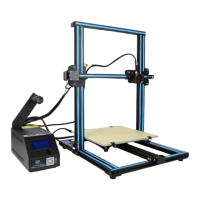
Therefore I installed the filament holder
on the back left handside of the printer
using this design:
https://www.thingiverse.com/thing:2898
173 (same link as above)
Again, I have remixed the design to
enable the installation of 2 filament rolls
 Loading...

