However, as things are never easy, here are specific instructions for the S5 motors:
Start with the Y-axis motor. Unscrew 2 of the 4 holding screws and take them with
you to work on the X-axis motor.
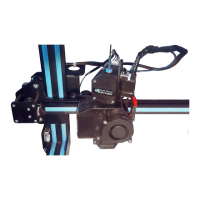
The X-axis motor is held by 4 long screws passing through the plastic cover of the
pulley and holding the X-stop trigger. You need to follow these steps:
a) loosen screws of the holder of the tension pulley on the right hand side of the
X-axis rail,
b) remove all 4 long screws on the front left hand side of the X-axis rail,
c) remove and keep nearby the plastic cap with X-stop
d) remove the stepper motor
e) screw in one side of the damper on the motor using the 2 screws that you
removed from the Y-axis motor
f) untight the screw holding the dented pulley on the motor axis and move the
pulley away from the motor by the thickness of the damper
g) place back the motor making sure that the pulley fits inside the belt
h) verify the position of the pulley with regard to the belt and adjust as relevant
i) place back the plastic cap and X-stop
j) screw the other side of the damper with 2 of the long screws where appropriate
k) re-tension belt and tighten the screws of the right hand side pulley
l) verify that the print head moves correctly on the X-axis
Part B: installing dampers and bracket on Y-axis stepper motor
Placing a damper on the Y axis is more or less as straightforward as on the X-axis,
however there is a subtle difference. Moving the whole bed with glass on top is
heavier and creates more momentum to accelerate and decelerate than for the X-
axis motor to move the print head. Consequently, the motor is much bigger and
powerful, creates more torque, and therefore more reaction force from the bracket.
As a consequence, adding a damper here between the motor and the metal frame
attachment, in the one hand, reduces the noise, and in the other hand, creates quite
some play between the motor dented pulley and the Y-axis belt. This creates
artefacts on the prints like salmon skin effect for instance. It is therefore a matter of
balance between noise and precision.
In this guide I first explain the simple installation of a dampener and then I explain 2
possible workarounds to finding the proper balance.
First is the installation of the damper:
a) loosen screws of the holder of the tension pulley on the front of the printer,
b) remove the 2 remaining screws that hold the motor to the metal bracket,
c) remove the stepper motor
d) screw in one side of the damper on the motor using the 2 screws that you just
removed from the motor
 Loading...

